Click here to view recipe.
I like to think I am not of the herd mentality – or perhaps I just want herd immunity. Those of you who know me realize that is the truth – I don’t like to go along with a crowd until I think things through for myself, which makes me somewhat of an independent unicorn I suppose. My need to be my “own person” translates into most things I do – how I dress, where I travel, and especially what I cook.
Let me back up. The other evening during our 2-hour zoom sisters call, I knit while visiting with my sisters. Kay was knitting too and Susan was….making bagels. She completed the mixing and even cleaned her kitchen before we hung up. Nothing like multitasking.
I was intrigued, curious, and if I’m being honest, jealous about the bagels. How hard could it be if she makes them countless times and could do it while talking to us? AND she raved about how great these bagels were. OK, I needed to be part of this herd. We Klass girls have a need to join each other’s virtual lives – books we read, blankets we knit, and recipes we share. Susan sent me the annotated recipe but by the time I opened her scanned copy, I had already reviewed the original recipe, made my tweaks (which were oddly similar to Susan’s!) and my bagels were already in the oven.
So bagels it was for my next daily baking adventure. Susan had used a mash-up of two recipes from the Washington Post that required Barley Malt Syrup. It just so happened our PCC Coop had the Syrup in stock and brought it to me via Instacart, nice people that they are.
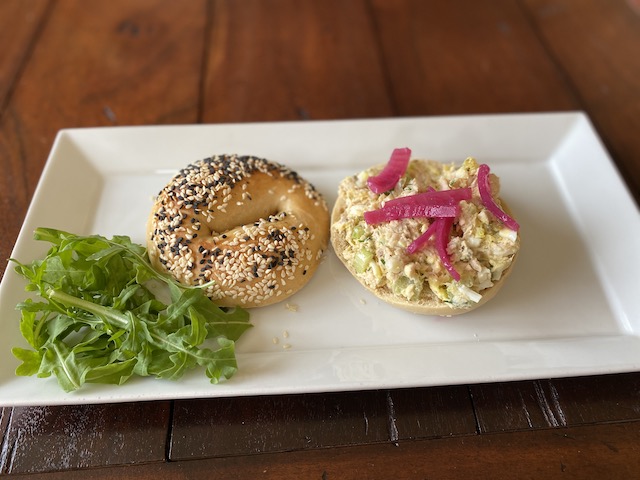
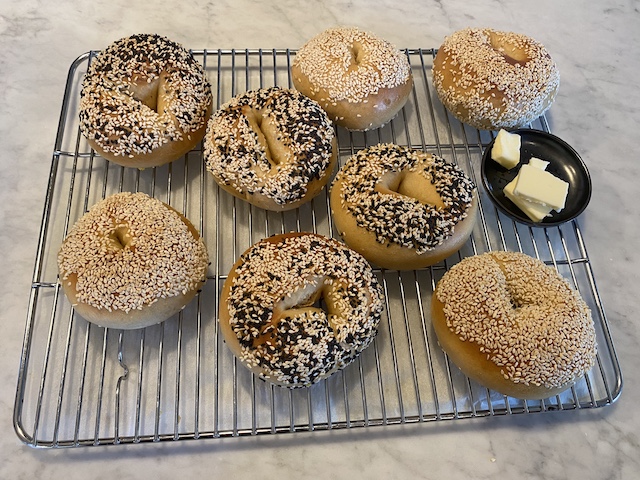
At 4 o’clock in the afternoon, I rolled up my sleeves, called Susan to see if I could use regular yeast (yes) and in less than 15 minutes I had the dough made and formed and in the fridge. The next day at 6:30 a.m. I was preheating my oven and boiling the water and getting ready for the final step. In less time than it took for my oven to preheat I had the bagels boiled and coated with black and white sesame seeds! 16 minutes after they went into my oven they were ready and after resting while I took a shower I sampled THE best bagels I have eaten ever. Ever. I am not a New Yorker but I truly believe these could give those highly-lauded bagels a run for their money.
I have to say this wasn’t even a messy project. It does call for a heavy duty stand mixer with a dough hook (I have that and don’t get to use it much these days) ) and a kitchen scale (which I have). And King Arthur Bread flour – I have stockpiled that as well. You need space in your fridge for a cookie sheet to stay overnight. The only problem is that it makes just eight bagels and two days later, after gifting just two of them, I am sadly out of bagels. No worries, I’ll make more dough tonight.
If you are a bagel fan or just curious, try these. They will not disappoint! I highly recommend you read the recipe through a few times to get it right. You might like to look at the original recipe because I tailored mine for what I had in the house and for the way I like to bake. (see footnote).
Homemade Bagels-adapted from the Washington Post with changes
Yields 8 bagels, about 4+ ounces each
Ingredients
- 1 ½ tsp active dry yeast (I had Red Star on hand)
- 337 grams warm water (scant 1 ½ cups)
- ½ tsp granulated sugar
- 1 Tbsp plus 1 tsp barley malt syrup (this is in several stores in Seattle)
- 623 grams King Arthur bread flour (about 4 cups)
- 2 tsp fine-grained sea salt
- 3 Tbsp cornmeal for dusting the baking pan
- About 1/4 cup sesame seeds (black or white or a combo) to sprinkle if you prefer sesame bagels like me)
Instructions
Measure the water and add the yeast and sugar in a 2-cup glass measuring cup. For those of you challah bakers, this is the same way I start making my own challah! Let it sit until it foams a bit then add the barley malt syrup and stir.
In the mixer bowl of a stand mixer, combine the flour and salt. Put on the dough hook and add the liquids. Mix on low for about four minutes until the dough comes together, then turn the speed to medium-low and continue beating for 7-10 minutes or until the dough is formed, smooth and stiff. It is stiff and that is why you can’t do this by hand!
Evenly spread the cornmeal on the bottom of a rimmed cookie sheet. Turn the dough onto your counter and divide it into eight equal pieces, about four ounces each. I weighed my total mass of dough then divided the ounces by eight so they would be equal. A little compulsive but…I like my baked goods to look professional. I then smoothed each ball of dough and covered them with Saran Wrap for five minutes at room temperature. Full disclosure-a silicone mat works well for forming and resting the bagels.
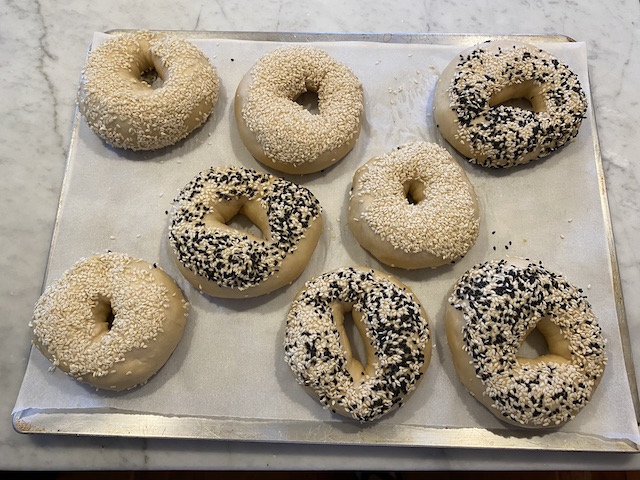
This is where I digressed big time from the original recipe, which had me rolling 11-inch snakes out of each ball and attaching ends together with water. Halfway through this, I decided just to punch my finger into each ball and form a bagel shape, making sure the middle hole was at least 1 ½ inches in diameter and that the dough around the hole was even and smooth. Put each bagel onto the cornmeal-dusted cookie sheet as you finish shaping until all eight are done. Be sure to leave as much space as you can between them as then rise a bit – it will seem crowded but you will be fine. Cover the rimmed sheet with lightly oiled or sprayed Saran and find space to overnight these in the refrigerator for 12-18 hours.
The next day when you are ready to boil and bake, put a regular cookie sheet in the oven (so it heats too) and preheat the oven with the rack in the middle to 450 degrees. Have 1/4 cup of sesame seeds ready to sprinkle on top (if you like sesame seeds).
Meanwhile, bring a large soup pot filled with four inches of water to a boil. Get ready by having a cookie cooling rack ready and a piece of parchment that fits the cookie sheet (which is now in the oven) on the counter. Carefully put four raw bagels in the boiling water at a time and let them boil for 30 seconds, taking a slotted spoon or a metal skimmer and submerging them gently into the boiling water. Carefully remove the dough rings to a wire cooling rack and do the same 30-second boil for the next batch. Do not keep the bagels in the water longer than 30 seconds or you will get holes in the inside of the bagel. Remove these to the rack. While they are still damp, sprinkle one side (the rounded side) of the boiled bagels with sesame seeds, gently press down place each bagel seed side up on the parchment paper. Be sure the bagels are spaced evenly on the parchment. Finally I grind some coarse salt onto the top of each bagel-just a bit.
When all the bagels are coated with seeds and the oven is preheated, remove the hot cookie sheet from the oven and carefully slide the parchment and bagels to the hot cookie sheet. They will sizzle! Put the hot cookie sheet back into the oven and bake for 14-16 minutes until the bagels are brown and crisp.
Use kitchen tongs to move the bagels to a wire rack to cool. Wait for 10-15 minutes to slice in half.
* Note: you might enjoy reading the original recipe from the Washington Post. There was a video as well that included the way they want you to form ropes when making the bagels. But my way is easier, trust me!
I have recently been using caraway seeds too. My next adventure will be to substitute some rye or whole wheat flour in these.


They look great! I have to get cornmeal and more flour, and then I’ll try the “punching a hole in the middle” method. I also have to get kefir for molasses bread, and I was wondering if you would try working a little molasses into it. Darker color, more “biting” flavor. Or am I crazy? Sorry, it’s early, and I’m only on my first cup of coffee.