
Click here to view recipe.

Challah – New & Improved!
I have been making my own challah for over half a century – for 55 years to be precise. I previously posted MY version of challah eleven years ago (!) that was at the time, the best IMHO. My sisters disagree – but that is not unusual. (Their recipe has more salt and they make it in a Cuisinart or mixer)
Fast forward over the last decade … I have been tweaking and changing the yeast amount, the sugar, the salt, but mostly the amount of time I rise the dough, let it “relax” and even the cooking temperature and oven position. Now I have it exactly like I want it.
I love making dough using a stainless steel bowl and my own two hands. For me it is highly therapeutic and very very satisfying. In this age of supply chain issues, I enjoy even more using ingredients I always keep on hand that cost me so little compared to $8 and up for a bakery challah that isn’t as big or nearly as good. I taught my daughter-in-law and her Peruvian nanny to make challah, and Maria (the nanny) has since taught at least five other nannies to do the same. Now I have a pyramid scheme but her breads come out even more beautiful than mine!
The issue for me is always this: do I make a 3 ½ cup of bread flour recipe into a giant loaf of challah, or do I make two smaller challahs, one to gift and one to eat, or do I make some cinnamon rolls for Saturday morning, or small challah rolls. It is a good problem to have…
As of late, I have become obsessed with having the braids remain perfect and not “pulled” apart or melted together. I have tried many tweaks: adding more yeast, more salt, lower oven temperature, longer rising….and after at least 20 attempts I came up with the recipe below. Credit goes to Hayley, my kind of daughter (really my daughter’s best friend since preschool). Hayley became crazed with making challah, subscribed to baking sites and told me to rise the dough a lot longer for both steps and to add more yeast. OK, I did her method and still had a bit of an issue with the braids “splitting” – so I looked at many internet sites and now bake my bread on a lower shelf at a lower temperature.
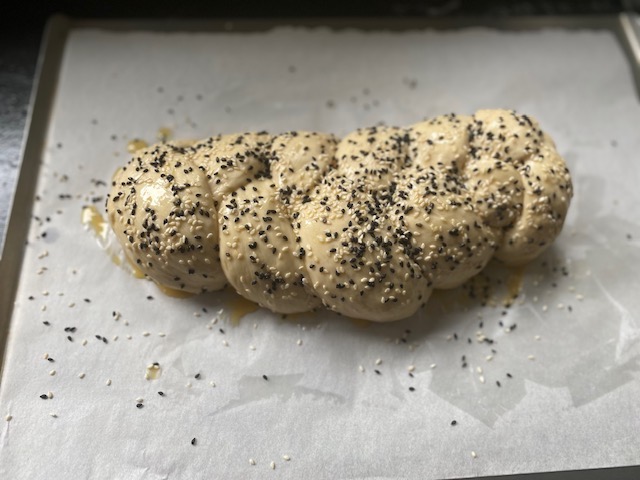
Ready for the oven
The following is my idea of perfection and hopefully my legacy to my family, my friends and my readers.
Revised Challah
Makes two loaves a little over a pound each or one large 2-lb loaf (or a loaf and cinnamon rolls)
![]()
Ingredients
- 1 ¼ cup warmish water (not more than 110 degrees F)
- 1 Tbsp regular yeast, red star or Fleishmans (not instant yeast)
- ½ tsp granulated sugar to proof the yeast
- 1 room temperature large egg
- A dash of pure vanilla extract
- 2 Tbsp very soft butter, cut into ½ inch pieces
- 3 cups of bread flour (I love King Arthur unbleached bread flour) plus 1 cup to add as needed
- ½ cup granulated sugar
- 2 tsp fine sea salt
- TO GLAZE
- 1 egg, beaten
- ½ tsp of granulated sugar
- Sesame seeds, or black sesame seeds or black poppy seeds or a combination of anything.
Instructions
In a 2-cup measuring cup, whisk together the warm water, yeast and sugar. Once the yeast bubbles, whisk in the egg, vanilla and soft butter. In a large stainless steel bowl, whisk the dry ingredients to combine, then add the liquid ingredients from the 2-cup measuring cup and mix to combine.
I use a large Danish dough whisk and eventually I start kneading the bread by hand, adding ½ to 1 more cups of bread flour so it holds together well. I then knead the bread for eight minutes, remove it from the bowl to the counter. After eight minutes, I cover the bread on the counter with a tea towel. While it rests I wash the mixing bowl, dry it, lightly butter it and then plop the kneaded bread inside. I cover the bread with a tea towel and let it proof for 90 minutes. (Either put it in a warm place or in the oven if you have a proofing feature on your oven, use that at 85 degrees).
After 90 minutes, remove the bread dough from the oven and punch it down, knead it for a minute or so. Divide the dough in half if you want to make two loaves. Divide each half into three or four pieces depending on whether you want a three braid or a four braid challah. If you are making a large challah, just divide the entire dough into three or four balls. Let the balls sit on the counter for two minutes. Confession: I get a little compulsive with having the bread look perfect so I weigh my balls of dough so they are pretty close to equal amounts.
After two minutes, start to roll out the balls into ropes. When the ropes are six inches long, stop again, cover and let the dough rest for five minutes. Then proceed to roll the ropes as long as you like. The ropes should not shrink back when you stop rolling since the dough has had a chance to rest. There are lots of youtube videos on how to braid challah!
Transfer the braided loaf onto a parchment lined cookie sheet, cover with an oiled or pammed piece of saran and let it rise for 50 minutes. At that time, remove from the oven and leave covered but turn the empty oven to 325 with the shelf a little lower than mid-oven.
When the oven reaches 325 (mine takes close to 12 minutes), brush the top of the challah with egg wash (the beaten egg and ½ tsp sugar mixed together) and then sprinkle with sesame or poppy seeds if desired. Brush seeds again with egg wash so they don’t come off.
Bake at 325 for 28-30 minutes for a huge loaf. If you’re making smaller loaves they cook in 23-25 minutes. The internal temperature should be 190 degrees if you have a thermometer to test the center of the loaf.
Remove from the baking sheet onto a rack to cool. Wait at least ½ hour to cut. Do not wrap in a plastic bag or freeze for at least five hours so the core is completely cool.
Please report back to me when you try these tweaks. A lot of you made my recipe during the pandemic, and I want you to try these changes. Please!


