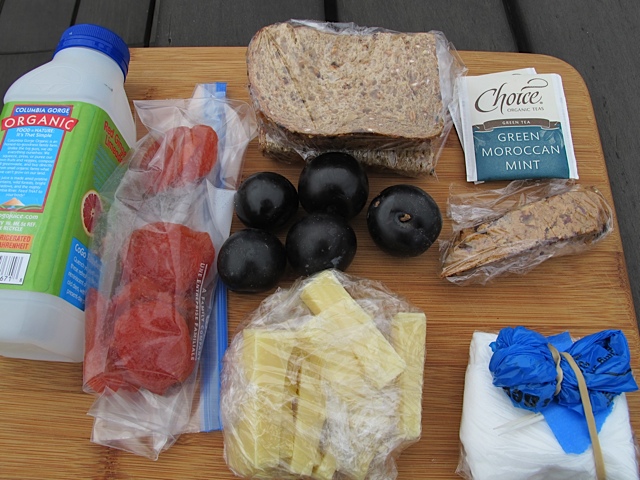
I have been a traveling fool of late. Over the past few months I’ve journeyed to Belize, Iowa and California and soon I’ll head back to the Midwest and then up to Vancouver, Canada. Some days I feel like I don’t even know which city I’m in, yet spending time with those I love makes it all worthwhile. I have always been on the go; I am an eager explorer, seated in an airplane most every month of the year.
Because I consider myself to be an experienced traveler, I have, over the years, refined the way I prepare for my trips. And it should come as no surprise that food prep is on the top of my list. One might even say I am food obsessed before I head to the airport. Multiple Ziploc bags of healthy and tasty treats are stowed away to help stave off hunger. Whether I’m at home or on the go I tend to eat lots of small meals throughout the day and get crabby when I am hungry. So I know I travel best when I have a good variety of snacks and meals on hand.
I admit I am a “food snob.” I don’t eat fast food or prepared food or packaged foods with too many ingredients if I can help it. I rarely find anything of interest on the in-flight menus and can’t stomach the thought of paying $15 for some stale crackers and mediocre cheese. I haven’t found the edible items sold in airports to be any more appealing. That said, I have been known to purchase a candy bar if the mood strikes me.
Never fear, I have a formula. I only pack foods that aren’t perishable and can withstand twelve hours in my backpack. I always take things with me that are both healthful and tasty. Unfortunately, I have found myself sitting on a runway for two hours waiting for takeoff more often than I care to recall. I have been bumped from flights late at night when even airport restaurants and food chains are closed. This past weekend I was on a flight home over dinner and nothing was available AT ALL. NOTHING! No nuts, no boxed “snacks”, zero.
So the following is my list of what I have in my trusty Ziploc bags. I gather everything the night before my travels. I even affix a Post-It to my backpack as a reminder to fetch everything from the refrigerator before I depart.
Marilyn’s Trusty Travel Foods and Paraphernalia
- Wet wipes and napkins and an extra plastic bag for garbage
- Floss/toothpicks (I never use them in public but sneak into the airplane bathroom after my meals. There is nothing worse than a bright green piece of spinach sticking in my front teeth!)
- PB and J on whole grain bread, each half wrapped separately. If it is breakfast time (many of my flights leave at 6 am) I pack a homemade scone in lieu of peanut butter and jelly.
- Dried apricots, figs or unsweetened cherries and a handful or two of glazed nuts (see recipe below). These last for weeks in a tightly sealed bag.
- An apple cored and quartered and rubbed with a little lemon juice. (It’s just too hard for me to eat an entire apple without having the peels stick in my teeth.)
- Some type of homemade, non-crumbly cookie (they aren’t messy, they satisfy my sweet tooth and they last for days).
- Cubed sharp cheddar cheese (good for your dental health, according to my dental student son).
- Tea bags of my choosing so I can actually drink something other coffee that is luke-warm.
- An empty water bottle that I fill after going through security.
Here is my recipe for Glazed Nuts. They travel well – even when it is hot outside. I bake these in my trusty toaster oven because there’s no need to heat up my large oven for just a few nuts!
Glazed Nuts
Ingredients
- 3 Tbsp real maple syrup
- 2 tsp orange zest (I have used lemon or lime or grapefruit too)
- 2 pinches of table salt
- 3 cups mixed nuts (almonds, walnuts or pecans)
Instructions
Preheat toaster oven or regular oven to 300 degrees. Cover the flat baking sheet for the toaster or for your oven with aluminum foil.
Mix maple syrup with orange zest and salt. (I recommend using a microplane grater for grating the citrus zest. Feel free to add more or less.)
Add the nuts to the bowl and mix all ingredients together until everything is coated.
Transfer to the flat pan that goes into a toaster oven (or to a regular cookie sheet for the oven). Bake at 300 degrees for 18 minutes.
Remove from oven and allow to cool for 5 minutes, then transfer the nuts to a bowl. They are sticky and might be hard to remove and they take a while to cool thoroughly, so keep breaking the pieces apart.
I always keep a cup of these on my kitchen counter and I freeze the rest for up to two months.
Check out more at Wanderfood Wednesday!


I’m usually traveling with a 2-year-old, so snacks are a must. These are great suggestions! I can’t wait to try your recipe for glazed nuts. Looks delicious.
Thanks Nicole. I love your blog and posts-you are an amazing photographer. Hopefully I can post a lot of other recipes that are kid friendly too!