Click here to view recipe.
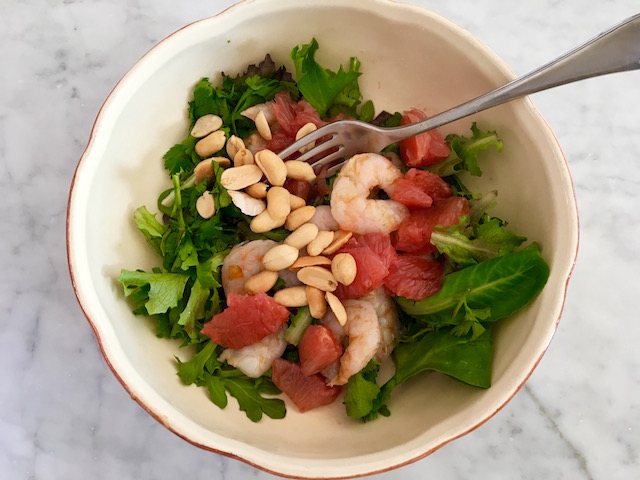
Sensational Spinach Salad
To me, cooking is like fashion. Things come and go. What is hot and what is not often depends on the season. Heavier stews and hearty soups in winter and light salads or chilled vegetable dishes in the heat of summer. Ingredients also come in and out of favor. Pomegranate molasses, chilies in adobo, edamame beans, and heirloom tomatoes aren’t ingredients you will find in older cookbooks. I remember that in my early twenties “salad greens” translated to either romaine or iceberg lettuce; wild greens and frisee weren’t even on my radar! I expect that we will continue to see ongoing trends. Who knows what will be hot this year … Instapot beans? Turmeric in everything?
ANYWAY, I was invited to a dinner a few nights ago with other Baby Boomers. Everyone was asked to contribute a dish and I volunteered to bring a salad for ten. I knew that a couple of those present were not “adventurous” in their tastes and some didn’t eat cheese. I began to look through my salad files on my computer, which translates into over 400 salad recipes – and this doesn’t even include my salad dressing recipes. (One of the items on my “to do list” is to further divide these into main dish salads, lettuce-based salads, grainy salads and vegetable salads).
As I perused my list of salads, I noticed a spinach curry salad that was an OLD recipe. I believe the last time I made it for company was about 30 years ago, no kidding. It sort of fit the bill for the weather as I love spinach salad right before spring and it was seasonal because apples are one of the only types of fruit you can buy at farmers markets in Seattle during the late winter/early spring (before rhubarb makes an appearance). No other ingredients were too exotic or difficult to find – in fact, I had every other item in my pantry or refrigerator. I also have a beautiful large porcelain salad bowl and no matter what goes in there, it always looks impressive.
My self-made rule of thumb, when invited to a potluck, is to have everything pre-chopped and mixed so that I don’t have to use a lot of dishes or hunt for measuring spoons. I brought the prepared spinach (organic baby spinach that I rewashed and de-stemmed) and had individual foil packs with the sliced apples coated with a little lemon juice (so they wouldn’t turn brown), peanuts, raisins, toasted sesame seeds and sliced onions. I tossed all of this with the spinach right before serving and it was a wonderful first course that was followed by salmon and orzo-vegetable salad.
PS: I sent this recipe to my children and Jake wrote back and remarked: “I surprisingly can’t imagine what the dish tastes like but it sounds good.” To elaborate on his remark, the salad contains an assertive curry flavor that combines with the sweetness of apples and raisins and is nicely tempered by the onions and crunchy peanuts.
And so I present Curried Spinach Salad adapted from a decades-old local collection of recipes, The Art of Salad. This original recipe was credited to Judi Frank. And you know me … I changed the recipe quite a bit from the original copy!
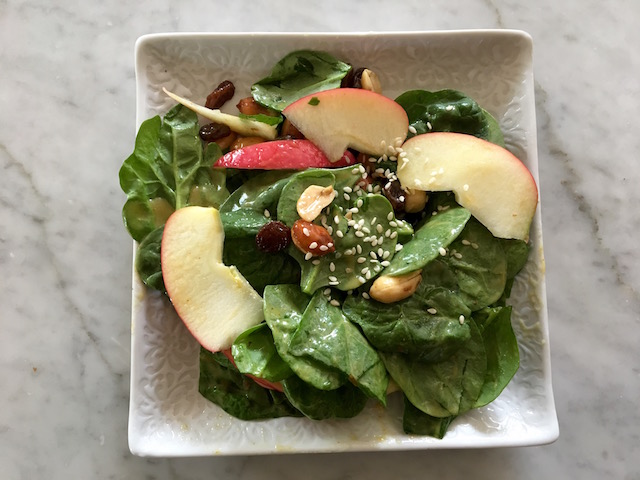
Oldie But Goodie Spinach Salad with Curry Dressing
Serves 8-12
![]()
Salad Ingredients
- 1 lb. fresh baby spinach, washed and stems removed
- 2 pink lady or gala apples, cored and sliced thin (leave the peels on)
- ⅔ c dry roasted salted Spanish peanuts with skins
- ½ c dark Thompson raisins
- 1 bunch thinly sliced green onion, white and light green parts only
- 3 T toasted sesame seeds for garnish
Curry Dressing Ingredients
- ⅓ c unseasoned rice vinegar
- ⅔ c canola oil or neutral oil-I believe olive oil would be good here too
- 1 T finely chopped mango chutney
- 1 tsp. curry powder
- 1 tsp salt
- ½ tsp dry mustard
- A couple dashes of hot sauce
Instructions
To make the dressing, I dump everything together in a large jar and mix it with a Nutribullet or immersion blender to make it creamier.
Wash, dry and de-stem spinach and place in a large salad bowl. Prepare the other ingredients. Soak the sliced green onions in cold water for a minute, then rinse and dry them. This takes out the “bite” and aftertaste!
Mix apple slices (reserve about ¼ of them), peanuts, raisins and onions and place on top of the spinach. Mix with a bit of the dressing, toss and sprinkle sesame seeds on top. I often garnish the very top with extra slices of apple.
Do not overdress the salad. You will need less than half of the dressing recipe. The remaining salad dressing will keep for a long time in the fridge (about two weeks) and is good in grainy, room temperature salads too.