Click here to view recipe.
My Favorite Eggplant Dish
There are very, very, very few fruits or vegetables that I don’t love and eat with gusto these days. This adoration for fresh produce, however, was not always the case. As a child I was scrawny and a very picky eater, so they say. My wise mother ignored my fussiness with foods and didn’t ever force me to eat or finish anything which shows that our tastes and horizons often change as we grow older… and wiser.
Eggplant was one of the vegetables I HATED in my youth. My Uncle Lou and Aunt Esther lived in Iowa, about a mile from us, and their back yard contained a family garden. Among other vegetables, they grew and harvested eggplant. Honestly, I didn’t give it a chance and in retrospect this was probably because it has a funny texture and smell unless you try it prepared in different ways.
Elegant Eggplant
Fast forward. Today, eggplant is one of my absolute favorites. I love the deep, rich and unusual color. And it’s so versatile! I make it using many many many various recipes and sauces and cooking methods. I pulled this one from Mark Bittman’s column and changed it to my taste, adding more basil and pureeing the tomato sauce. And I always pass a bowl of freshly grated parmesan cheese for guests to add if they so choose.
As it turned out, I had a few cups of extra tomato sauce because I didn’t want to douse the eggplant in sauce. As luck would have it, later in the week I ended up with scads of extra turkey loaf. I chopped up some of the cooked turkey loaf and added it to this sauce, then served it over whole wheat spaghetti. SOOOO good.
As a side note, I save dried or stale whole wheat or grainy bread if I don’t eat my way through an entire loaf (often, because there are just two of us at home now). So the bread crumbs are always a staple in my freezer! AND I love the idea of baking slices of beautiful eggplant without gallons of olive oil. Less is more. Because I’m a fan of simplicity I add basil while cooking the tomato sauce rather than layering it in as instructed. Buon Appetito!
Mark and Marilyn’s Global Eggplant with Red Sauce
Serves 4-6

Ingredients
- 3 medium sized eggplants, about 2 ½ -3 pounds
- 4 tablespoons extra virgin olive oil + a bit to drizzle over the dish before baking
- 1¼ teaspoons salt, plus more to taste
- Fresh black pepper to taste
- 1 large yellow onion, chopped
- 2 tablespoons minced garlic (I love garlic-use less if you don’t)
- 2 28-ounce cans diced tomatoes, with their juice (I like Muir Glen fire roasted)
- 1 ⅓ cup fresh basil leaves (chiffonade)
- 1 ½ tsp granulated sugar
- 1 cup whole grain breadcrumbs
- Optional: 1 cup fresh grated parmesan cheese for serving (pass along side)
Instructions:
Heat the oven to 450°F and place the racks with at least 4 inches between them.
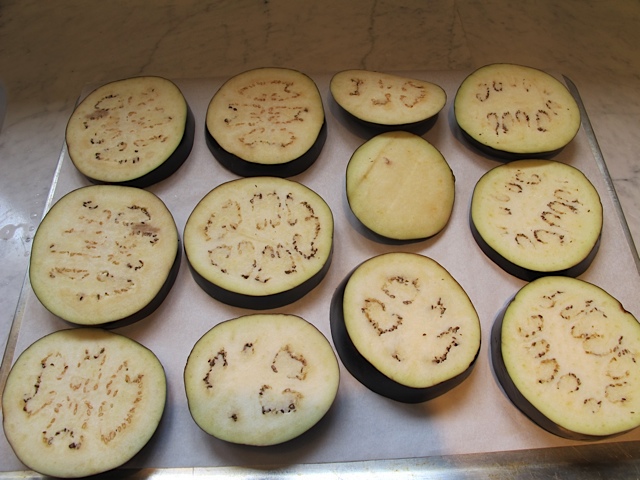
Cut the eggplant crosswise into ½-inch-thick slices and arrange them on two parchment lined baking sheets.
Use two tablespoons of the oil to brush the top of each eggplant slice and sprinkle the slices with ½ teaspoon salt and some freshly ground black pepper.
Roast the eggplant until the slices brown on the bottom and sides, 10 to 15 minutes; turn with tongs and cook the other side until the slices are crisp in places and golden, another five to ten minutes. At this point remove the baking sheets with the eggplant from the oven and lower the heat to 400ºF.
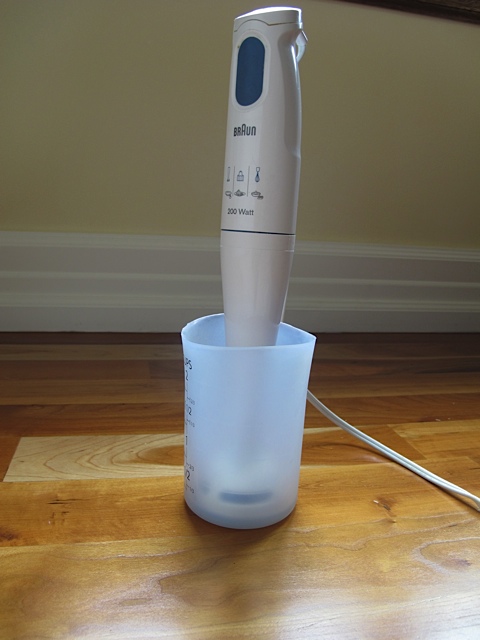
Meanwhile, put two tablespoons of the oil in a large saucepan over medium heat. When it’s hot, add the onion, sprinkle with another ½ teaspoon of salt, and cook, stirring occasionally, three minutes. Add the garlic and stir for one minute. Add the canned tomatoes, cut basil and add sugar (always add a touch of sugar when making tomato sauce) and cook, stirring occasionally, until this thickens, 20 minutes. Taste and adjust the seasoning. I use my immersion blender and smooth out the sauce by pulsing it with the hand blender. Remove two cups of tomato sauce and reserve for another time or purpose.
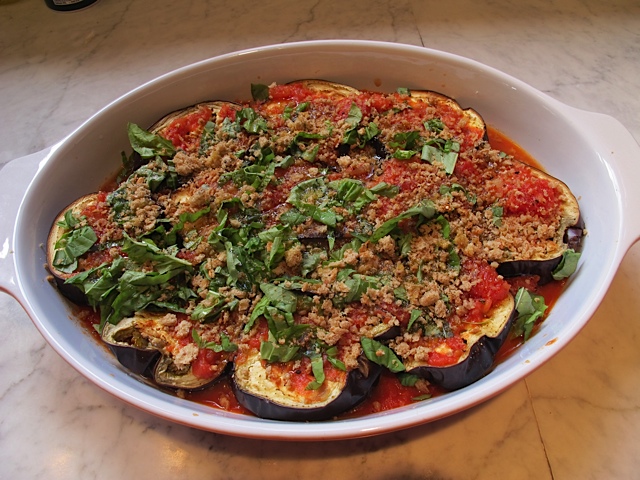
Cover the bottom of a 9 by 13-inch baking dish with about ½ inch of the tomato sauce. Nestle a layer of eggplant into the sauce. Cover with a thin layer of tomato sauce and repeat a second layer until all the eggplant is used up
Put a thin layer of tomato sauce on top of the dish. Sprinkle with the breadcrumbs, the remaining ½ teaspoon of salt and drizzle with more olive oil.
Bake until the breadcrumbs are golden and the sauce has thickened, 15 to 20 minutes; let rest for 10 minutes before serving. Serve hot, warm, or at room temperature. I garnish each portion with a few whole basil leaves.
If you aren’t serving with cheese, this is vegan. If you use gluten-free bread, it is gluten-free. If you make it my way, it is wonderful.
This is SUCH an easy and hearty dish. I am thinking it would be good with some chopped mushrooms too, sauteed along with the onion if you want it even heartier. And it’s great to put some pasta on the bottom of the plate and top it with a portion of eggplant and tomato sauce – the noodles soak up the juice.