Tapado – Fish Stew from Guatemala

Authentic Tapado

A few months ago I had the pleasure of traveling to Livingston, Guatemala. Situated on the Caribbean coast, Livingston is a laid-back little place that seems to be worlds apart from the rest of Guatemala. It has a large Garafuna population (descendants of Carib, Arawak and West African people) and is a jumping off place for tourists to begin their Guatemalan travels. As usual, when we arrived by boat and walked uphill to town I began my search for the best local cuisine, and I was lucky enough to stumble upon a hole-in-the-wall place that serves Tapado. This luscious fish stew features ingredients found in nearly every marketplace in Guatemala – bright green bananas, fresh coconut and an array of seafood. As I dove into the steaming bowl of stew placed in front of me, I realized it contained a whole small fish – skin, bones and all. Despite the fact that it was a very messy proposition – I was in heaven.

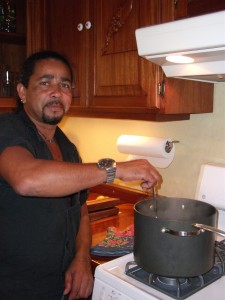
Jose making Tapado

When I returned to our home in Belize, I couldn’t get Tapado out of my mind. I remembered that our Belizean friend’s mother was from Guatemala, and I thought I’d ask him if he was familiar with the dish. Initially I wasn’t terribly optimistic. Jose is a serious, quiet man whose capable hands can fix any and every house-related issue that arises. I didn’t know much about his culinary interests. I was delighted to find out that his mother used to make huge vats of Tapado for Jose and his thirteen brothers and sisters. Even better – Jose offered to teach me how to make it himself!

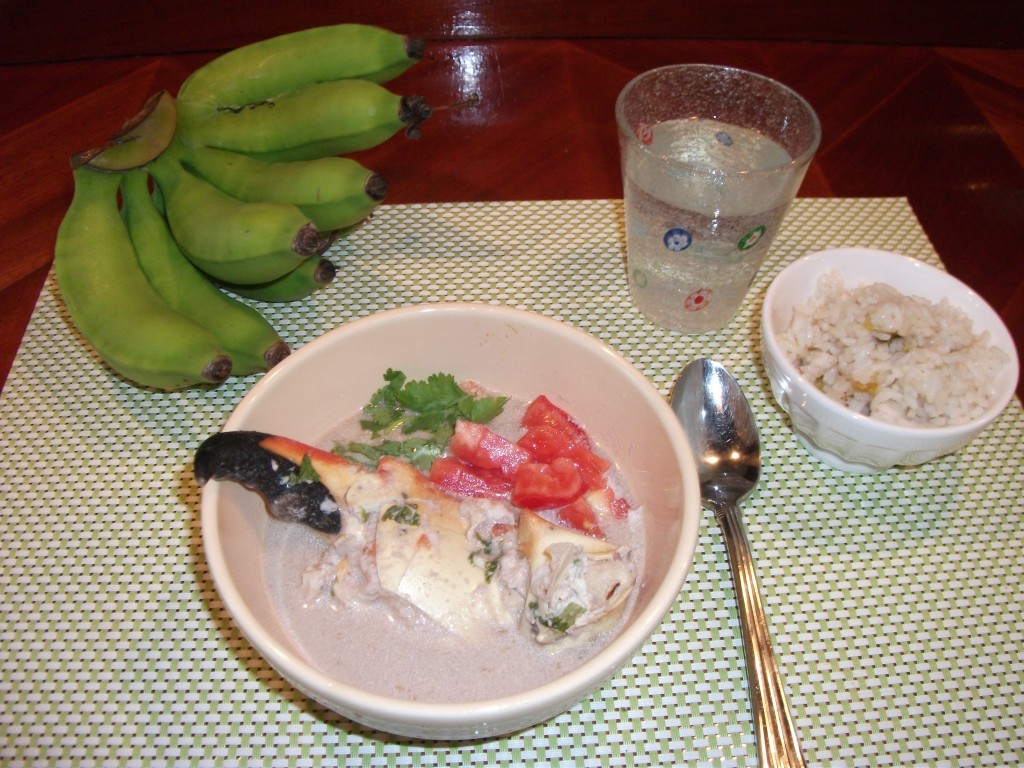
I learned a lot from Jose that day in his tiny kitchen. For instance green unripe bananas, when simmered, taste much like cooked potatoes. Jose also introduced me to annatto, a reddish vegetable dye that is used all over Belize and Central America to color the food. I’ve since made Tapado here in the states, forgoing the whole fish and substituting fresh snapper or any other white fish. The version I make features large whole crab legs – so you have to dig the meat out of the shells. Every time I make it for friends and family they tell me that they feel transported to another world. As I look around the table with a huge pot of Tapado as the center piece I think of Jose and his mother, dolling out this heavenly fish stew to their huge family.

Tapado

Serves 8-10

Ingredients
  • 10 very green (unripe) bananas
  • 1 lb large crab legs, smash shell slightly with a hammer but leave meat inside
  • 1 can coconut milk (14 oz)
  • 3 cups water
  • 2 large tomatoes, diced (1 for stew and 1 for garnish)
  • 1 Tbsp salt (plus more to taste)
  • 1 tsp ground black pepper
  • ½ bunch chopped cilantro (1/3 cup for stew – reserve some leaves for garnish)
  • 4 cloves garlic, peeled and coarsely chopped
  • 1 lb snapper or whitefish fillet, cut into 1 ½ inch pieces
  • 2 limes, juiced, plus 1 lime for garnish
  • 1 lb shrimp, shelled and cleaned
Instructions

Have a large dutch oven or sauce pan ready (at least 3 quarts).

Peel and slice bananas into ½ inch pieces and soak for 3 minutes in water, drain. Add to dutch oven.

Add the remaining ingredients except snapper, shrimp and lime and cover. Bring to a boil over medium high for 20 minutes. Check occasionally and skim off the foamy matter than comes to the top as needed. Uncover, stir and add fish, shrimp and lime. Continue to cook for 5 minutes, then remove from heat.

Scoop some of the Tapado into a bowl. Garnish soup with chopped tomatoes and fresh chopped cilantro with a wedge of fresh lime. I like to serve this with arroz con platanos (authentic rice with plantains) – check out next week’s post for details! This soup reheats very nicely for future meals.

Share
Posted in Central America, Fish & Seafood | Tagged , , , | 3 Comments

“B’tayavon” – Passover 2011

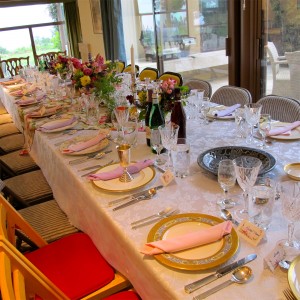
Table for 47

Table for 47

Ah, Passover 2011. One for the history books…  This year we had 47 people gathered together to celebrate this special holiday. Friends and family from all over the country converged at a family home in Northern California. Guests ranged from my one year old grandson to a 90-something Bubbie (grandmother). The celebration started at 5pm when guests began to arrive in droves.  Everyone enjoyed some pre-dinner nibbles and the chatter soon became so loud it was difficult to hear. The official ceremony started at 7pm with everyone seated at two huge 25-food long tables. Three different relatives conducted the Seder, and in the middle of it all we feasted on salmon, chicken, brisket, various Passover kugels, vegetables, salads…there was enough food for an army. Later in the evening we dove into dessert which consisted of flourless chocolate cakes, macaroons, Mexican flan, sponge cake, and fruits and candies. We didn’t say our final goodbyes until 11 pm.  No one left hungry, that is for sure.

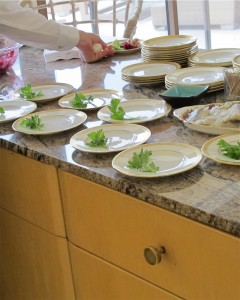
Preparations for the feast

The holiday retells the story of the ancient Israelites who were freed from slavery in Egypt. As the story goes, the Pharaoh freed the Israelites, and they left so quickly that they could not wait for bread dough to rise (leaven). In commemoration, for the week long duration of Passover no risen bread is eaten, which is why it’s called “The Festival of the Unleavened Bread.” Flat unleavened bread or Matzo is a ubiquitous symbol of this holiday.  Depending on how religious a Jewish family is or whether they are Ashkenazic or Sephardic, foods such as grains, cereals and pastas might not be eaten during the week.

Interesting to me is that Passover is one of the most celebrated of all Jewish events.  Coincidentally – it is one that my own family embraces like no other.  It just so happens that Passover is my clan’s favorite Jewish holiday.  The kids all look forward to the unusual foods, and we all love the Seder, or gathering of family and friends to retell the story of Passover.  Most years we give it a more modern twist, and in 2011 much time was devoted during the Seder to discussing different types of enslavement and freedom or lack of freedom in our modern world.

With so many families present, there were many wonderful stories and shared practices.  This year’s Seder was in part traditional with lots of Hebrew singing, and also modern with guests participating and lots of laughter.  At one point Varda, my daughter in law’s mom who was born in Israel, had us all tell about our favorite Passover memories.  A huge surprise for all was a tape recording of my daughter-in-law Shira (now 31 years old) singing the four questions in Hebrew taped when she was three years old!!  This was truly my favorite part of the evening.

Most years I am responsible for a majority of the preparations – setting the table, planning, shopping, and cooking – lots of hard work. But this year – a first. I got to be a guest.  And I loved it! Of course, I couldn’t completely relinquish control so I whipped up a couple of matzo-dried fruit kugels (a baked pudding-like dish) and helped out wherever I could.

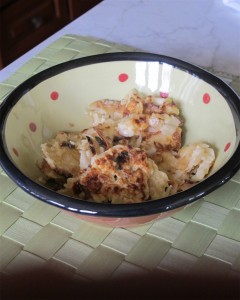
The next morning many of us gathered again at Shira and Daniels and I offered to make fried matzo, a family favorite.  It couldn’t be easier and is a very satisfying dish for breakfast.  We’ve been known to eat it throughout the year – sometimes even for dinner!

Fried Matzo

Fried Matzo (Matzo Brei)

Serves four huge eaters

Ingredients:
  • 8 sheets of “thin tea” matzo
  • Warm tap water to cover the matzo
  • 3 Tbsp salted butter
  • 3 Tbsp vegetable oil
  • 4 large eggs
  • ½ cup milk
  • Salt to taste
Instructions:

Roughly break the matzo sheets into fourths and place into a deep 4-quart bowl. Soak in warm water until they have almost lost their crunch but are NOT too soggy (about 3-5 minutes).  Pour into a colander and drain well but don’t push down on the matzo or it might fall apart too much.

Meanwhile, heat both butter and oil in a large fry pan on medium high heat until it is sizzling.

In a medium bowl – the same one you soaked the matzo and water – whisk together the eggs and milk. Add the drained and soaked matzo to the egg/milk mixture and gently mix together until the matzo is coated with egg.

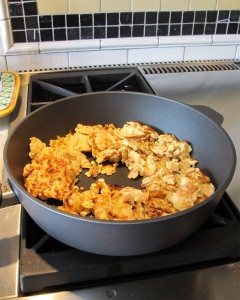
Pour the entire mixture into the oil/butter in the fry pan and lightly press down into a “pancake” to cover the fry pan.  Let it brown on one side, breaking it up slightly with a heat resistant spatula.  Keep turning and breaking up the pieces until they are browned all over and until all the liquid evaporates.  It shouldn’t be dry but should not be too soft either. This process should take approximately 7-10 minutes.

Fried Matzo being made

I add salt while it is frying to add some extra flavor. You may choose to omit salt at this stage and allow everyone to add their own after it is served.

Our family likes this with cherry jam on the side.  Some prefer just salt and pepper with no sweet additions. I’ve seen families eat this with applesauce, cinnamon/sugar mix and even with maple syrup.   I have made it extra fancy and savory by adding slivered lox and finely chopped onion to the matzo while it is cooking.  If you do this, it could turn into a main dish for dinner served with a salad.

This is so good that I prepare this a few times during the calendar year.   My family usually consumes every last bite but from time to time there are leftovers, which reheat beautifully. I hope you’ll try it! B’tayavon – which in Hebrew means Bon Appétit or “enjoy your meal.”

Share
Posted in Breakfast, North America | Tagged , , , | 3 Comments

It’s a Vegetable…It’s a Side Dish…It’s Pepperonata!

This was the first post I had in my “coming out” as a blogger…and it’s still one of my favorites. The pictures here were professional quality, several notches or miles above my point and shoot camera. The recipe reminds me of Italy, and the colorful pepperonata serves as a side dish, a condiment for fish or chicken. I’ve even layered this with hummus to make veggie sandwiches.

Re run, yes. But worth revisiting!

~~~~~~~~~~~~~~~~~~~~~~~~~~~~~~~~~~~~~

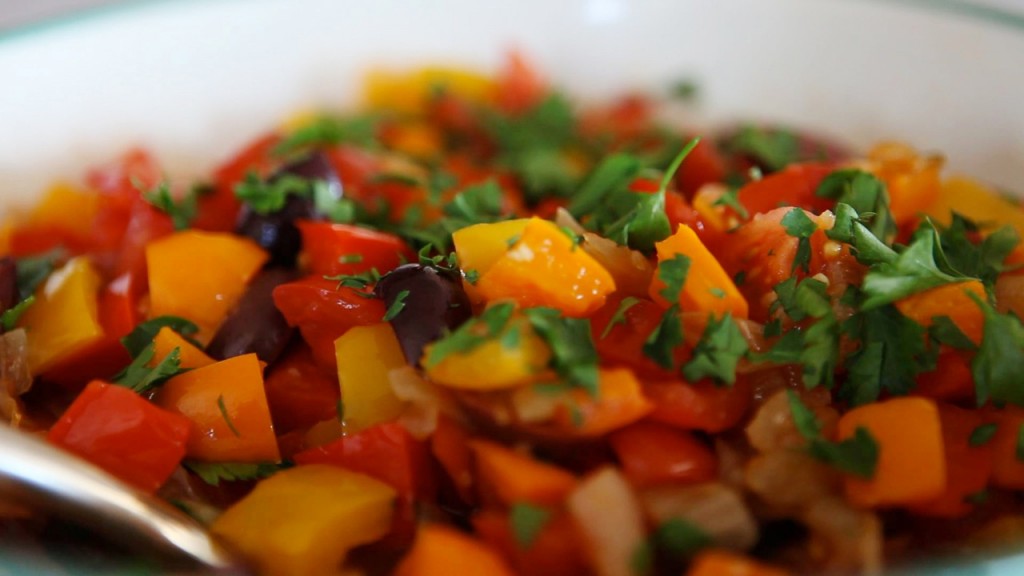
Beautiful Pepperonata

Despite the fact that it’s been more than a decade since I learned about Pepperonata, I remember the day like it was yesterday. My sister Susan and I made plans to meet in Italy and quickly set our sights on Tuscany. Before we even set foot in the beautiful bucolic town of Radda, we knew that the five days we were about to spend there would be the highlight of our trip. We would immerse ourselves in the culinary world of “Tutti a Tavola” (All to the Table!) – a cooking school that promised to teach us to cook as the Tuscans do. We learned about so much more than cooking. Four Tuscan “mammas” – Mimma, Lele, Franca and Simonetta – welcomed us into their homes, their kitchens and their hearts and taught us about true Italian hospitality where friendship, family and good food combine.

The small, hands-on classes started in the late afternoon as the fading light turned the hills and vineyards deep shades of gold and umber. Each day we would assemble in the kitchen, gaze across the tables laden with colorful produce and fresh herbs and crusty breads and listen to the mammas explain that day’s recipes. We then rolled up our sleeves, stood side by side, and, as laughter filled the kitchen, prepared simple, delicious and seasonal Italian fare.

These beautiful women had so much fun together, and their kitchens were magnificent. The simplicity of their counter spaces and bright colors on display inspired my own kitchen in Seattle. They each used authentic Tuscan ceramic platters to serve their food – hand made in a ceramics studio just down the road. At one point I asked Mimma if it worried her that she might chip or break her serving ware. She replied that these items were made to be used and loved so a slight crack or chip was nothing to worry about! From that day forward I vowed to stop reserving my “nice” dishes and platters for special occasions. Today I use each and every kitchen utensil and dish I’ve collected over the years – often serving breakfast on one-of-a-kind plates I collected. After all, why have them tucked away on a shelf or inside a closet?

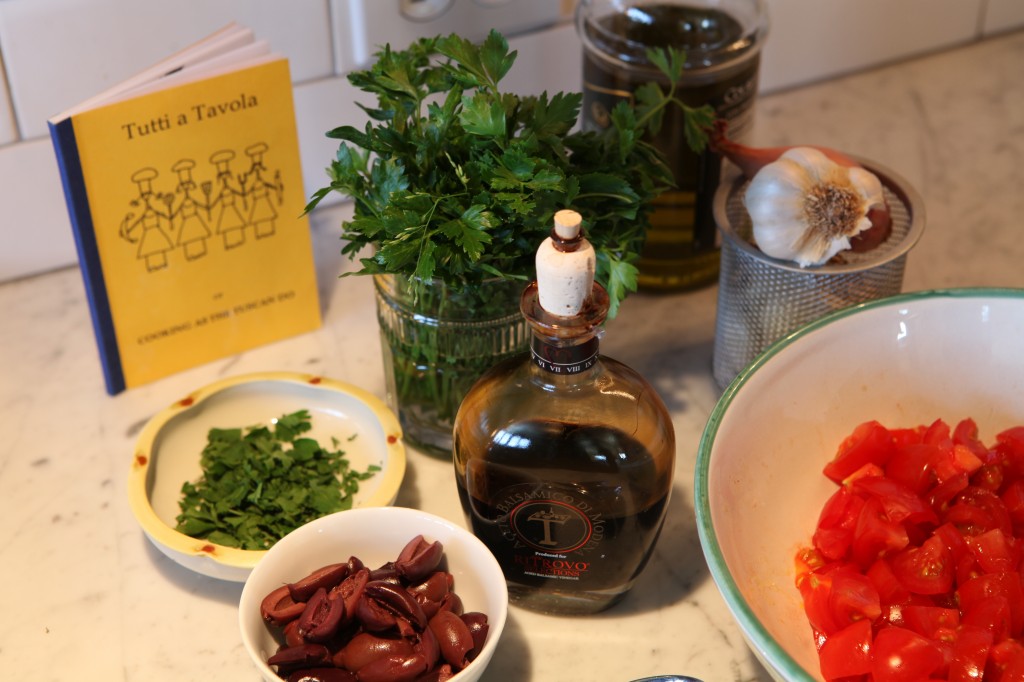
Pepperonata mise en place

Even more memorable than the kitchens and the cookware, however, is the food. And Pepperonata is, perhaps, my favorite recipe from these days in Tuscany. Not only is it savory and delicious – it is beautiful. The bold colors of yellow, green and red peppers mixed with bright tomatoes and caramelizing onions – all glistening with the best olive oil… it is a work of art. And the best part is its adaptability. I often serve Pepperonata warm as a vegetable side dish. Other times I toss leftovers into an omelet along with pungent goat cheese. It can also be folded into pasta along with shaved Parmigiano-Reggiano or used as a flavorsome condiment for fish or chicken. I have sliced the peppers in slivers instead of cubes and topped bruschetta or homemade pizza with this mixture too. Warm or cold, it always delights my palate.

Pepperonata

Ingredients
  • 2 Tbsp extra virgin olive oil
  • 2 lbs peppers, seeded and diced into ½ inch squares (use a variety of colors)
  • 1 lb brown skinned onions, peeled and diced the same size as the peppers
  • 2 cloves garlic, peeled and minced
  • 1 lb fresh Italian tomatoes, diced ½ inch
  • ¼ cup kalamata olives, pitted and halved
  • Balsamic vinegar to taste (approximately 1-2 Tbsp)
  • ¼ cup chopped parsley (to garnish)
Instructions

Heat olive oil in a large sauté pan over medium heat. Add the onions, reduce heat to low and cook until soft, about 20 minutes. Add the garlic after about 15 minutes and cook another 5 minutes.

Add the peppers and cover the pan. After a few minutes, leave the cover slightly ajar until the peppers are browned, around 20 minutes. Continue to stir occasionally.

Add the diced tomatoes, then the black olives. Immediately sprinkle with some vinegar and let the liquid evaporate. Before serving, sprinkle with chopped parsley.

This dish can be served warm or at room temperature. It can also be stored in an airtight container in the refrigerator for up to 5 days.

Share
Posted in Europe, Side Dish | Tagged , , | 6 Comments