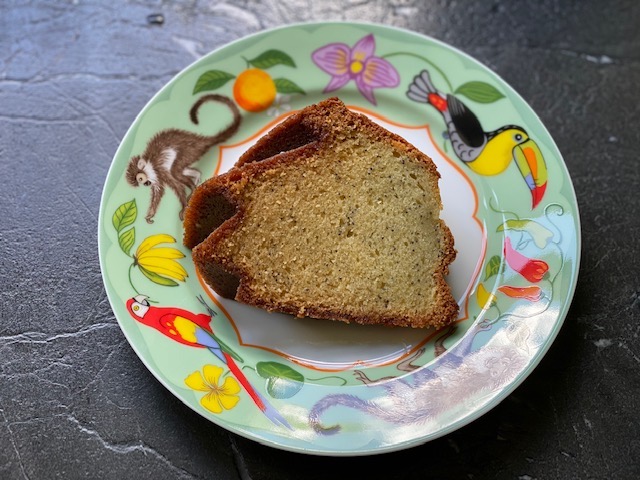
Morning Bundt Cake With Poppy Seeds

Click here to view recipe.

Piece of Cake!


My friend Ginny lives in Montana and we tend to like many of the same foods – Cuban food, roasted veggies with Tahini, roasted garlic, etc. When she mentioned she had a recipe for a great poppyseed cake my ears perked up.

She sent the recipe to me, which was from the Saint Paul Pioneer Press in 1994. Being a Midwest girl, it is no secret that the center of the country has some mighty fine cooks. I asked her what she changed… because instinctively I thought about adding some lemon zest and lemon juice and eliminating the almond extract, replacing it with lemon extract. BUT Ginny said no, make this the way it is written.

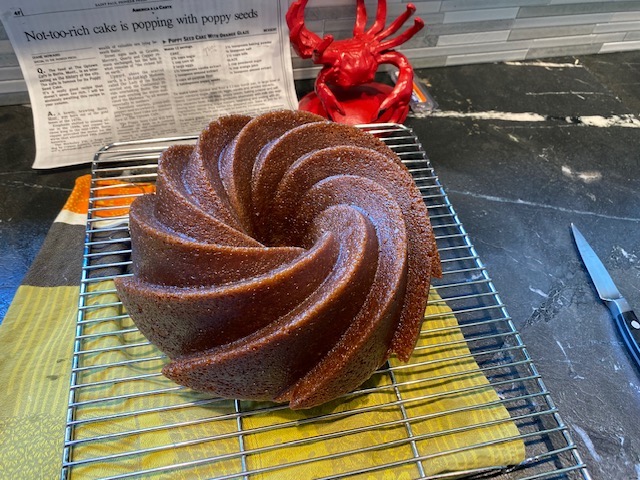
I gulped and followed her directions to a “T”. And you know what? It is a perfect coffee cake to have as dessert or with coffee or tea. It turned out beautifully, partly due to the fancy bundt pan my brother Kal gifted me several years ago. Presentation is key. I also like that this uses oil (mine was avocado oil) rather than butter so it is not too rich.

Isn’t she a beauty?

I was underwhelmed reading the ingredients and directions, but I stand corrected. MAKE THIS. You don’t need to dirty your electric mixer, and it is satisfying to create something beautiful with your own two hands.

Poppyseed Cake
Makes 16 thin slices

pf-icon2


Cake Ingredients
  • 2 ¾ cup granulated sugar
  • 1 cup neutral oil (I had avocado oil on hand)
  • 3 large eggs, room temperature
  • 1 ½ tsp pure vanilla extract
  • 1 tsp almond extract
  • 3 cups unbleached all purpose flour
  • 2 Tbsp poppy seeds (OK, I heaped the tablespoons a little)
  • 1 ½ tsp baking powder
  • ½ tsp sea salt
  • 1 ½ cups milk
Glaze Ingredients
  • 1 cup powdered sugar, sifted
  • ¼ cup fresh orange juice
  • ¼ tsp almond extract
Instructions

Preheat the oven to 350 degrees with the rack mid oven. Grease and flour a 12 cup bundt pan. NOTE: I only had this fancy 10 cup bundt pan and I used my handy dandy homemade “Pam”. I brushed this on liberally with a pastry brush, getting into the nooks and crannies. It paid off, the cake looked amazing. Cakes with lots of sugar like this stick to the pan so be careful to prep yours!

In a medium bowl, combine the dry ingredients: flour, poppy seeds, baking powder and salt. In a larger bowl, whisk the sugar, oil, eggs, vanilla and almond extracts.

Pour ⅓ of the flour mix alternating with ⅓ of the milk into the large bowl containing the sugar/oil mix. Mix well with a spatula so everything is combined.

Pour into the prepared cake pan evenly-the batter is fairly liquidy. Bake for 45-50 minutes (Mine took 55 minutes but my 10 cup cake pan was really full) until a cake tester indicates the batter is thoroughly done. Let the pan rest on a rack for 10 minutes.

Meanwhile, whisk the glaze ingredients together. When the 10 minutes are up, carefully invert the cake onto the rack, place some parchment or foil under the rack and brush every nook and cranny (use a pastry brush) with the glaze while the cake is still warm. Allow the cake to cool before slicing.

I cut half the cake when it cooked and carefully wrapped and froze it.  2 weeks later, it is still superb.

PS: I have made this more times than I care to tell you , and the last time I caved and put in the grated zest of 1 lemon.  I loved this addition and will do it going forward.`I also put a little lemon juice with the orange juice to have a total of 1/4 cup since my orange was small.


Share
Posted in Breakfast, Cakes & Pies, Dessert | Tagged | Leave a comment

Oatmeal Apple Breakfast Muffins

Click here to view recipe.

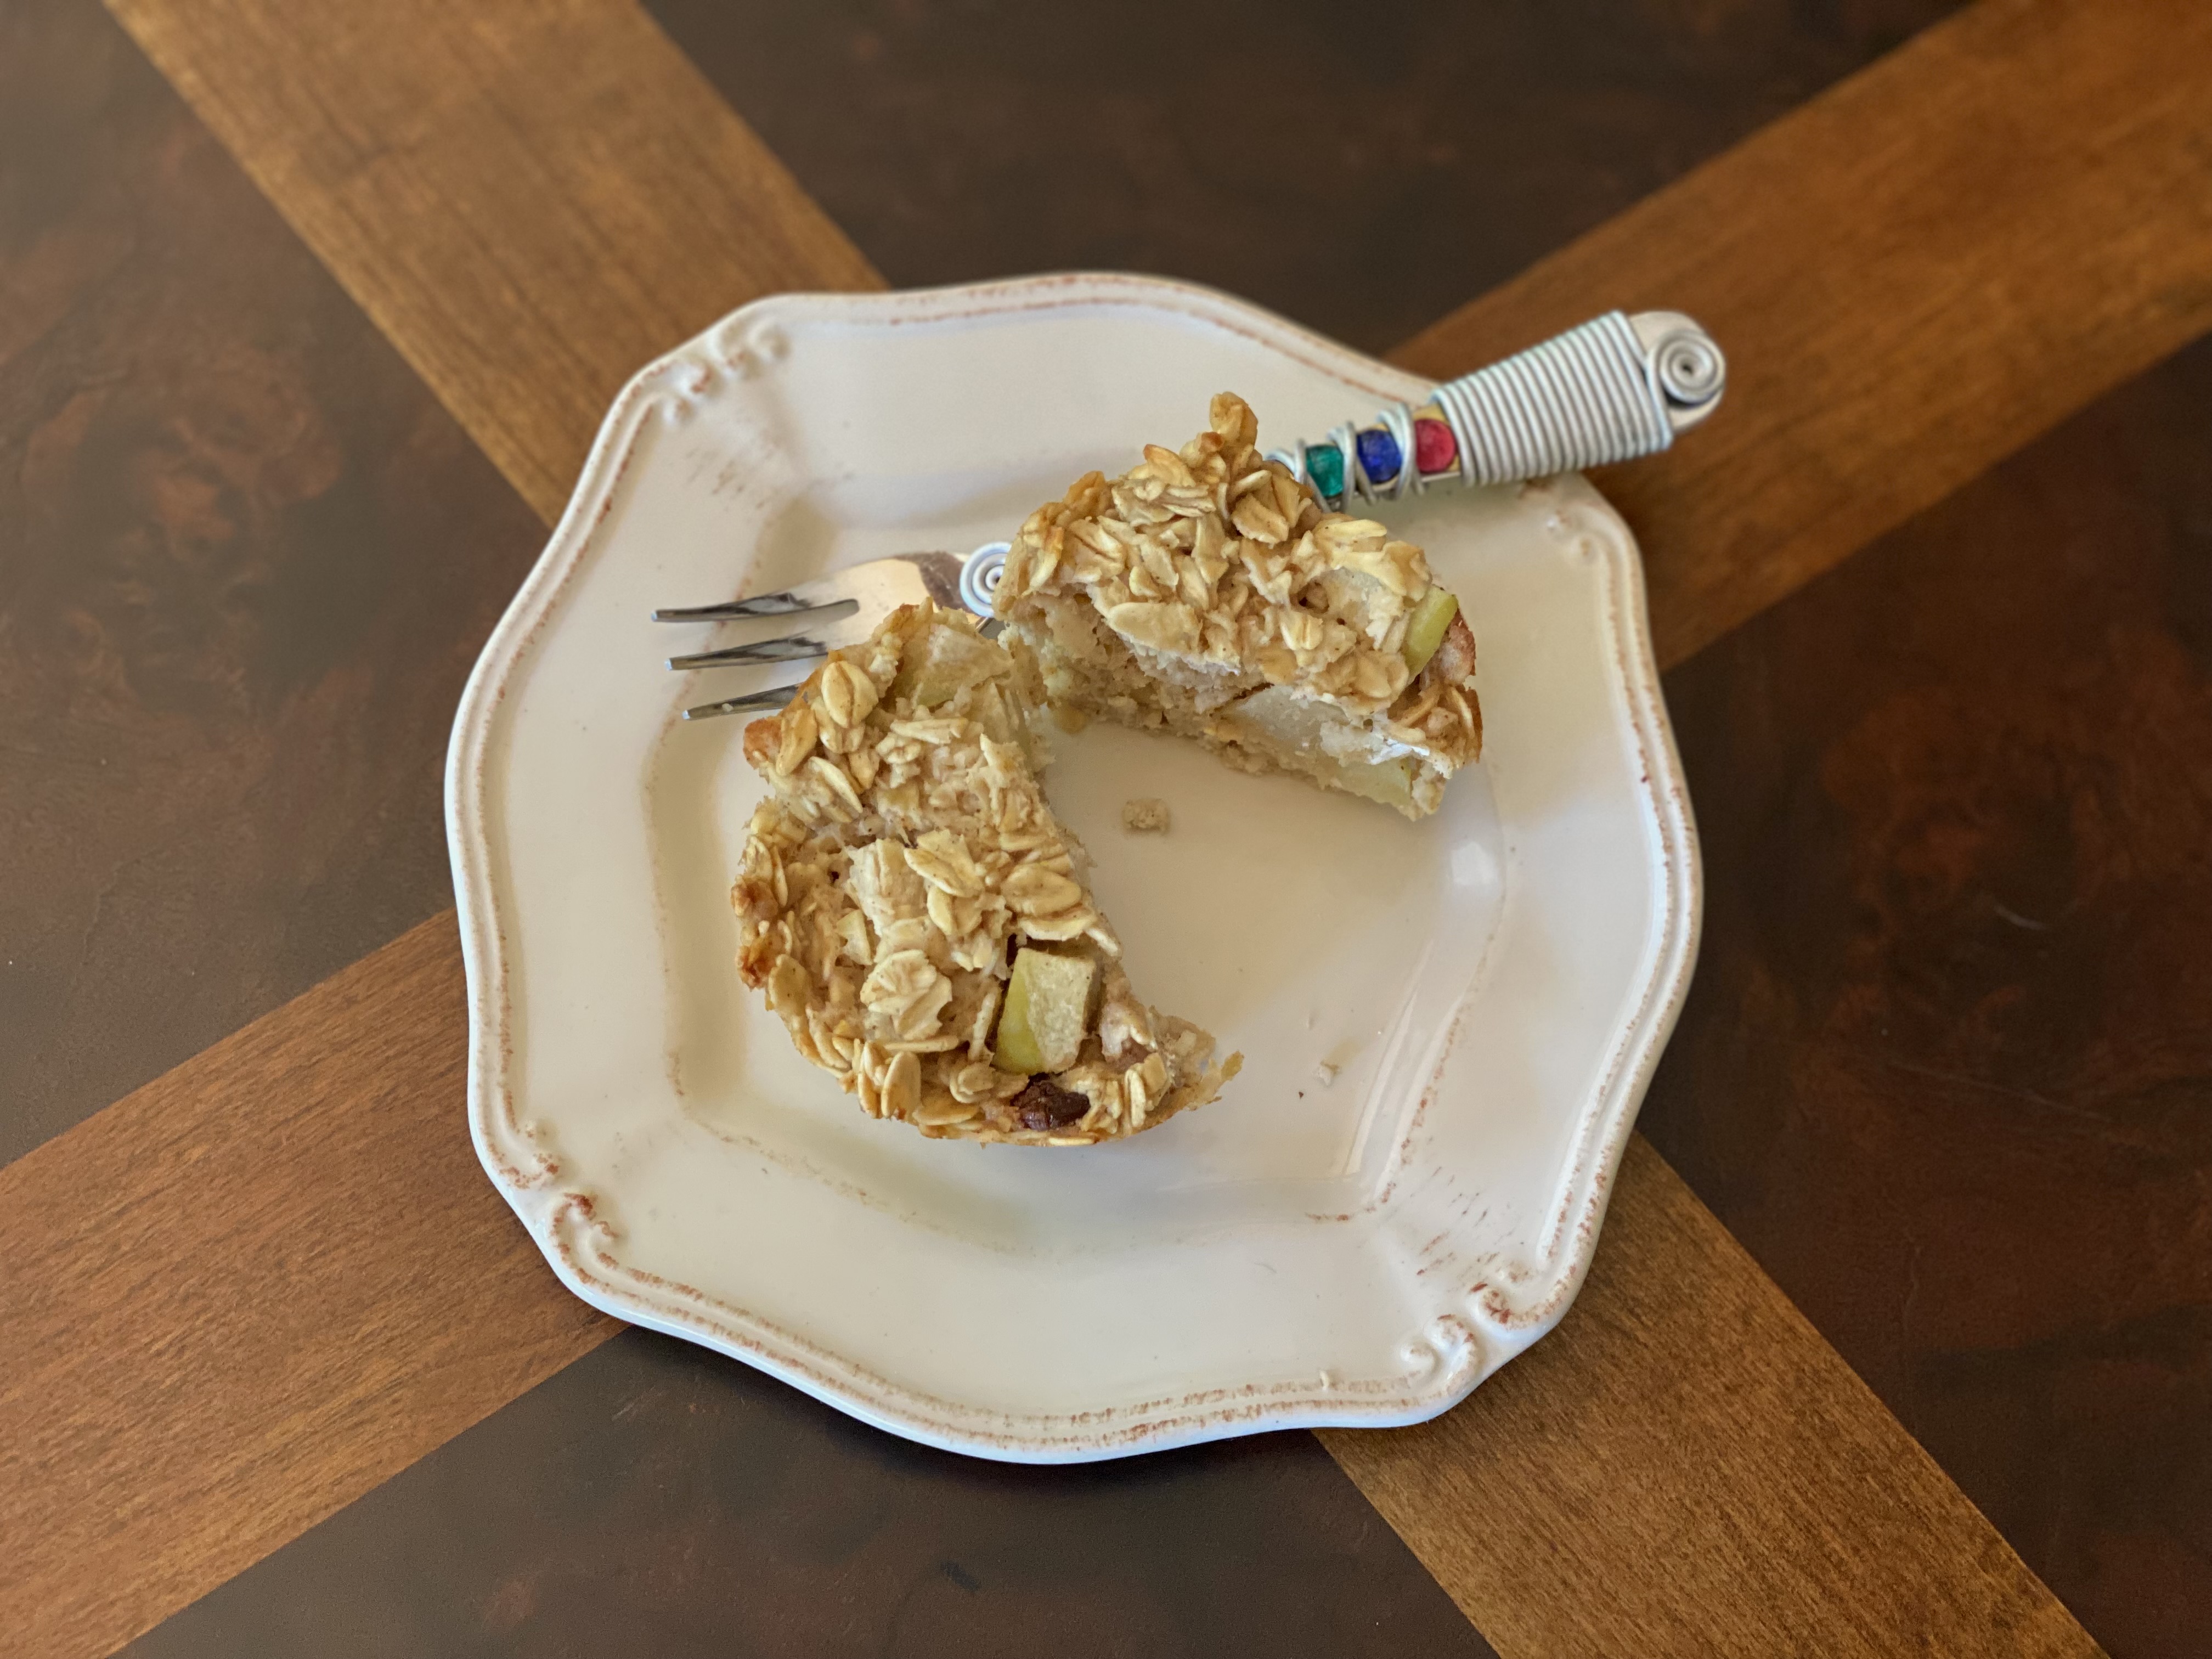
I love all things oatmeal, and I also am big on breakfast to go when I am on the go.  I accidentally arrived on this healthful baked individual oatmeal cups formula after trying other recipes with banana, with pumpkin and such.  However, my apple trees are loaded with tart apples so I devised this combination myself.  I happened to have all these ingredients in my pantry and in my refrigerator so I test drove the recipe a few times to get it right.

I think it is gluten free but I am not an expert there at all.  I eat everything with grains, with lactose, with sugar…I am easy to feed.

I make just six muffin cups at a time since our household has only two adults, but it would be easy to double the recipe for 12 muffins  if you wish.  If I have an early morning airplane ride or car trip, these are usually packed in my carry-with-me bag for a quick, filling breakfast.

Here you are, straight from my imagination to your stomach!

Oatmeal Apple Breakfast Muffins

Makes 6 Muffins

pf-icon2


Ingredients:
  • 1 ½ cups old fashioned oats (not quick cooking)
  • ½ teaspoon aluminum free baking powder
  • ¼ teaspoon ground cinnamon
  • Pinch of salt
  • ½ cup coconut milk or almond milk or buttermilk
  • 1 large egg, beaten
  • 1 Tbsp pure maple syrup
  • ¼ cup applesauce (prepared is fine but I used my homemade sugar free applesauce)
  • 1 cup peeled, diced apple (mine was green but any tart apple type is good)
  • 2 Tbsp dried tart cherries
Instructions:

Preheat the oven (I actually use my toaster oven) to 350 and spray or grease a 6-cup nonstick muffin tin.  If you only have a 12 cup muffin tin and are only making 6 muffins, just put some water in the empty spaces so it bakes evenly.

In a medium bowl combine the oats, baking powder, pinch of salt, dried cherries, apples, cinnamon and salt and set aside.

In a large measuring cup (4 cups) combine milk or buttermilk, egg,maple syrup, and applesauce, and whisk well.  Add this to the dry ingredients and stir well to combine.  I usually let the mixture sit on the counter for a few minutes so the oatmeal soaks up more liquid.  Stir again.

Using a large ice cream scoop, divide the raw mixture between the six cupcake holders.  Place into the oven and bake for 25 minutes or until a toothpick comes out clean.

Let the muffins cool for five minutes then carefully transfer to a rack and cool completely.  I often keep a few of these in the fridge for five days but they also keep well, once cooled, for up to a month in an airtight freezer container.

PS: You can substitute fresh apricots, peaches, or pears for the apples if you like.


Share
Posted in Breads, Breakfast | Tagged | Leave a comment

Overnight Cinnamon Rolls

Click here to view recipe.

Cinnamon Rolls – Fresh From the Oven

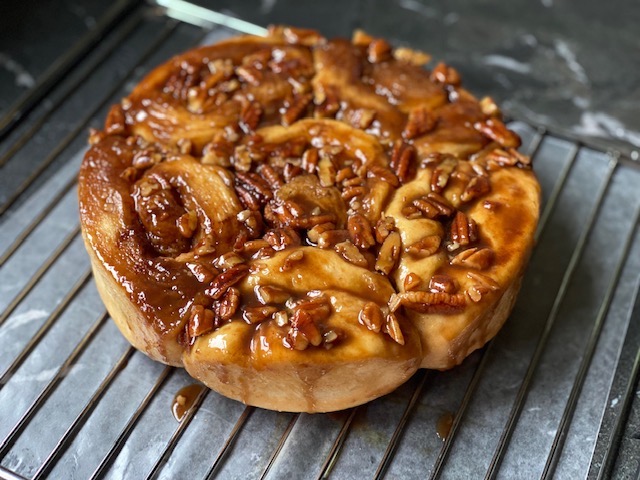
Around the time I started baking challah, I decided to use the challah dough to create cinnamon rolls.  That is kind of laughable because I am really not a fan of sweet breads for breakfast, but everyone else seems to be in the other corner. And I must say, having a pan of rolls to bake early in the morning then to eat with my morning homemade latte is a real treat.

Overnight Cinnamon Rolls

pf-icon2


Here is how it is done folks:  This makes six nice sized rolls.  If you want 12 rolls, make the challah dough but use the entire recipe of challah dough for rolls in a 9 x 12 pan.

  1.  Make challah dough according to my new, revised recipe and continue up until the first 90 minute rise is complete.
  2.  Then remove about half the raw dough for the rolls and knead it a bit, cover and use the remaining dough and proceed with the challah braiding.  After the challah is braided, covered and rising for the second time, I proceed with the rolls.
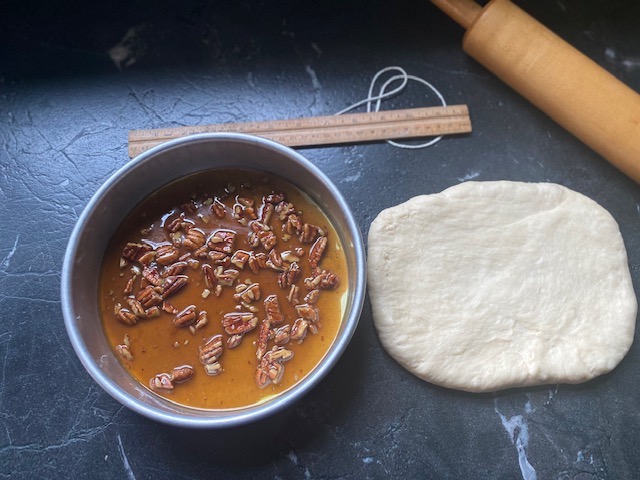
  3. Spray with Pam a 9-inch x 2 ½ inch cake pan, bottom and sides  Then make the caramel topping.
Ingredients for the bottom of the pan:
  • 2 Tbsp salted butter 
  • ¾ cup dark brown sugar
  • 1 ½ Tbsp kefir or buttermilk
  • ½ cup toasted pecans coarsely chopped
Ingredients for the filling of the rolls:
  • Additional ½ cup dark brown sugar 
  • 1 tsp ground cinnamon
  • 2 tsp of salted butter
Instructions

In a small saucepan, make the bottom pecan sauce by melting  butter and ¾ cup dark brown sugar. Remove from heat and add kefir and pecans.

(For the filling) In a separate bowl, combine ½ cup dark brown sugar and cinnamon.                 

In a cup, melt  2 tsp of salted butter to brush on the dough before filling. 

Knead this dough you reserved for the rolls until it is nice and smooth.  With your fingers, press into a rectangular shape then use a rolling pin to evenly roll this rectangle into an 8 inch long x 6 inch wide rectangle.  Brush with melted butter but leave the top inch (along the 8 inch width) free of butter.  

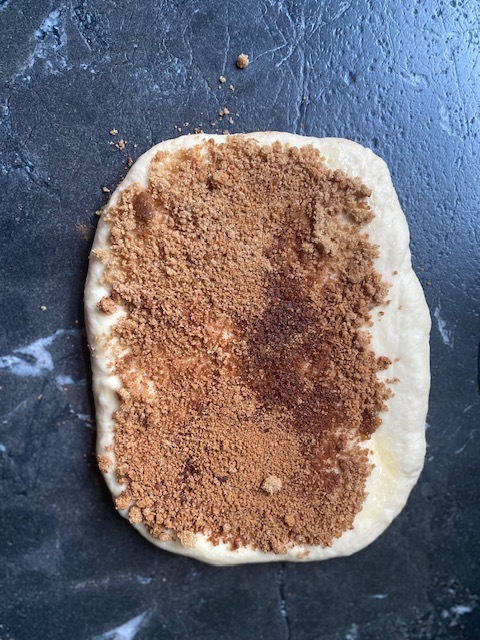
Glaze and Dough

Spread the brown sugar/cinnamon filling mix with your hands to cover the buttered part of the dough.  Press down slightly.  With clean hands, roll up, starting on the bottom jelly roll style into a tight tube. Pinch the seam with your fingers.  Put the seam side down and be sure the roll is even in size.  

Filling Slathered On

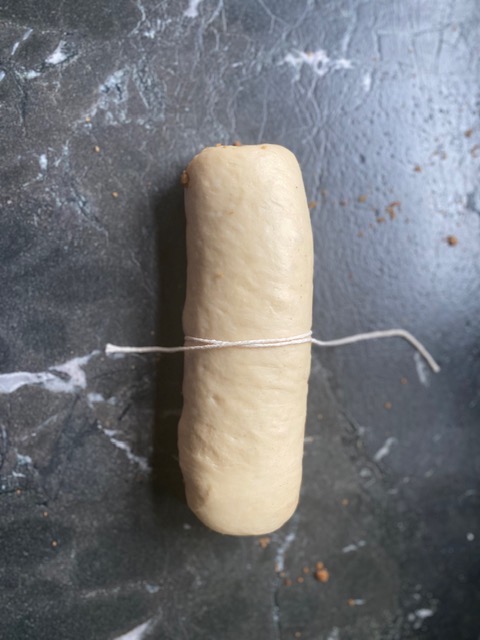
I cut my rolls using kitchen string. 

Roll Tied with String

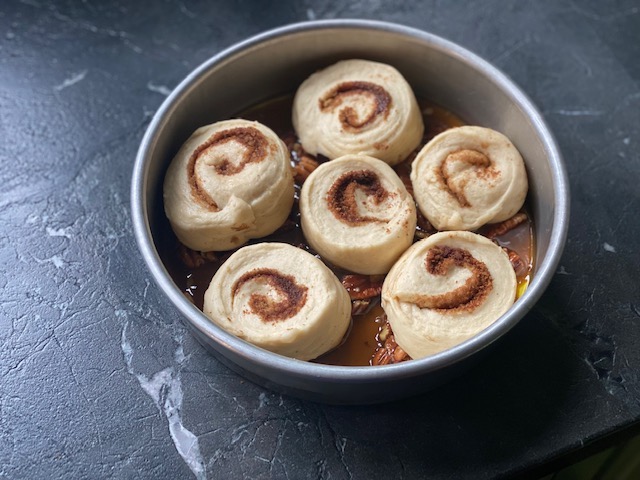
I cut  a piece of string 10 inches or so and slice it under the roll in the middle, bring the two ends to the top and cut.  Cut each half into 3 more pieces, and place each roll cut side down in the pan (see my photo and/or this nifty YouTube video).

And Voila!

Cover gently with a piece of oiled or pammed saran and a tea towel and let the rolls rise in the refrigerator for at least eight hours or overnight.

In the morning, remove the pan  from the fridge and let the pan of rolls rest on the counter while you preheat the oven to 350 degrees with the rack mid oven.  When the temperature reaches 350, uncover the rolls and place them in the oven, bake for 22-25 minutes or until the internal temperature reaches 190 degrees.  Let the pan cool on a rack for five minutes then invert on a cooling rack so the caramel sauce is on top.  (I place a piece of parchment or waxed paper under the pan to catch any drips!). Let the rolls continue to cool until you can’t stand it any more, then pull apart and enjoy.  

My husband makes something called “sop”.  It is not something I would eat but he loves this as do my kids.  Basically he tears the cinnamon rolls into – inch pieces, jams them in a tall glass then pours milk over the torn up rolls and eats the soggy milk-soaked pieces with a spoon. To each his own.  


Share
Posted in Breads | Tagged | Leave a comment

Revised Challah

Click here to view recipe.

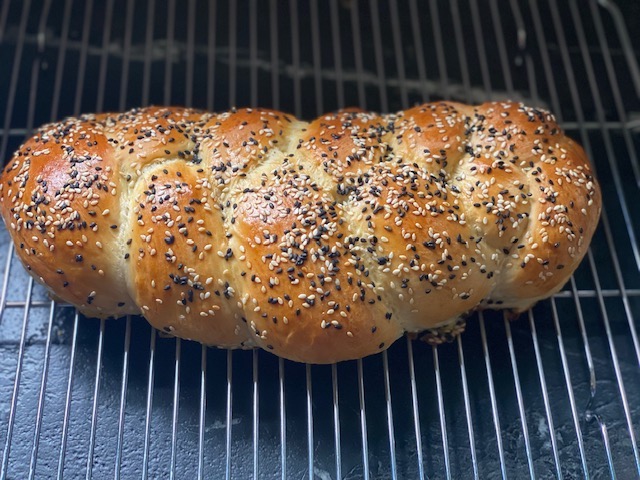
Challah – New & Improved!

I have been making my own challah for over half a century – for 55 years to be precise.  I previously posted MY version of challah eleven years ago (!) that was at the time, the best IMHO. My sisters disagree – but that is not unusual.  (Their recipe has more salt and they make it in a Cuisinart or mixer)

Fast forward over the last decade … I have been tweaking and changing the yeast amount, the sugar, the salt, but mostly the amount of time I rise the dough, let it “relax” and even the cooking temperature and oven position.  Now I have it exactly like I want it. 

I love making dough using a stainless steel bowl and my own two hands.  For me it is highly therapeutic and very very satisfying.  In this age of supply chain issues, I enjoy even more using ingredients I always keep on hand that cost me so little compared to $8 and up for a bakery challah that isn’t as big or nearly as good.  I taught my daughter-in-law and her Peruvian nanny to make challah, and Maria (the nanny) has since taught at least five other nannies to do the same.  Now I have a pyramid scheme but her breads come out even more beautiful than mine!

The issue for me is always this:  do I make a 3 ½ cup of bread flour recipe into a giant loaf of challah, or do I make two smaller challahs, one to gift and one to eat, or do I make some cinnamon rolls for Saturday morning, or small challah rolls.  It is a  good problem to have…

As of late, I have become obsessed with having the braids remain perfect and not “pulled” apart or melted together.  I have tried many tweaks: adding more yeast, more salt, lower oven temperature, longer rising….and after at least 20 attempts I came up with the recipe below.  Credit goes to Hayley, my kind of daughter (really my daughter’s best friend since preschool).  Hayley became crazed with making challah, subscribed to baking sites and told me to rise the dough a lot longer for both steps and to add more yeast.  OK, I did her method and still had a bit of an issue with the braids “splitting” – so I looked at many internet sites and now bake my bread on a lower shelf at a lower temperature.

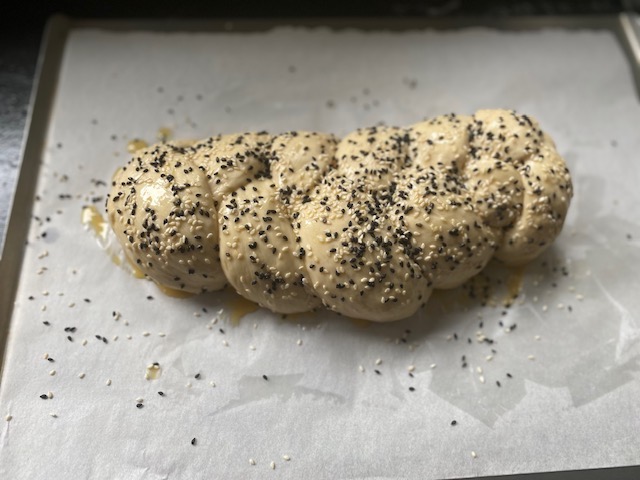
Ready for the oven

The following is my idea of perfection and hopefully my legacy to my family, my friends and my readers.  

Revised Challah

Makes two loaves a little over a pound each or one large 2-lb loaf (or a loaf and cinnamon rolls)

pf-icon2


Ingredients
  • 1 ¼ cup warmish water (not more than 110 degrees F)
  • 1 Tbsp regular yeast, red star or Fleishmans (not instant yeast)
  • ½ tsp granulated sugar to proof the yeast
  • 1 room temperature large egg
  • A dash of pure vanilla extract
  • 2 Tbsp very soft butter, cut into ½ inch pieces
  • 3 cups of bread flour (I love King Arthur unbleached bread flour) plus 1 cup to add as needed
  • ½ cup granulated sugar
  • 2 tsp fine sea salt
  • TO GLAZE
  • 1 egg, beaten
  • ½ tsp of granulated sugar
  • Sesame seeds, or black sesame seeds or black poppy seeds or a combination of anything.  
Instructions

In a 2-cup measuring cup, whisk together the warm water, yeast and sugar. Once the yeast bubbles, whisk in the egg, vanilla and soft butter.  In a large stainless steel bowl, whisk the dry ingredients to combine, then add the liquid ingredients from the 2-cup measuring cup and mix to combine. 

I use a large Danish dough whisk and eventually I start kneading the bread by hand, adding ½ to 1 more cups of bread flour so it holds together well.  I then knead the bread for eight minutes, remove it from the bowl to the counter.  After eight minutes, I cover the bread on the counter with a tea towel.  While it rests I wash the mixing bowl, dry it, lightly butter it and then plop the kneaded bread inside.  I cover the bread with a tea towel and let it proof for 90 minutes.  (Either put it in a warm place or in the oven if you have a proofing feature on your oven, use that at 85 degrees).  

After 90 minutes, remove the bread dough from the oven and punch it down, knead it for a minute or so.  Divide the dough in half  if you want to make two loaves.  Divide each half into three or four pieces depending on whether you want a three braid or a four braid challah.  If you are making a large challah, just divide the entire dough into three or four balls.  Let the balls sit on the counter for two minutes.  Confession: I get a little compulsive with having the bread look perfect so I weigh my balls of dough so they are pretty close to equal amounts.

After two minutes, start to roll out the balls into ropes. When the ropes are six inches long, stop again, cover and let the dough rest for five minutes. Then proceed to roll the ropes as long as you like. The ropes should not shrink back when you stop rolling since the dough has had a chance to rest.  There are lots of youtube videos on how to braid challah!

Transfer the braided loaf onto a parchment lined cookie sheet, cover with an oiled or pammed piece of saran and let it rise for 50 minutes.  At that time, remove from the oven and leave covered but turn the empty oven to 325 with the shelf a little lower than mid-oven.

When the oven reaches 325 (mine takes close to 12 minutes), brush the top of the challah with egg wash (the beaten egg and ½ tsp sugar mixed together) and then sprinkle with sesame or poppy seeds if desired. Brush seeds again with egg wash so they don’t come off.

Bake at 325 for 28-30 minutes for a huge loaf. If you’re making smaller loaves they cook in 23-25 minutes.  The internal temperature should be 190 degrees if you have a thermometer to test the center of the loaf.

Remove from the baking sheet onto a rack to cool. Wait at least ½ hour to cut. Do not wrap in a plastic bag or freeze for at least five hours so the core is completely cool.

Please report back to me when you try these tweaks.  A lot of you made my recipe during the pandemic, and I want you to try these changes.  Please!

Share
Posted in Breads | Tagged | Leave a comment

Kefir Bread

Click here to view recipe.

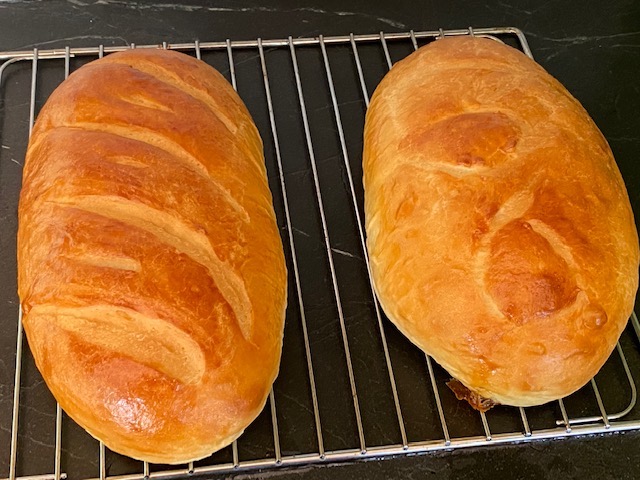
Kefir Bread Fresh Out of the Oven

Buttermilk bread was in my repertoire at least 20 plus years ago and used to be my “go to” bread to bake.  Over time, I must admit that I forgot about it and concentrated on challah, oatmeal bread, whole grain crackers and various loaves.  A couple weeks ago I decided to revert back to this recipe, subbing Kefir for buttermilk since I always have plain kefir on hand.  

This dough is silky and is easy to work with. The bread makes great toast or sandwiches – it’s not too sweet and it is really, really good.  This recipe makes one large loaf or two smaller loaves.  I think if I get fancy and try to form a turtle bread or a sunflower bread, I’ll use this recipe.  Meanwhile it is going into heavy rotation here. And yes, the house smells amazing!

Kefir Bread

pf-icon2


Ingredients
  • 1 Tbsp. yeast
  • ¼ c warm water
  • ½ tsp sugar
  • ¼  stick soft butter
  • 2 Tbsp neutral oil (I use avocado or grapeseed oil)
  • 2 Tbsp honey
  • 1 ½  tsp sea salt
  • 1 c buttermilk or kefir,  room temp (after taking it out of the fridge and shaking  the carton, I heated it in a microwave-safe cup for 45 seconds)
  • 1 egg beaten, room temp (USE ONLY HALF FOR THE BREAD and add ¼ tsp sugar to the other half of the beaten egg for the top)
  • 3-4 c bread flour
Instructions

In a bowl, proof yeast with the warm water and sugar.  Add liquids, then flour a bit at a time.  Knead for 8 minutes on the counter, then put in a buttered large bowl and  rise for 70 minutes covered with a tea towel in a warm place.  Punch  the dough down, kneading it 20 times or so.  Let it relax and sit for 10 minutes, then knead a bit more and form into rolls or loaves and let rise, covered, for 45 minutes in a warm place. 

At this point, begin preheating the empty oven to 325 degrees.  After the oven is preheated, brush the tops of the rolls or bread with the egg wash.  I usually score a design into the dough with my lame, then bake the two loaves on a parchment paper lined cookie sheet at 325 for 25 min until the center registers 190 degrees.   Cool on a rack for at least a half hour before slicing.

Share
Posted in Breads | Tagged | 4 Comments

Amazing Coconut Fish Soup

Click here to view recipe.

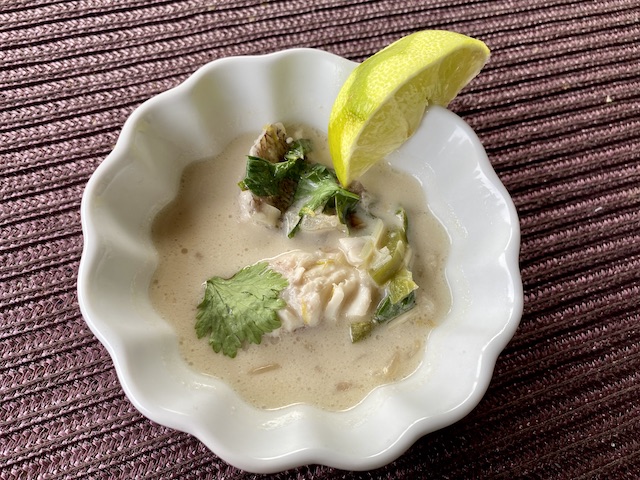
Fabulous Fish Soup

During a brief trip to visit my sister in California, we were constantly busy  … taking long walks along the ocean, eating ice cream and candy at local spots, having lunch at Gayle’s bakery, and visiting with her kids and my great nieces and nephews.  At the end of our final day, we were worn out and Susan pulled a coconut fish stew out of the freezer to have for dinner along with some excellent sourdough bread.


I ate one spoonful of the soup and told her I needed the recipe.  I took a photo of her printed copy and a few weeks later I made it along with some brown rice for a very filling meal.  I came home to Seattle and Googled the recipe, hoping to find the author and discovered this was from Melissa Clark at the New York Times.  Thank you, Melissa!


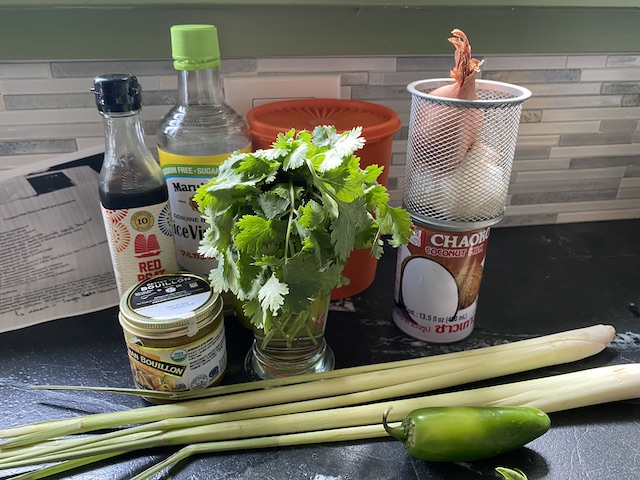
Fish Soup Ingredients

I love Asian based flavors: coconut milk, lemongrass, fish sauce,  cilantro and basil. And of course we are lucky enough to always have great fresh fish in the Pacific Northwest.  My soup came out just like my sister’s and I froze a tiny carton for some evening in the future when I get home late and just crave something nourishing and warming.  An added plus here is that it takes no time at all to put all of this together.  The hardest part is gathering the ingredients!

Amazing Coconut Fish Soup*

Serves 4

pf-icon2

Ingredients


  • 1 Tbsp avocado oil
  • 3 Tbsp thinly sliced shallots
  • 1 small clove garlic, peeled and minced
  • 2 ½ cups chicken stock (I used Better than Bouillon)
  • 2 lemongrass stalks, peeled and cut into 2-inch segments then pounded and sliced very thin.
  • 13.5 oz can coconut milk
  • 1 jalapeno pepper, seeded and thinly sliced.  (I used a little less due to my husband’s taste buds.)
  • 2 Tbsp unseasoned rice vinegar
  • 1 Tbsp dark brown sugar
  • ½ tsp salt (You can add more at the end to taste)
  • Grated zest of 1 lime
  • 1 lb snapper filet or other firm fish, cut into 1 ½ inch chunks-shrimp (or scallops work too)
  • 2 Tbsp chopped cilantro
  • 2 Tbsp fresh chopped basil
  • ½ lime, juiced (save the other half and slice into wedges to serve the soup)
  • Cooked rice or quinoa to serve
Instructions:

 Place a 5-quart saucepan over medium-low heat.  Add the oil and let it warm, then put in the shallots and garlic, stir until everything is softened but not burnt.  Add the stock, lemongrass, coconut milk and jalapeno, vinegar, brown sugar, salt and lime zest.  Simmer for 10 minutes, uncovered.


Stir in the lime juice, seafood and herbs.  I turn off the heat at this point and let the rest steep in the liquid for five minutes.


Ladle over rice or quinoa and serve with lime wedges.  

*Tweaked from Melissa Clark’s NYTimes recipe

Share
Posted in Soups | Tagged | Leave a comment

Broccoli Pecan Salad

Click here to view recipe.

Bright & Beautiful Broccoli Salad

You know me.  Whenever I stumble upon a soup or a salad or a dessert I love, I immediately want to try to make it in my own kitchen.  Recently I was visiting my middle sister in Santa Cruz and we stopped for lunch at Gayles – my favorite bakery.  Don’t tell anyone but on the way home we ate a mid-afternoon snack there too.  

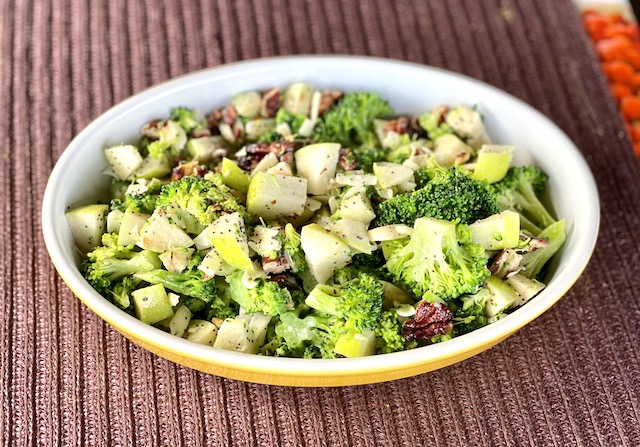
In the display case were a multitude of amazing looking salads!  We shared a few things and ordered a pint of this broccoli salad which blew me out of the water.  It was so so good: crispy, sweet from the apples, tangy from the vinegar, crunchy from toasted pecans and salty with Gruyère cheese. The dressing was barely there and added just a little richness with specks of poppyseed to the salad. I jotted down what we could identify, looked at the listed ingredients and when I returned to Seattle I went to work.

I made this twice in the matter of one week and I will probably make it a third time. The only thing I would change would be to use a red skinned apple for color.  The second go around I lightly blanched the broccoli so it would be more vibrant.  Done. And – everything can be mixed or chopped by hand.  

As an aside (also called flight of ideas) I have some previous trauma surrounding broccoli.  When my middle son was young he only loved “brown” foods.  Meat, fish, bagels, potatoes, no vegetables. I think he did this to put a knife in my heart since he realized I loved vegetables, and a variety to boot.   Broccoli was an exception to his general disdain of all things green – so I served broccoli more times than you want to know when I was young.  I still love it but it does give me pause.

Enough about me. 

Broccoli Pecan Salad

Serves 6 

pf-icon2


Salad Ingredients
  • 6 cups broccoli flowerets  
  • 1 cup grated good quality Gruyère cheese
  • 1 ½ cups apple (IMHO – an apple with some red on the skin would be prettiest) (my photo is with a green apple because that is what I had)
  • 1 cup toasted pecans, coarsely chopped
Dressing Ingredients
  • ½ cup mayonnaise 
  • 1 ½ Tbsp  apple cider vinegar
  • 2 Tbsp avocado oil or another neutral oil
  • 2 tsp honey
  • 3 Tbsp Poppy Seeds
Instructions

Chop broccoli into smallish, ½ inch pieces. Drop into about 2 inches of boiling water in a pot, stir it around and leave it with the lid off for no more than 1minute, stirring constantly.  Remove the broccoli with a strainer and immediately put the flowerettes into an ice water bath.  After they cool down, remove any excess water by drining well then rolling the broccoli in a dry towel.  By the way, this makes the broccoli vibrant green and even a day later it maintains its color.

Prepare the apple by removing the core and dicing into ¼ inch pieces.  

Combine all dressing ingredients in a bowl – whisk and taste, add more vinegar or honey to your taste.

Lightly fold most of the dressing into the ingredients listed above.  The dressing will seem to disappear.  The salad can be refrigerated, covered, for a few hours before eating.  Before eating, add the remaining dressing to moisten it up. The next day I will say that the salad held up just fine.  Day 3, not so much.

And you know what?  I am making this for our family Thanksgiving.  I sent this photo of my salad to my sister and she said “Oh, are you going to write that on your blog, a hack?”  Yes, I answered.  You better believe it!  She also told me that my broccoli was a little more chunky than Gayles.  So be it!


Share
Posted in Salads & Dressings | Tagged | 2 Comments

Basil Walnut Pesto

Click here to view recipe.

I started out this summer with a couple of basil plants in a garden space that my neighbor let me use this summer.  The plot of land is basically shaded by bushes and trees and is backed up to a green belt, hence it gets very little sun.  The basil grew but did not flourish so mid-summer I bought another plant and put it in a large container in my front flower beds.  Wow! The new plant grew like nobody’s business and produced lots and lots of beautiful basil.  This September, after using bits here and there in my cooking, I decided to make pesto.  I lacked the traditional pine nuts so substituted walnuts.

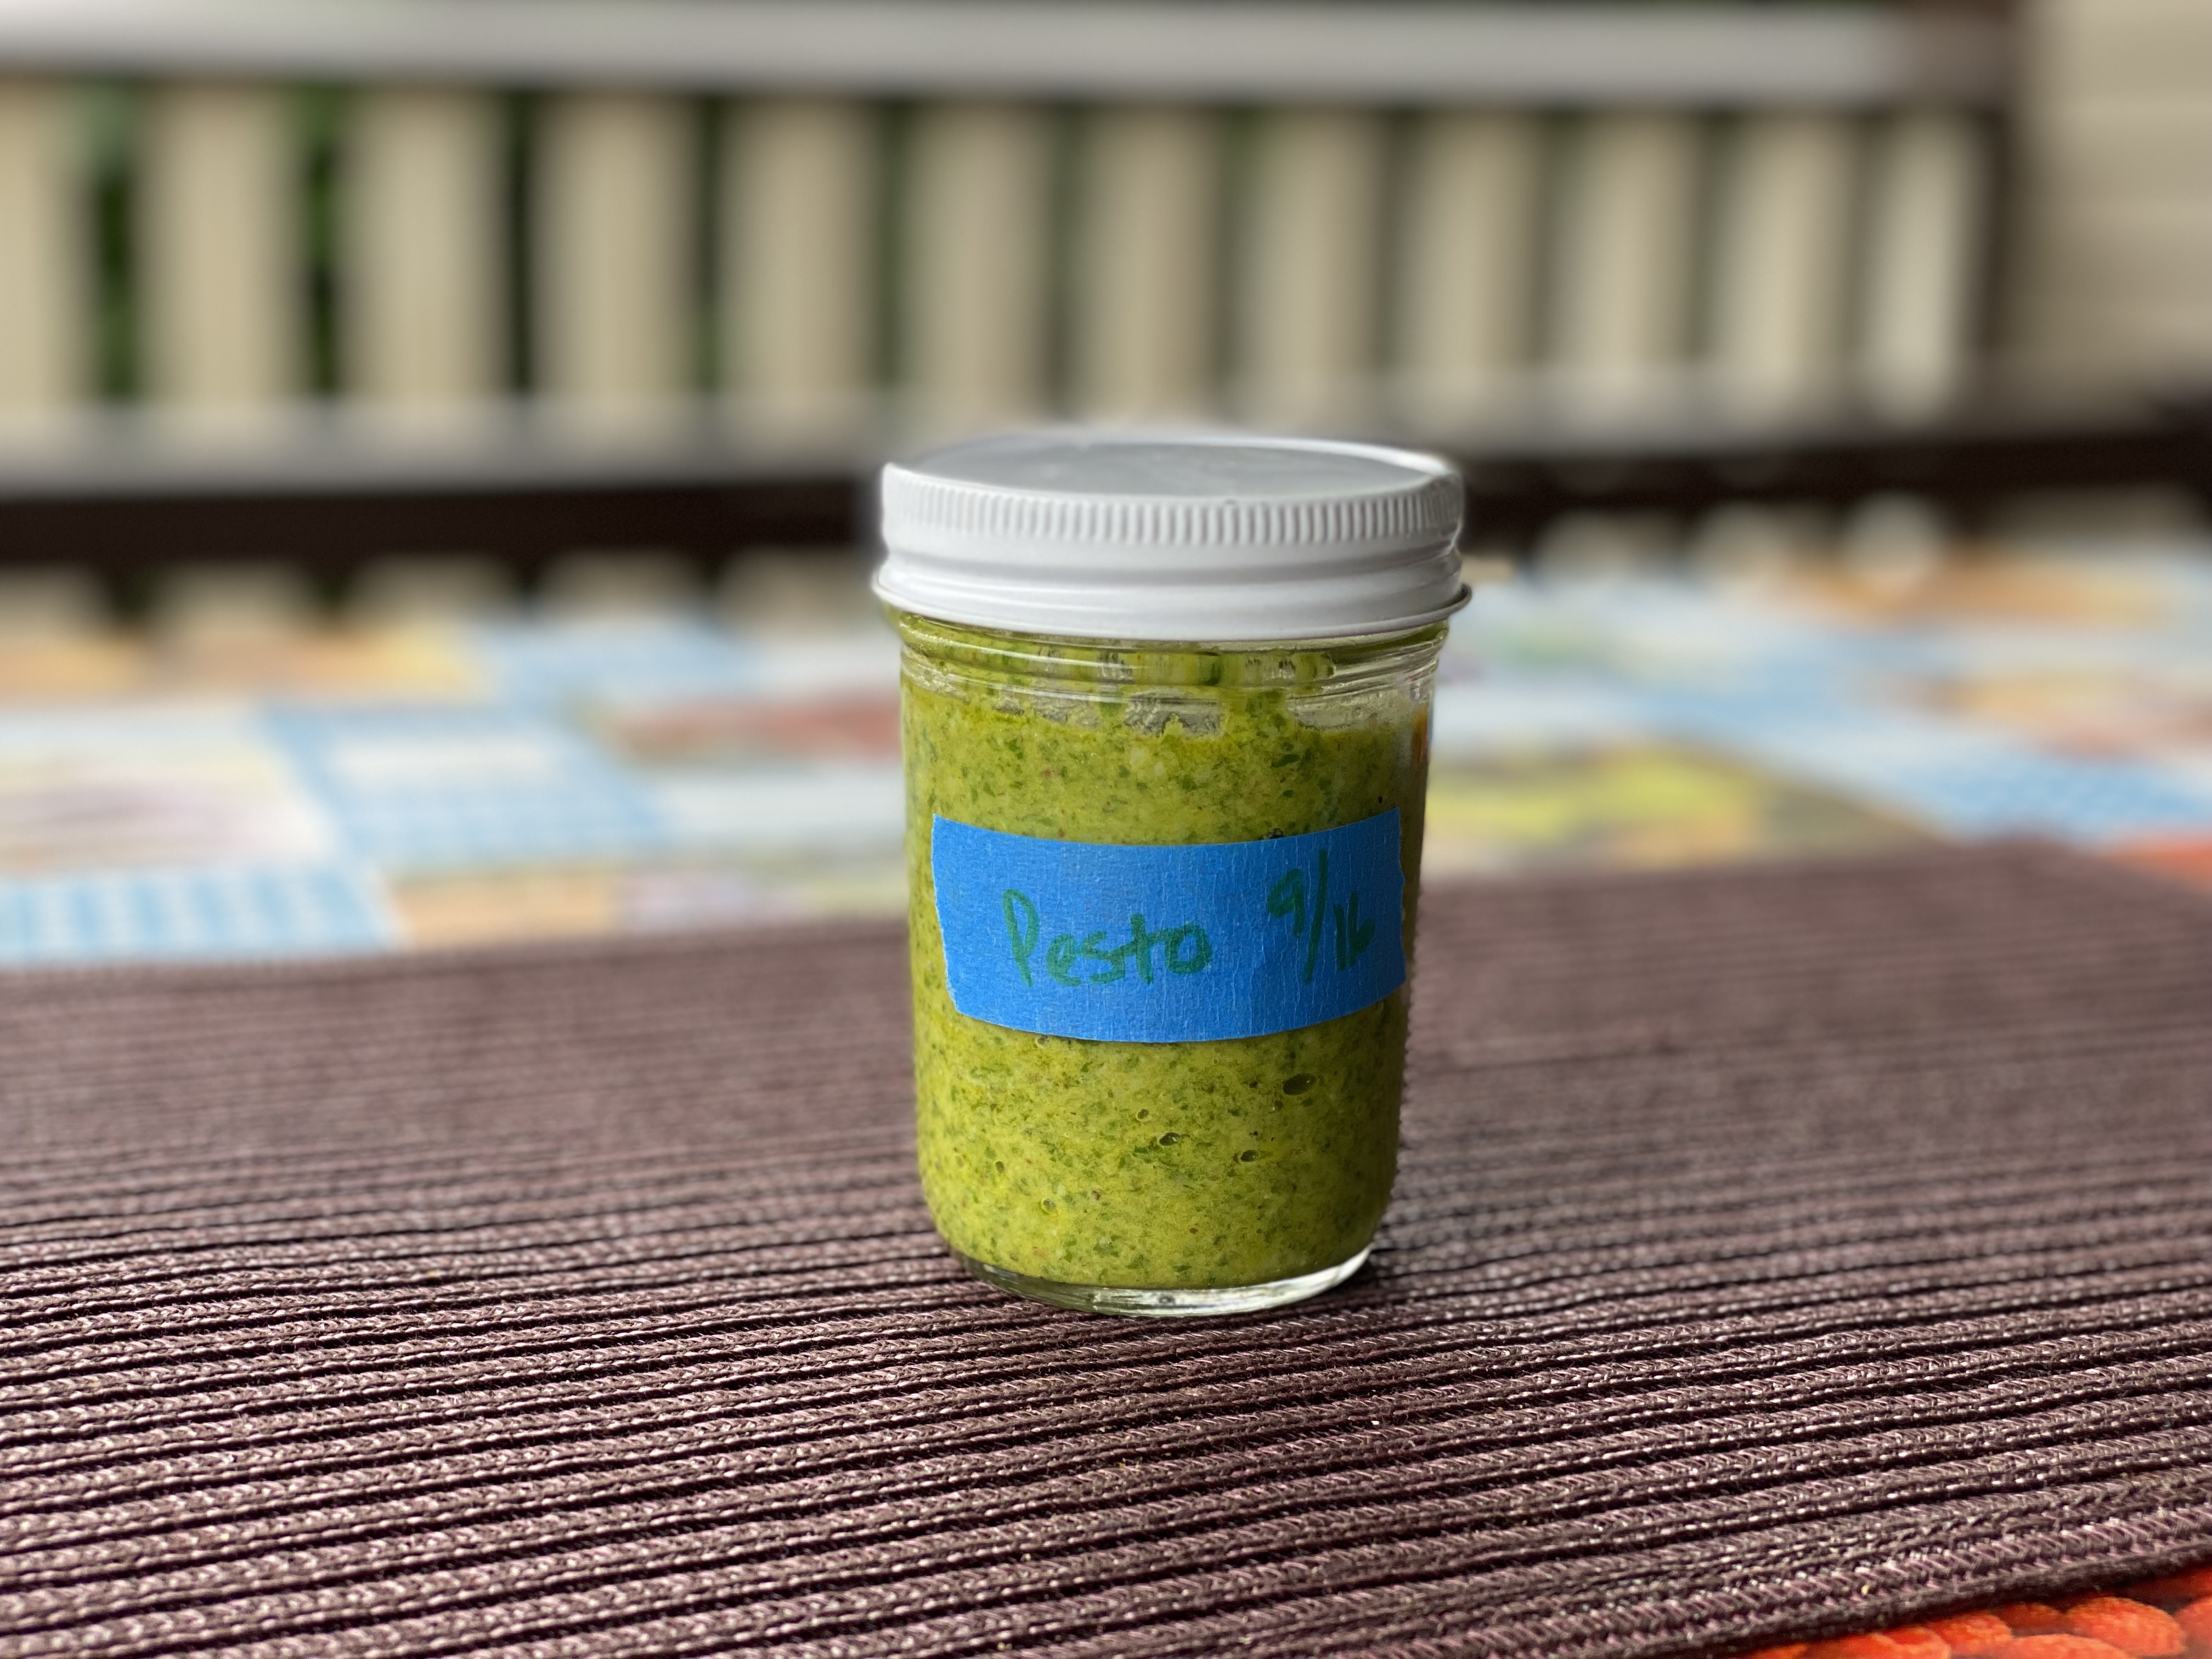
On my first try I covered the pesto with a layer of olive oil, but it still turned brown at the top.  A few days later I briefly blanched the basil, squeezed out the water and then proceeded.  I love the final result and now I have a large jar in the freezer for this winter when I want to pretend it is spring.

To me, pesto is one of the finer things in life.  It takes me literally 10 minutes to prepare.  I love it tossed with hot pasta and some freshly chopped tomatoes and a splash of cream. I also love it mixed with homemade mayo or on top of soft cream cheese as a dip or a spread for crackers.  

I think a person could really use any type of nut here, and I plan to try fresh raw macadamia nuts from Guatemala the next time I visit.

Basil Walnut Pesto

Makes about a cup of pesto

pf-icon2


Ingredients
  • 3 cups fresh basil leaves, packed
  • ⅓ cup grated fresh Parmesan cheese 
  • ⅓ cup walnuts, raw or lightly toasted and cooled 
  • 1 large peeled clove garlic 
  • ⅓ cup extra virgin olive oil (mine is from Italy!)
  • ½ tsp salt 
  •  ¼ tsp freshly ground black pepper
Instructions

First you are going to blanch the basil.  This extra step prevents it from turning brown!

Remove the basil leaves from the stems, and drop them into a saucepan of boiling water.  Stir basil for 30 seconds then quickly remove the leaves to an ice water bath.  After a few minutes, put the blanched leaves in a dish towel and dry them well.

In a food processor add blanched basil, grated parmesan cheese, walnuts, and garlic. Pulse until coarsely chopped, about 10 pulses.

With the motor continuously running, slowly drizzle in the olive oil and process until smooth. Stop halfway and scrape the sides so everything gets processed.  Finally, season to taste with salt and pepper.  Your kitchen will smell unbelievable!

Put the pesto into a glass jar with a lid.  It will stay fresh in the refrigerator for a week or it can be frozen for up to 6 months.  To defrost, remove from the freezer and put into the fridge overnight.


Share
Posted in Condiment | Tagged | 2 Comments

Honey Oatmeal Bread Redux

Zay – two months shy of 13

I originally published this almost ten years ago – but I make it so often and it’s such a beloved bread in this house I thought I’d post it again. And I can’t help but include an updated picture of my grandson Zay – nearly 13 and pictured here practicing for his Bar Mitzvah, wearing his baseball uniform. Quite a bit grown up since the original picture with grandpa!

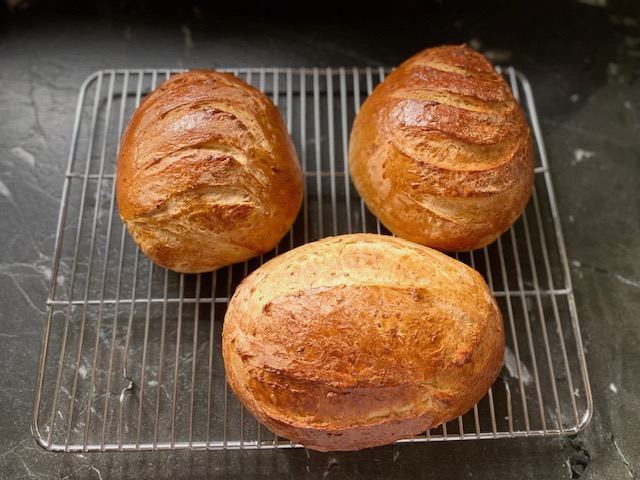
Three loaves needed to feed the whole family!

My latest attempt at lame (pronounced LAHM, meaning “blade” in French – this technique allows me to score my bread and make it even more enticing!)

~*~*~*~*~*~*~*~*~*~*~*~*~*~*~*~*~*~*~*~*~*~*~*~*~*~*~*~*~*~*~*~*~*~*~*~*~*~*~*~

Click here to view recipe.

Daughter Rachel with horse & buggy near Kalona

I grew up in Iowa, a place of simplistic beauty. My daughter and her family still live in eastern Iowa so I often travel back to the place where I spent almost 20 years. Last spring we took a short field trip (literally… it was a trip through the farms and fields) to Kalona, Iowa – a twenty-minute drive from my daughter’s house. I used to visit this beautiful area almost 40 years ago when I worked as a nurse in Iowa City. These were the days before the farmer’s market movement so I was always on the hunt for fresh cheese, produce and eggs.

This charming rural town is home to a large number of Amish families and contains many locally owned shops, bakeries and restaurants. A subgroup of the Christian Mennonites, Amish churches provide rules that include simplicity in the way their followers live and dress and instruct their congregants survive without the ease of modern technology. My grandson Zay was fascinated with the horse drawn buggies, the mode of transportation for observant Amish families even during sub-zero Iowa winters and sweltering, humid summers. Amish women wear dark colored, long garments, sensible shoes and white or black head coverings and the men have long beards and they wear brimmed hats. The most devout in this community do not use electricity, and they certainly do not own cell phones or computers!! They utilize oil lamps in their businesses; all machinery for farming and manufacturing is run by manpower. Many Amish men and women allowed me to photograph their businesses and horse drawn carriages but humbly stated that they did not want their pictures taken!

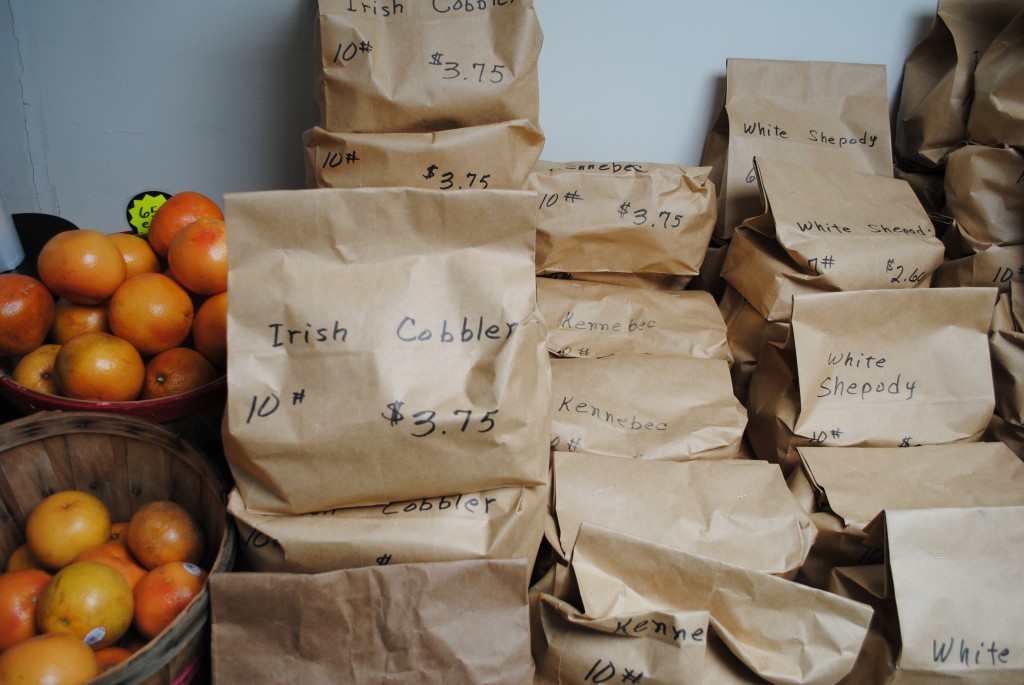
During this trip to Kalona, we began at the cheese factory and watched the cheese curds (AKA squeaky cheese) being stirred. The curds were fairly bland, buttery yet salty and definitely squeaky. We bought a small bag of them and ate most of our stash in a short time. They were perfect “kid” food – easy to grab and nutritious to boot. Next was the Stringtown Grocery where we bought bulk mini cinnamon chips (which I use for my scones), local pastry flour and small vegetable starts for leeks and onions. There were more than 30 varieties of potatoes packaged by hand in paper sacks, many with names that were new to me.

Potato varieties at the Grocery

Our final stop of the morning was the Golden Delight Bakery! In addition to beautiful homemade berry and cream pies, breads and pastry, the establishment sold freshly made glazed doughnuts. The women allowed me to photograph the work space where they were getting ready to bake pecan logs, apple pies and rolls. Without electricity the room was exceedingly quiet and peaceful and the women chatted amicably with each other. They courteously answered my many questions and eyed us with amusement. On the way out we purchased doughnuts, ate them outside on a picnic table then returned home a much-needed nap.

Zay with his grandpa eating his glazed doughnut at the bakery

Once I had a chance to rest I decided to use the freshly-purchased flour to bake some of my family’s favorite Honey Oatmeal Bread (recipe below) and soon the kitchen smelled almost as good as the Bakery in Kalona.

What a morning! And such a great reminder that foodies like me don’t need to travel to exotic locations when in so many instances a short drive down a country road will reveal an entirely different world – sometimes a world that has stood still for over 100 years.

This is a sweet tasting, very moist bread that is loved in our family. It’s perfect for toasting and I love to serve it with fresh butter and a bit of honey. And it freezes very well for up to a month.

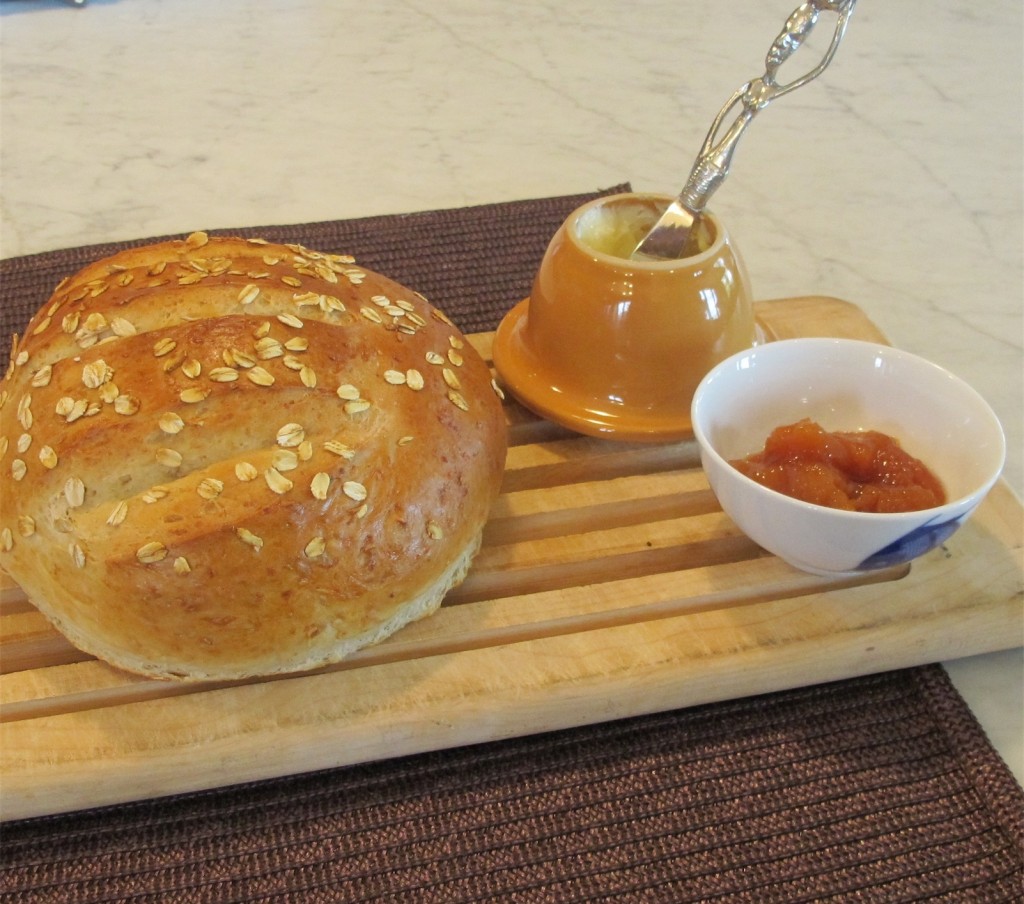
Freshly baked bread

Honey Oatmeal Bread

Makes 2 loaves

pf-icon2

Ingredients:
  • 2 cups boiling water
  • 1 cup old fashioned oats
  • 2 Tbs. butter
  • ½ c honey
  • 1 Tbs. active dry yeast
  • 2 tsp table salt
  • 5-6 cups white bread flour (says “Better for Bread”)-about 660 gms
  • Egg white for glaze and about 2 Tbsp oats for glaze
Instructions:

Pour boiling water over oats and stir to blend. Mix in shortening and honey. Cool until lukewarm, (less than 120 degrees) then blend in yeast and let stand 5 minutes. You should see a little bit of foaming action from the yeast/honey mix.

Add salt and 4 cups of flour and beat together with a rubber spatula. Let the dough rest 10 minutes, add flour bit by bit until it forms together and is a bit sticky but can be kneaded on the counter. The dough is stiff.

Clean out the mixing bowl and oil or butter the inside of your clean bowl. Place the smooth ball of dough inside and cover the bowl with a tea towel and let it rise in a warm place for  1 hour.

Punch down the dough, form two smooth balls and let it rest again for 5 minutes. Knead a couple of minutes to get the air bubbles out and pat each ball into a rectangular shape, about 10 inches wide by 12 inches long, and roll like a jelly roll, shaping into two loaves. Gently place each loaf into a well greased 8 ½’ x 4 ½’ x 3’ pan and let the dough rise 1 hour in a warm place covered with an oiled piece of saran wrap.

After the dough has been rising for 1/2 hour or so, preheat the oven to 350 degrees. When the oven comes to temperature and the total rising time is between 50-60 minutes, brush the top of each loaf with beaten egg white mixed with a about 1 tsp of water. Sprinkle tops with some oat flakes, and rebrush with the egg white mix to keep the oatmeal flakes from falling off.

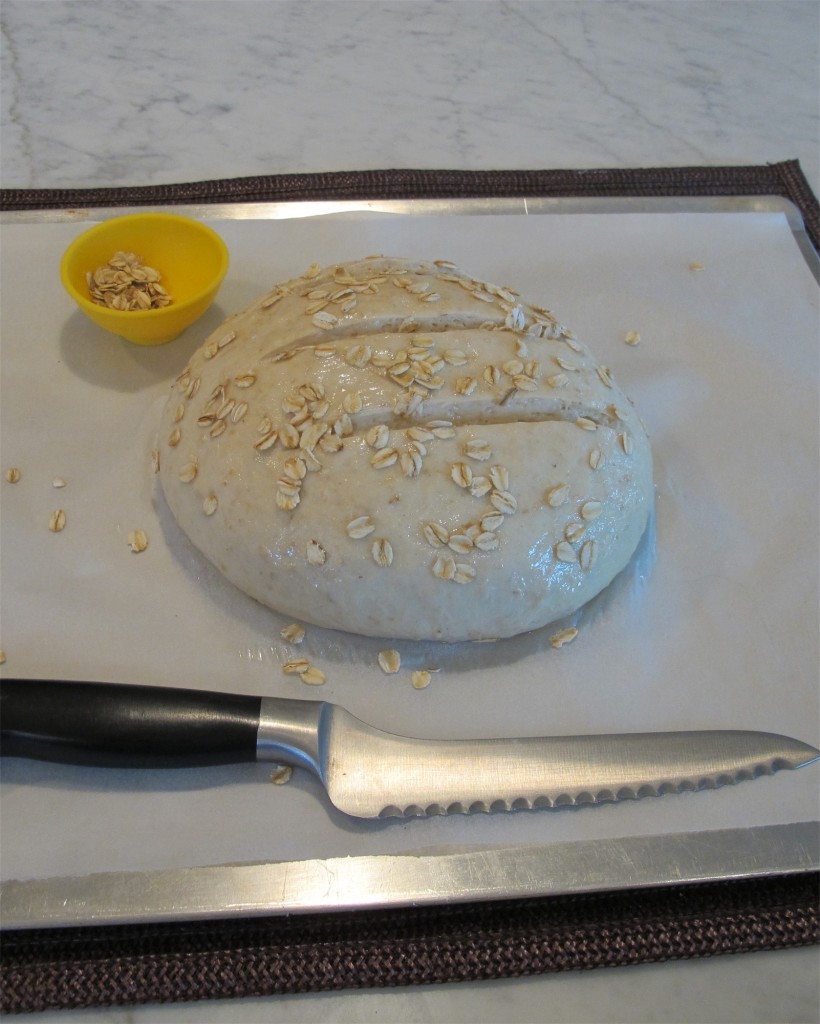
Ready for the oven!

Bake ½ hour at 350 or until internal temperature registers 190 degrees. Let cool for 5 minutes, then gently shake the bread and remove to a rack, leaving the loaf on it’s side. Wait at least 20 minutes before slicing into the loaf and do not put in plastic wrap or freeze for at least 4 hours so the internal temperature is cool.

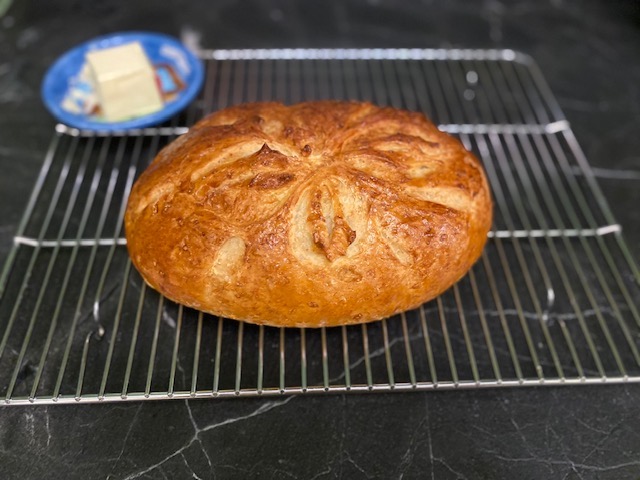
NOTE: You can use 1 cup of whole wheat flour in place of 1 cup bread flour, and can make ½ recipe in you don’t want two loaves.  In these pictures I made a free form round loaf without a bread pan which works as well.

Share
Posted in Breads | Tagged | Leave a comment

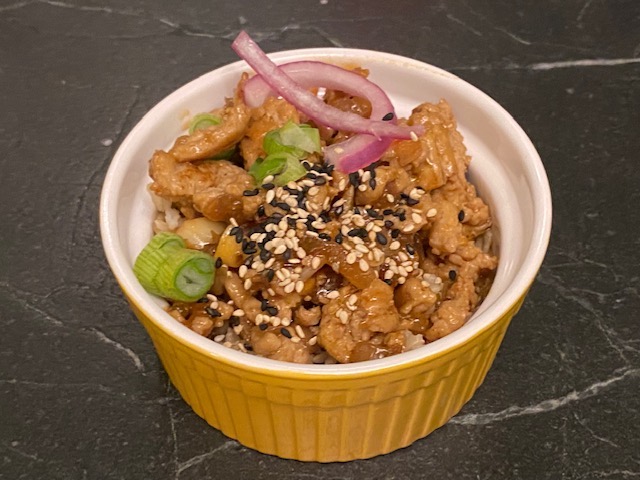
Asian-Inspired Ground Chicken

Click here to view recipe.

Asian-Inspired Ground Chicken

The other night, I wanted to make something new and easy and filling.  I had some raw ground chicken hanging out in my refrigerator and all the rest of the ingredients in my pantry.  I got out a large straight sided frying pan and 20 minutes later, dinner was on the table.  At the same time this was cooking I made brown rice in my pressure cooker and threw together a tasty kale salad with green apples, fennel and cucumber.  

The second time I made this, I prepped all the vegetables and sauce and even the garnish and left it for a few hours until we were ready to think about dinner.  Because everything was prepped, it took ten minutes or less to finish the chicken part of the meal.  My brown rice had been made earlier so dinner was simple and effortless.

Asian-Inspired Ground Chicken

Serves 6

pf-icon2


Ingredients
  • 1 teaspoon avocado oil (or another neutral oil) 
  • 1 cup peeled and diced brown skinned onion
  • 3 tablespoons peeled and minced fresh garlic (I do this by hand)
  • 2 pounds ground chicken (mine was a mix of light and dark meat) 
  • Fresh black pepper to taste
  • 1 tablespoon chili sauce
  • Pinch of cayenne pepper
  • ½ cup tamari sauce
  • ⅓ cup dark brown sugar
  • 2 tablespoon toasted sesame oil
  • ⅓ cup chicken broth (I make this with Better than Bouillon, my best friend)
  • 1 tablespoon cornstarch mixed with 1 tablespoon of water
  • Pickled red onions if you have them 
  • Black and white sesame seeds for garnish
Instructions

Heat a 12-inch saute pan on medium heat.  Add the oil and cook the diced onion for four minutes until softened, add the garlic and continue to cook another minute more.

Add the ground chicken and while it is cooking, break it up into smaller pieces with your spatula.  When it is cooked throughout, season with the ½ tsp black pepper.

Mix the chili sauce, cayenne, tamari, dark brown sugar, sesame oil and broth together in a small bowl with a whisk.  Pour over the cooked chicken in the skillet and stir well.  Bring to a low simmer and then add the cornstarch mixed with water and stir until thickened. Taste and add more pepper if needed.

I put this over cooked brown rice and then sprinkled with red pickled onions and toasted black and white sesame seeds.  Easy peasy.  I know this would be equally good over basmati rice, cooked barley, quinoa or really any grain.


Share
Posted in Poultry | Tagged | Leave a comment