Chicken Paillard in Montana

Click here to view recipe.

The Gang's All Here!

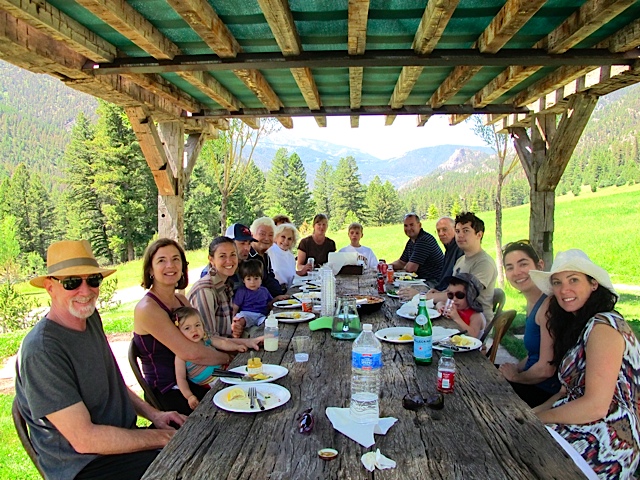
This summer our family invaded Montana. My married adult children + their kids + Wayne and me = nine. NINE bodies. Plus four car seats, countless pieces of luggage, booster seats, iPads, travel pillows, car food, the list goes on. We rented a highly unattractive 15-passenger white van and, once we were sure that everyone was on board, set off for our long-planned family reunion near Yellowstone National Park. We made several bathroom breaks and food stops and overnighted in Coeur d’Alene Idaho at a motel with a swimming pool. So you might be wondering, “How was it driving nine hours for two consecutive days with four kids under the age of three??” Ninety percent of the time it was fine (loud, but fine). The other ten percent of the time … it was bad. Really bad! Let’s just say we won’t drive that far with that many children in tow again anytime soon.

My brother-in-law hosted all of us along with the rest of his side of the family for four nights at his beautiful ranch. Thankfully he’s a planner like me. Taking into account the 45-minute drive to town and the enormity of our pending invasion, he carefully planned every meal and shopped ahead of time. We even received a schedule of when we were to be at the house for breakfast, lunch and dinner. Hmmmm…

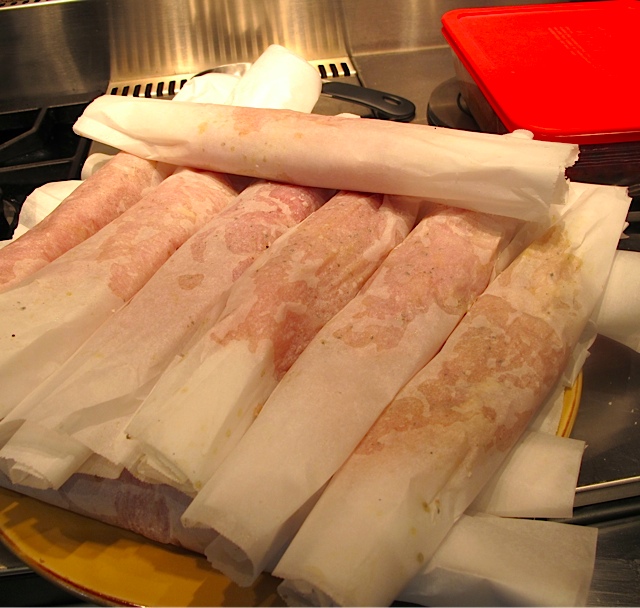
His culinary skills are legendary and we feasted on fabulous dishes including paella, wood fired pizzas (including a dessert pizza topped with fresh ricotta and raspberries) wild boar and  chicken chili, and a 4th of July buffet including smoked, dry rubbed ribs and chicken. He allowed me in the kitchen as a guest sous chef and asked for my help with meat prep. I stuffed whole chickens, placing fresh herbs between the skin and the meat, removed the silvery membranes from the meaty ribs and pounded a pile of chicken breasts, rolling them in parchment paper for a luncheon feast. I loved helping, yet I am usually the one giving orders in the kitchen and found the role of sous chef a little less fun.

Chicken Prep

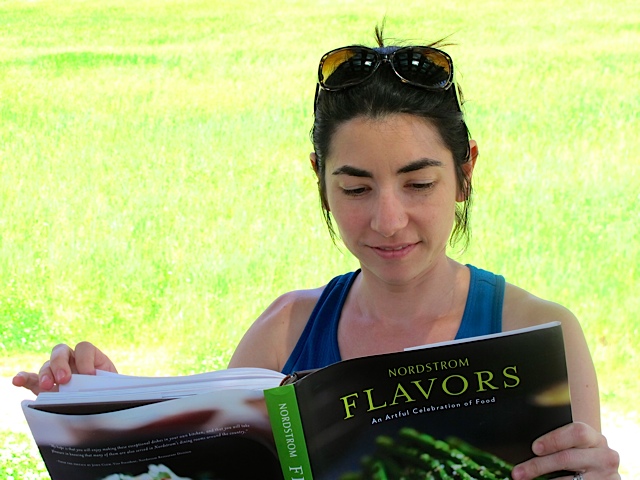
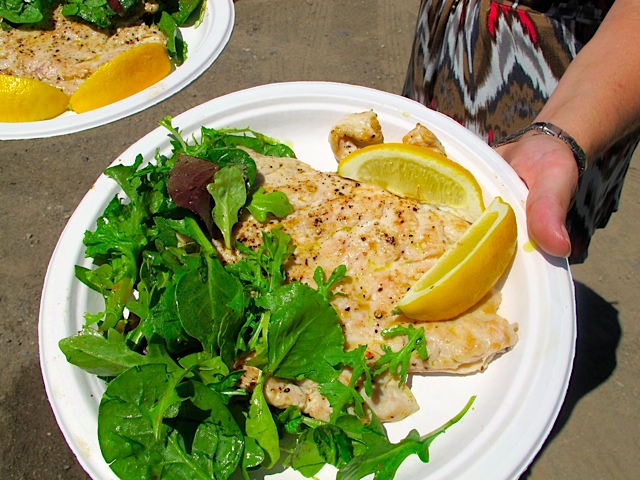
My favorite lunch, which we ate on a grassy knoll at a rough hewn rectangular table, consisted of chicken paillards and a simple arugula salad. Clean, simple food that even the young kids scarfed up before running off to play in the yard. I mentioned the pounding of the chicken breasts, and I did eighteen of these babies. I always find that using a meat pounder – wood or metal – is a great outlet for any angst or pent up frustration. I inquired about the recipe and was told that it was originally published in Nordstrom Flavors by Michael Northern. I ended up ordering this cookbook to add to my collection–and I’ve earmarked several other recipes I plan to try. Keep watching for my twists on some new recipes!

My daughter perusing Recipes

Below is my interpretation of Chicken Paillards (pronounced Pay- yar’) with salad – with many changes from the original printed recipe, of course. It’s a great, do-ahead, light summer dinner or luncheon dish that will appeal to most everybody.

Delicious Chicken Paillards & Salad

Chicken Paillards

Serves 4

pf-icon2

Ingredients
  • 4 chicken breast halves, (about ½ pound each) tenderloin section removed (I saved them and cooked them the next day in risotto)
  • ½ cup olive oil for brushing
  • sea salt in a small dish to sprinkle
  • ground pepper to sprinkle
  • large organic lemon cut into 8 wedges, seeds removed for garnishing the plate
Instructions

Cut parchment into 12-15 inch squares. After removing the tenderloin portion of the chicken breast, place the remaining chicken in a zip lock plastic bag. Pound the meat until it is approximately 1/4 inch thick – this takes some muscle! Remove the breast from the bag, place it on the square of parchment and generously brush the top with olive oil and sprinkle with salt and pepper. Turn the breast to the other side and brush and season the same way. Roll the breast with the parchment on the bottom and make a “log” Repeat with the other chicken breast halves using the same plastic zip lock and put the “logs” of parchment-wrapped chicken  onto a plate and refrigerate up to 8 hours before continuing.

In a large sauté pan, heat two tablespoons of olive oil until hot but not smoking. Unroll the breast and lay flat into the fry pan–my pan is large and I could do two breast halves at a time. Sauté for about a minute, turn with tongs to the other side and continuing cooking another minute until slightly brown. If you are doing a multitude of these, you can keep them warm on cookie sheets in a 250 degree oven briefly until you are finished sauteeing and ready to serve.

Dijon Vinaigrette Dressing

Ingredients:
  • ½ cup + 1 Tbsp good quality balsamic vinegar
  • 2 Tbsp Dijon mustard
  • 2 Tbsp sweet onion, bermuda or walla walla
  • 2 Tbsp honey
  • 2 Tbsp fresh basil leaves
  • Sea salt and black pepper to taste
  • 1 cup olive oil
Instructions

Add all ingredients except oil to a blender and whirl until well combined and smooth. Slowly add the olive oil to emulsify. Set aside.  You will have a lot of this left over, and it keeps in the refrigerator for a month.  It pairs well with Greek type or chopped vegetable salads).

Salad Ingredients
  • ¾ lb wild greens (I used a half spring mix and half arugula)
  • 12 cherry tomatoes, cut in half
  • ¼ small red onion, cut into strips
  • ¼ English cucumber, unpeeled and thinly sliced
Salad Instructions

Put all salad ingredients in a large salad bowl. Right before serving, drizzle with about ½ cup of dressing and gently coat the salad.

To serve: place about ¼ of the dressed salad on the side of each dinner plate and top with the cooked chicken. Put two lemon wedges alongside and encourage your guests to squeeze the juice onto the chicken before consuming. Bon gusto!!

Share
Posted in Meat, North America, uncategorized | Tagged | 2 Comments

Beautiful Black Rice Salad

Click here to view recipe.

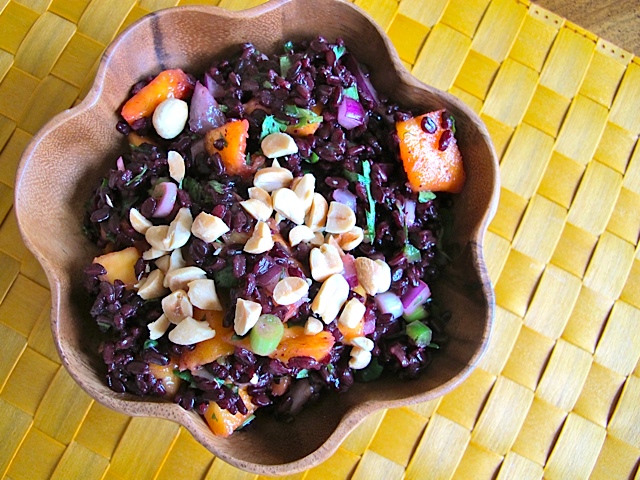
Black Rice Salad

Anyone who knows me well is aware that my favorite dishes to prepare – and eat – are soups and salads. I’m not talking about frilly, zero calorie salads consisting of a few pieces of lettuce and fat-free dressing. I prefer hefty, flavor-packed salads made of grains, beans, lettuces, fruits, vegetables…in every different combination and flavor profile.

My girlfriend sent me a recipe she loves for a black rice salad, and I immediately asked if this was something she made. Turns out her friend brought it to a bridge luncheon.  I made it, changed it (of course) and asked her to find out the source of the original recipe. As it turns out, this was published in the June 2012 issue of Bon Appetit. What I am sharing here is my version with some changes I made the first try and changes I like.

My revised recipe has fewer steps, and more of a citrus punch. It is light, filling, and has the flavors I crave during the summer – zesty lime, salty fish sauce, and herbaceous cilantro. I served this last night with some oven-seared Copper River King salmon and sautéed brocollini. The plate was visually stunning and texturally delicious. The black rice turns aubergine in color and with the orange mango and orange segments, cilantro flecks and peanuts, it is a gorgeous salad.

Try it, you’ll like it. If you prefer more spice, add more jalapeno peppers. You can also adjust the amount of lime juice and fish sauce (or even leave out the fish sauce) to taste. And if you are one of those folks who hates cilantro try chopped parsley or even a little chopped mint. I dress the rice, then wait to combine it with the rest of the ingredients so that the mango and orange maintain their texture and color. Leftovers are good but not as pretty as the first time around.

By the way, I bought my black rice at my Asian market, Uwajamaya. They carry every variety of rice known to humankind, and the package says “Dried Black Rice.” You don’t want to make sticky black rice for this one! I checked out black rice to see if it was good protein wise and nutrition wise.  I plan to use black rice a lot more often now!

See for yourself here: http://www.blackrice.com/nutrition/.

Colorful ingredients

Black Rice Salad

Serves 8

pf-icon2

Ingredients:
  • 1 navel orange, peeled and sectioned. (Squeeze juice from membranes and reserve for the dressing). Cut orange segments in half.
  • 1 ripe mango, peeled and cut into ½ inch cubes
  • ½ cup fresh cilantro, minced (you can use the stems too)
  • ¼ cup finely chopped red onion
  • 3 green onions, cut ¼ inch, white and light green parts only
  • ½ jalapeno, seeds removed and minced ¼ inch
  • 1 cup black rice
  • 2 cups water
  • ½ tsp salt
  • 3 Tbsp fresh lime juice
  • 1 Tbsp canola
  • ½ Tbsp fish sauce
  • ½ cup chopped unsalted dry roasted peanuts
Instructions:

In a large glass bowl, combine the first six ingredients and set aside.

In a 3 quart saucepan, bring water and salt to a boil, add rice — cover and simmer for 25 minutes until cooked. Drain very well and return the cooked rice to the saucepan off the heat, cover the top of the pan with a dish towel and let it sit 15 minutes. After this time, stir the rice (it should be dry) and put it in a clean large bowl. Let it cool to room temperature.

Prepare dressing by whisking together the juice from the orange you peeled along with the lime juice, canola oil and fish sauce. Drizzle over the rice.

When ready to serve, add this cooled, dressed rice to the vegetables and fruit in the large bowl. Add more lime juice or salt to taste, and sprinkle chopped peanuts on top.

Share
Posted in Salads & Dressings | Tagged | Leave a comment

Perfect Picnic Potato Salad

Click here to view recipe.

Potato Salad - Perfect for the 4th!

Since moving to Seattle thirty plus years ago, we have held a Fourth of July party almost every year without fail! We initially lived in a larger home and would invite families with kids, then host a potluck dinner with pickleball, lawn bowling, and games for the children. We grilled hamburgers and hot dogs and assigned guests to bring drinks, salads, and desserts. The buffet resembled a veritable feast! Typical of Seattle, the weather seldom cooperated and I remember one year in particular when the temperatures were in the 50s and everyone wore winter jackets. Regardless, these parties were always full of fun, fabulous people and food!

Seven years ago we moved to a condominium in the city. For a few years we continued to host a rooftop deck 4th of July party, and friends were able to view fireworks exploding from both Lake Union and the Space Needle. We no longer have such gatherings as this holiday has morphed into more of a family get together and we are often out of town. I do miss having these parties though and have not given up hope to reinstitute this great tradition.

I always asked my neighbor Valerie to bring potato salad. There are thousands of variations out there – warm potato salad, creamy, mayonnaise-based potato salad, vinegary potato salad, potato salad with every vegetable known to humankind. But Valerie’s is a very very very plain potato salad and it was always a hit and tasted delicious. It appeals to those (like me) who don’t like raw onions or pickles or a lot of “stuff” in their potato salad. So I’m sharing this with you, my readers. I believe the original recipe included some garlic salt and green onion too, but I pare it down to just the essential ingredients. You’ll need at least this much salt for the bland potatoes, by the way. And feel free to use this as a starting point – you can add pretty much anything to make this your own.

The best tool for perfectly sliced eggs

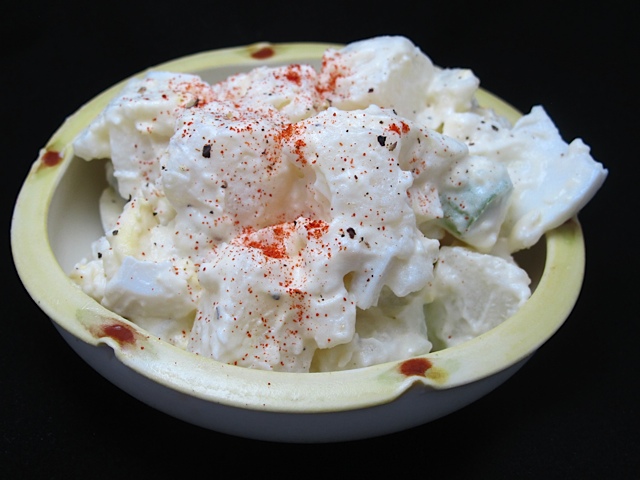
Perfect Picnic Potato Salad

Serves 6

pf-icon2

Ingredients
  • 6 medium, equally sized waxy, red potatoes – about 2 lbs total.
  • 3 hard boiled eggs, sliced
  • 7-8 oz Best Foods Mayonnaise or homemade mayonnaise*
  • 2 stalks celery, finely diced
  • 1 ½ -2 tsp table salt
  • ½ tsp pepper
  • Paprika for the top if desired
Instructions

Hard boil and peel the eggs. Cool completely.

Wash and cover the potatoes with water in a 3-4 quart sauce pan. Bring to a boil, then lower to a simmer and cover. Cook until a knife easily slides through the potato, about 20 minutes. Remove the potatoes to a bowl of ice water and when cool enough to handle, peel with a potato peeler. This should be simple to do. Refrigerate the potatoes and eggs. (I do this the day before serving.)

When eggs and potatoes are cold, slice the eggs (I have a handy little egg slicer that I use, but you can cut them any way you wish), cube the potatoes into ½ inch chunks and slice celery. Gently fold in mayonnaise a little at the time, and season liberally with salt and pepper. When ready to serve, put into serving bowl and dust the top with paprika.

This is the mayonnaise I make – it is super easy and so much better than store-bought! And it lasts for at least a week in your fridge.

Share
Posted in Side Dish, Vegetables | Tagged | Leave a comment

Shallot Fish Sauce: Brussels #3

Click here to view recipe.

If the Proverbial Shoe Fits!

Having had too much fun for two days in Amsterdam, we headed for the central station to catch a train to Brussels. Signs were not translated into English but we successfully got ourselves onto the correct train, found a clutch of seats, and settled our luggage overhead (thank you, Susan my strong weightlifting sister). We knit, edited our photos on the iPad, ate our cheese, crackers and goodies and before we knew it the train arrived at our destination. Brussels was bustling as we climbed out of the train and we wheeled our carry-on bags downhill to the Hotel Amigos. Our room for three was superb and the only downside of this hotel was the unexpected internet cost: $22 per day! No worries, I found a smaller place (Hotel Mozart) close by where I used the wireless internet for free.

Beautiful Bruges

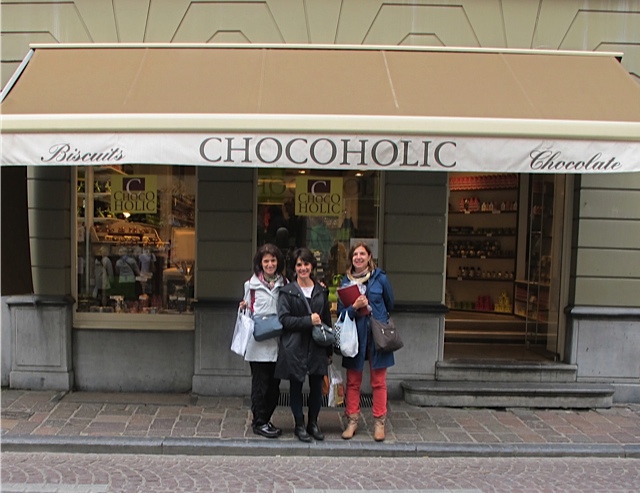
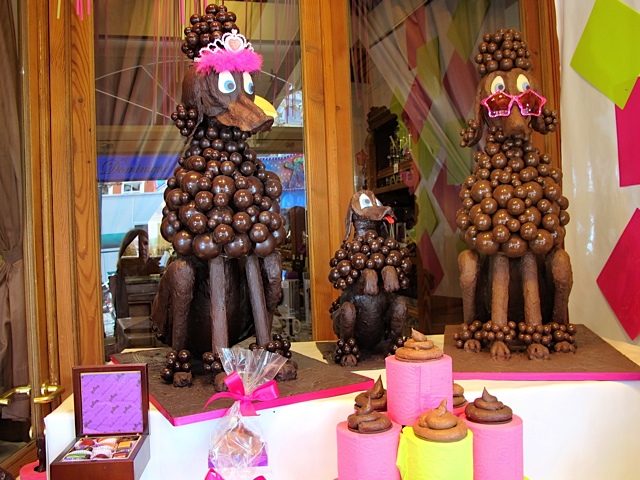
I’m a bit embarrassed to admit that our time in Brussels (and our day in Bruges and bit of time in Ghent) was consumed with chocolate hunting. We visited no fewer than 100 chocolate shops, from familiar names like Neuhaus and Godiva to smaller boutiques nestled throughout town. Every chocolaterie gave out “sample” pieces of chocolate and of course we each bought sacks and boxes and bags of chocolate as well. I’m not exaggerating when I say that we ate 15 pieces of chocolate per day on each of the four days! We did manage to squeeze in some museum tours, a lot of walking, and indulged in Belgium’s famous Frites (aka french fries) – we split cones of these fresh, hot, crispy potatoes every day.

Chocolate, Choolate Everywhere!

And of course we had some fantastic meals. On our first night, the concierge suggested a bistro close to the hotel, and the three of us shared some soups, salads, a couple of fish entrees. We ordered salmon with shallot sauce which was out of this world. We veritably licked the sauce with our fingers.

I could see the chef back in the glass fronted kitchen and couldn’t tell if he was horrified by our “American” behavior or secretly thrilled about our obvious adoration of his food. Regardless, I marched myself back there, (I never ask if this is OK because most of the time I’m told I cannot go into a commercial kitchen) and told him how much we enjoyed the food , then of course asked for the recipe for the shallot sauce. The chef was French (Jacques) and had to show me containers of what he used because he didn’t know how to translate “beef stock” or “shredded” or “herbes de provence.” Using my middle school French, I specifically asked if he used butter or oil to sauté the vegetables before adding liquid, and the answer was an emphatic “NO!” Everything was stewed together slowly. No worry, I smelled the spices and stock, saw how the carrots were shredded and got the picture, and later created the sauce which is almost a dead ringer for what we ate there. I would use this same sauce for roast chicken or beef if I wanted an assertive, full bodied sauce.

Roasted Salmon with Shallot Sauce at the restaurant

As an aside, on my initial attempt with this sauce I pureed the ingredients when they were done and the sauce then formed a beige-colored foam on top-YUCK! I tried straining it (not good) and ultimately decided to leave it the sauce alone once it reduced to have it a bit chunky when spooned on top of the fish.

Our final leg in Brussels went superbly. We stuffed ourselves with chocolate, but I’m not over it at all. AND it was so amazing to travel with my sisters – they go nonstop, knit nonstop, explore nonstop. They never dwell on what we should or should not eat. No one remarked about their body looking bad. What a pleasure! I can hardly wait for Kay to have her 60th…and for more sisters’ adventures!

Shallot Sauce

pf-icon2

Ingredients:
  • 3 Tbsp shallots, peeled and sliced crosswise into ¼ inch slices
  • ½ cup shredded carrot
  • 1 cup good quality beef stock (I actually used leftover juice from a roast!)
  • 1 ½ cup full bodied red wine (I had a pinot noir)
  • 1 Tbsp dried Herbs de Provence
  • Fresh ground pepper
  • Salt to taste
Instructions

Combine all the above in a 2-3 quart sauce pan bring to a simmer and turn to very low. Leave on the stovetop uncovered for 2-3 hours, checking occasionally. The sauce should reduce eventually to 1 ¼ cups. Be sure it is salted to taste.

This truly tasted like a beef stew. It was rich, had deep notes of wine and enhanced the simple baked fish beautifully. It’s not often that I am impressed or surprised by fish preparation. This sauce was more like a rich gravy that you would find on a pot roast. Spoon about 2 Tbsp on top of roasted or grilled salmon* and serve.

*I use the Cooks Illustrated recipe for roasting salmon. Simply preheat the oven to 500 degrees, adjust your oven rack to lowest position, and place a rimmed baking sheet on the rack. While the sheet is heating, prepare skin-on salmon fillets by making 4 or 5 shallow slashes about an inch apart along the skin. Pat the salmon dry with paper towels. Rub fillets evenly with oil and season liberally with salt and pepper. Reduce oven temperature to 275 degrees and remove baking sheet. Carefully place salmon skin-side down on the baking sheet. Roast until centers of thickest part of fillets are still translucent when cut into (about 9 – 12 minutes).

Share
Posted in Europe, Fish & Seafood, Odds & Ends | Tagged , , , | Leave a comment

Finding Fondue in Amsterdam (Part 2 of 3)

Click here to view recipe.

Me, Kay & Susan in front of Rijksmuseum

Amsterdam was the first stop on our European adventure.I last time set foot in this beautiful city in 1998 when my daughter had Spring break and we decided to have an adventure there.

The plane ride from Newark to Amsterdam took a little over eight hours, and we were tired but determined to muscle through the day. We checked into the Ambassade Hotel where we reserved a lovely room with two double beds. (By the way, because I am the oldest I usually get a bed to myself! One of the only advantages let me tell you.) We stopped at the hotel dining room buffet and enjoyed a beautiful plateful of smoked fishes, lots of fresh fruit, muesli, and great coffee. Then we were off to the Anne Frank Haus where we were fortunate to have a private tour of the museum with Garance Reus. It’s changed since I was last there in that it is more interactive, there are more computer displays and some of the rooms are currently not available for public tour. The line to purchase tickets stretched around the block and was filled with young and old, Dutch and visitors from other countries. This made me hopeful that the messages of tolerance and a need for a powerful, civil society and of the dangers of racism would be heard.

Beautiful Canals in Amsterdam

That day we took a boat trip through the canals and ate at some fantastic places suggested to me by my friend Beth Sheppard, who once lived in Amsterdam (she writes amazing blogs on one of my favorite travel sites – Wanderlust and Lipstick). Of course we visited the Van Gogh and Rembrandt museums and Keukenjof Flower Gardens where tulips spread out as far as the eye could see. We even shopped for shoes – though not the classic, wooden Dutch clogs reminiscent of fairy tales. Both days in Amsterdam were jam packed and we were walking from 7 am until midnight.

And naturally we sampled the food. But to be honest, Dutch food is fairly pedestrian: sandwiches, potatoes, and cheese. Thankfully I recalled that the last time I visited I had phenomenal fondue, so I asked a tour guide for a recommendation and we hopped into a taxi to Cafe Bern, a wonderful fondue restaurant, and the food highlight of my visit. And I discovered two things about myself:

1) I get an idea in my head about something I want to see or do or eat, and I won’t let it go. Hence it was with the fondue. My sisters really didn’t care that much about having fondue, but there was no way I was leaving Amsterdam without this experience. I get overly focused (some may call it obsessed) about one specific thing and won’t stop!

2) I really am a night owl. Every single evening, at around midnight, both my sisters had to tell me to stop talking. Even though I am up and at it by 6:30 am or so, I am at my best far into the night and could stay up easily past midnight. I’m just saying…

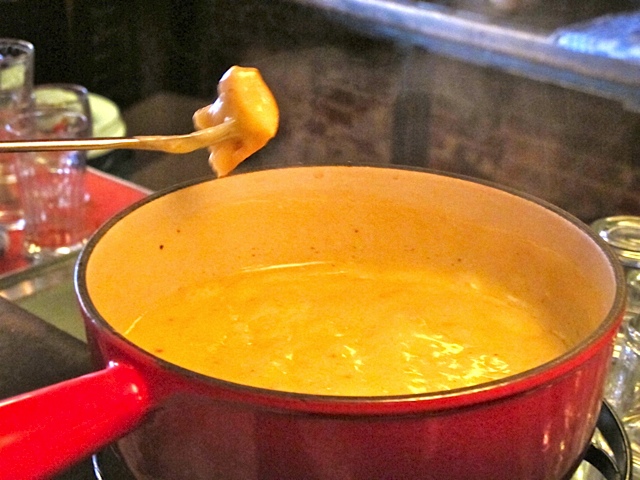
This fondue recipe is one my son found while he was helping out at a cooking school in Seattle. We made it, loved it and have searched no more. It makes me smile to know that I have owned my wedding -gifted fondue pot for 40 years. Unlike the restaurant in Amsterdam, I serve this fondue with slices of green apple, toasted bread cubes, blanched broccoli, cauliflower, green beans…just about anything that can be dipped.

My Favorite Fondue

Cheese Fondue

Serves 8

pf-icon2

Ingredients
  • 1 clove garlic
  • 2 cups dry white wine
  • 7 cups shredded Swiss cheese such as Jarlsberg, Emmentaler, Gruyere, or Appenzeller
  • 1 tablespoon cornstarch (or flour)
  • 3 tablespoons kirsch
  • 2 teaspoons corn starch
  • salt, pepper, nutmeg
  • Bread cubes, apples, veggies, etc. for dipping
Instructions

Use a fondue pot and rub the cut side of the garlic all over the insides of the pot. Throw away the garlic.

Heat the fondue pot and add the wine but do not boil. Mix the cheese and the cornstarch and slowly add it to the wine stirring until the cheese melts.

Mix the kirsch and cornstarch. Blend the kirsch mixture into the cheese mixture until it is a smooth thick sauce. Season with salt, pepper and a little freshly grated nutmeg.

The reason for using cornstarch (or flour) is to keep the cheese and wine from separating. If you boil the mixture however, you can still make it separate so simmer gently, do not boil.

Share
Posted in Europe, Odds & Ends | Tagged , | Leave a comment

Chocolate PB Cookies: Manhatten

Click here to view recipe.

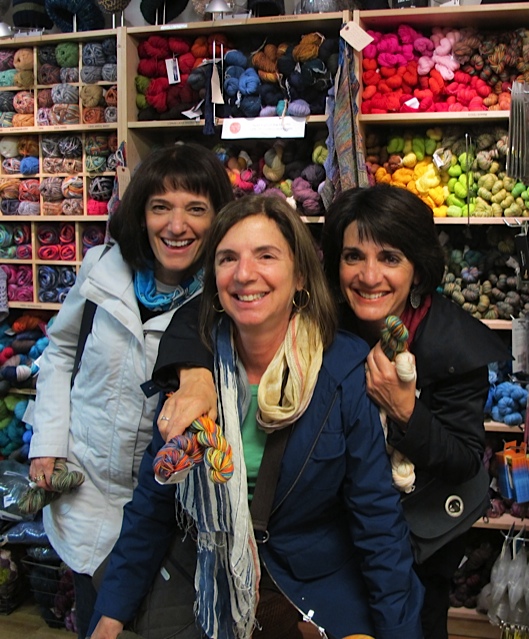
The Klass Sisters at Knitty City!

This is the first of a three part series, kind of like “Jaws 1, Jaws 2 and possibly Jaws 3. I will be covering the travels and food obsessions of the three sisters, also known as “The Klass Girls” – Klass being our maiden name.

My middle sister Susan will be celebrating her big Six-Oh-No in October, but she likes to be ahead of the curve and wanted to travel with us six months before this auspicious occasion. This wasn’t terribly surprising considering her penchant for being ultra prepared for any occasion.

Without going into a lot of detail, I would guesstimate that at least 75 emails went back and forth between the three of us: should we see a play in New York? (yes) What play? (Warhorse) Did we want to buy train tickets ahead of time? (yes) Should we use a travel agent for hotels and air? (THANK YOU Pam – thetravelplanner@verizon.net.) How many pairs of jeans? (2) How many shirts? (4) Do we want to do a day trip to Bruges? (yes) Oh, and don’t forget a great raincoat and waterproof shoes. You get the picture, except with every single question came pages of dialog.

Our youngest sister lives on the East Coast and Susan and I are on the West Coast, so we converged in New York City at dawn and planned to leave for Amsterdam late the same day. The two West Coast girls needed to take individual, 6-hour long, red eye flights. Considering that neither of us is very good at sleeping on an airplane (or sleeping much at all, for that matter), we weren’t gleefully looking forward to this part of the trip, but we muscled through and met up at baggage claim – ready to roll. We decided to check our tiny carry-on bags to New York which, of course, involved phone calls at midnight to Susan. Admittedly, it was a welcome change to march on the plane with only my small backpack and not to have to hoist a tightly packed bag into the overhead bin. Yet we wanted that carry-on for train travel in Europe.

Anyway, the first twelve hours before we departed for Amsterdam and then the final three days of our trip were spent in New York City with Kay. We hit the ground running and ate a remarkable breakfast at Normas, found a delightful yarn shop (score), and finally sampled Levain’s cookies. Why did all three of my offspring know about Levain Bakery and why hadn’t they filled me in? Where had these cookies been all my life? Granted, I know how to make a good cookie – but these world-famous, six-ounce pieces of heaven are to die for!

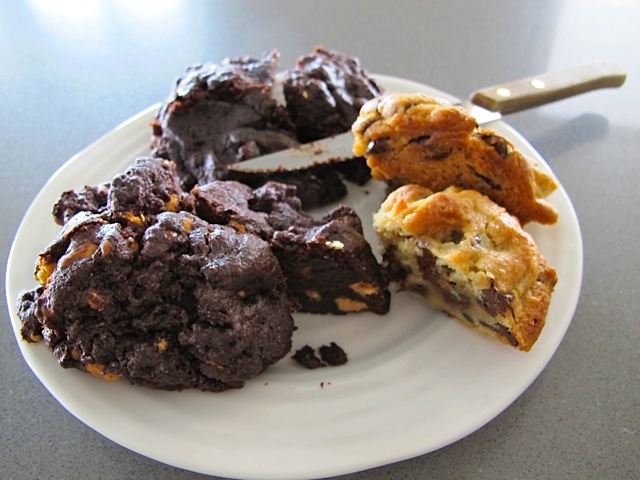
Levain Cookies

On the way back from Amsterdam we stayed in New York for three days and shopped. Not one who loves shopping, I only like to do this with my sisters. We ate at the Shake Shack, Mario Batali’s Eatily, ABC Kitchen, Carnegie Deli… we stuffed ourselves silly. We also saw a play, visited Ground Zero and continued to eat and hoard the dark chocolate treats we bought in Belgium. Susan, by the way, lost 3 pounds on the trip and I most likely did too because my pants were a little looser (remember I don’t weigh myself). This shows you what a lot (like all day) of brisk walking will do…along with dark chocolate.

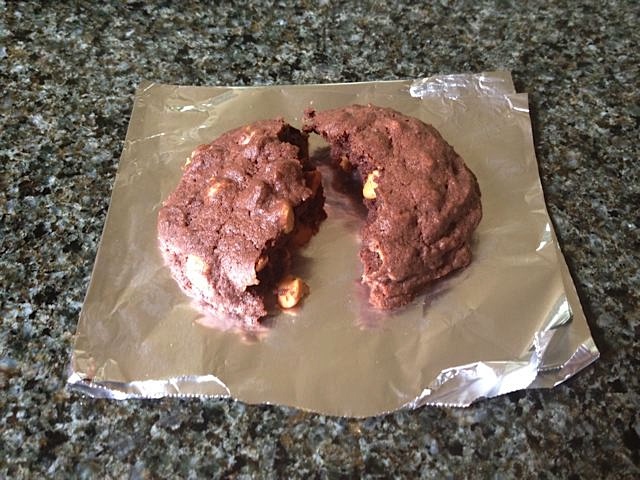
During this trip, I became obsessed with Levain cookies. We ate them both before our Europe trip and afterwards while in NYC, took a few on the plane for emergency fuel and visited their bakery. Of course I pumped the bakers about how many ounces per cookie, what was in them, etc. I then found a “copycat” recipe online, which I promptly delivered to my sisters and brother. Susan was the first to have a go at them, and reported that they were very, very close to what we had in New York. This recipe and pictures are her rendition of the type of cookie I loved the most there: Chocolate peanut butter! And the raw dough balls can be frozen for baking later on if you can’t fathom making a 12 of these monsters.

Susan's Levain wanna-be cookies

Oh So Chocolaty Peanut Butter Chip Cookies (Levain copycats)

Makes 12-13 large cookies

pf-icon2

Ingredients
  • 2 sticks cold regular (salted) butter, cut into 8 slices
  • 1 1/4 cup granulated sugar
  • 2 large eggs
  • 1/2 cup dark Dutch processed cocoa powder, sifted (I use Sharfenberger)
  • 2 1/4 cups all-purpose flour
  • 1/2 tsp table salt
  • 3/4 tsp baking powder (aluminum free)
  • 1 cup bittersweet chocolate chips (Guittard)
  • 2 cups peanut butter chips
Instructions

Preheat oven to 350 degrees and put a rack in middle of oven. Line a baking sheet with parchment paper.

In a large bowl of electric mixer fitted with paddle, cream together butter and sugar until well blended and fluffy, about 5 minutes. Add eggs and beat until well-incorporated, then add in cocoa powder.

Sift together flour, salt and baking powder until just combined, and mix in with the egg/sugar mix just until combined. Gently fold in remaining ingredients.

Transfer dough to a clean counter and gently mix dough by hand. Divide into 12 equal weight balls, about 4 oz each (I used a #50 cookie scoop) and place on cookie sheet. I only put 6 per sheet. Bake in the preheated oven 16-20 minutes. Remove the parchment and cookies to a cooling rack. Keep in an airtight container for up to 4 days.

Share
Posted in Dessert | Tagged , | 5 Comments

“Bird Seed” Whole Grain Cereal

Click here to view recipe.

Bird Seed Cereal

In my Seattle kitchen, you’ll always find a huge bin of my favorite healthful cereal in the freezer and a smaller amount secured in a covered jar in the fridge. My kids affectionately call this cereal “bird seed” because of how it looks. Most mornings I put about half a cup of this dry, mixed up concoction into a cereal bowl, pour in a half cup of hot water or milk and stir, cover the bowl and stick it back in the refrigerator. I eat it several hours later. This morning I topped my cereal with some thick tangy Greek yogurt and homemade applesauce. Often I sprinkle the cereal with chopped pears and a little homemade granola or even poached fruit.

The only challenging part about making this cereal is gathering the ingredients. A quick trip to the health store or coop is needed to hunt down the more exotic seeds and granules. It’s worth it though – the recipe produces a large amount and lasts me for a couple of months. Unless, of course, one of my children visits and swipes it from the freezer. Despite the fact that they mock the appearance of this cereal mix, my entire extended family LOVES it!

“Bird Seed” Cereal

Ingredients:
  • 2 oz milk thistle seeds (These are kept with the bulk tea sand spices at my co-op)
  • 1/4 lb. flaxseed
  • 1 pounds rolled regular oats, barley flakes or kamut flakes-or a combination
  • ½ pound of oat bran cereal
  • ¼ lb. Soy lecithin granules (found in the refrigerated section – I use Bob’s Red Mill brand)
  • 2 oz organic chopped unsulphured apricots or dried unsweetened cherries or currents
  • 2 oz organic sunflower seeds or pumpkin seeds
  • 2 oz chopped walnuts
  • 1 ½ cups organic wheat germ
Instructions:

Grind flaxseed and milk thistle seed in a coffee grinder or blender. You may have to do this in batches to ensure the seeds are thoroughly ground. Add to the rest of the ingredients in a large mixing bowl, combine well and put in a covered container in a cool, dry place. This recipe can be doubled if you have freezer space (it must be kept in the refrigerator or freezer).

Note: the formula for this cereal came from my late sister-in-law, who was told by her Bastyr trained naturopath that it boosts immunity. I did a little research to investigate the ingredients and they are, indeed, very healthful:

  • Lecithin granules: Contain essential fatty acids along with the fish-oil-like, omega-3 linolenic acid
  • Milk Thistle Seed: Purported to support liver functions
  • Flaxseed: Filled with omega 3 fatty acids
Share
Posted in Breakfast | Tagged , , , | Leave a comment

Belizean Onion Habenero Condiment

Click here to view recipe.

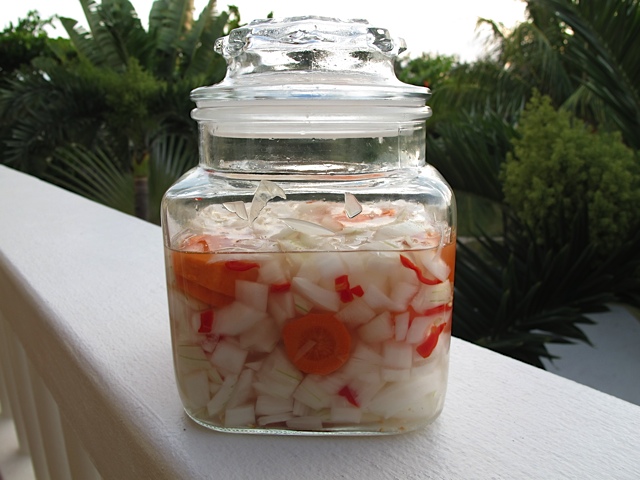
"The Condiment"

I have to laugh whenever I look at the title of this post… “The Condiment” is the name we bestowed on the concoction Wayne threw together before my arrival at our home in Belize earlier this month. We don’t always travel together – he often gets to our Belize house a few days earlier or leaves a few days after I depart. We are fortunate to have this flexibility; we both have such busy lives and we travel so frequently that it’s nice to come and go on our own schedules. There is one rule however: he (or she) who arrives first must grocery shop and cook, and she (or he) who leaves last must go through our check list and clean up. So when I walked in a week after my husband arrived, the fridge was full of all sorts of grocery items including stewed black and red beans, “the condiment” and my favorite roast chicken. Dinner was ready. I cannot tell you how happy this made me after my 3am wake-up call and nine hour flight! And “the condiment” was something neither of us had ever made…

This “condiment” is available all over San Pedro. We find jars of bright vegetables swimming in vinegar on the tables of almost every take-away restaurant and even at the fancy places. There doesn’t seem to be a precise recipe, per se – so Wayne analyzed the containers in town and struck out on an expedition to collect all the ingredients.

Just a few simple ingredients

This recipe is truly his own. I have never had sliced carrots in “the condiment” but I love the texture they provide. We’re both careful when handling habaneros, wearing gloves so the oils don’t stay on our hands for the rest of the day. Wayne added the habanero seeds which makes this fiery hot, so if you want a milder mix add only the habanero flesh and discard the seeds. During his mission to replicate “the condiment,” Wayne learned that the red habaneros are hotter than the orange, yellow or green varieties here. Also, many locals told him to only use white onion (they said the brown skinned or red skinned onions don’t stay firm). But this is a small town in Belize and there were no white onions to be had so he made due with the brown skinned variety. They work just fine but the locals were right – the second batch we made with white onions stays a little prettier.

I love to eat heaps of this alongside tacos, grilled fish or chicken. We even have it with our morning eggs! Because of the texture, I even prefer it to my beloved hot sauce.

“The Condiment”

pf-icon2

Ingredients
  • 2 white skinned onions, roughly chopped into ½ inch pieces
  • 3 medium sized carrots, peeled and thinly sliced
  • 1 Tbsp sea salt
  • 2 sliced red habaneros, seeds and all
  • 1 Tbsp raw (turbinado) sugar
  • Plain white vinegar*- enough to barely cover the vegetables in the quart glass jar.

*It’s funny… I add the sugar only because the first time he made it, Wayne used “Mexican” vinegar, and when we looked at the bottle it turned out it had sugar and “other flavorings” added–yet it wasn’t as mild as seasoned rice vinegar, for example. Since none of the Belizeans use anything besides plain vinegar, that is what I did for the second batch but I needed the sugar to tone it down a bit.

Chopped vegetables waiting for vinegar bath

Instructions

Place everything but vinegar and sugar into a glass quart container and mix. Pour plain white vinegar with sugar stirred in (it won’t dissolve but don’t worry) to barely cover the vegetables.. Stir every 30 minutes for the first hour-and you can actually eat it after this. This keeps for up to a week in the refrigerator.

So easy, you have to make “the condiment” sometime this summer people!

PS: My favorite snack or lunch down here is to take a mound of warm cooked quinoa, cover it with warm stewed beans. I then spoon about 2 Tbsp of “The Condiment” on top and I’m good to go. Another good reason to make and serve this in hot weather: it creates big time THIRST and you have no choice but to drink oodles and gobs of water; therefore you stay hydrated when the temperatures hit the high numbers.

Share
Posted in Central America, Condiment, Odds & Ends | Tagged , | Leave a comment

Gaga for Gumbo

Click here to view recipe.

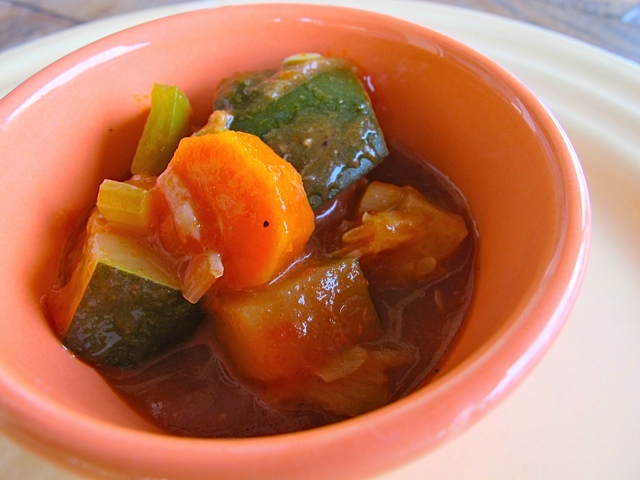
Delicious Gumbo

Gumbo isn’t a Belizean dish but its roots are Cajun/Creole so it seems like it should be served here. With a bit of tweaking, I have made this hearty dish both in Belize and in the US. I learned it from Alexis, Rachel’s friend from the Midwest. She bravely decided to take the plunge and make Gumbo while in Belize last January. “Knock yourself out,” I thought. I was, admittedly, a bit skeptical that she would find all the ingredients needed in the small, sparsely stocked stores in our remote locale. She proceeded to go to town, buy the ingredients, and cook the most delicious Gumbo for dinner that night. Despite the fact she had no recipe and was cooking in a foreign kitchen – she pulled it off! There were oohs and aahs from everyone at the table – myself included.

Alexis told us she originally used an old, faded, cut-from-the-newspaper recipe her mom found years ago. During her youth, she and her siblings always requested this savory stew for their birthday meal. She has since adapted it and alters the recipe depending on her mood – much like I do whenever I cook. There was no okra to be found so she substituted green zucchini squash instead. The stew she made fed six of us for several days and was even better when we reheated it.

Celery, onions and green peppers provide the focus of many Creole and Cajun dishes, so although I butchered the original formula for this stew, I feel like I can still call it GUMBO.

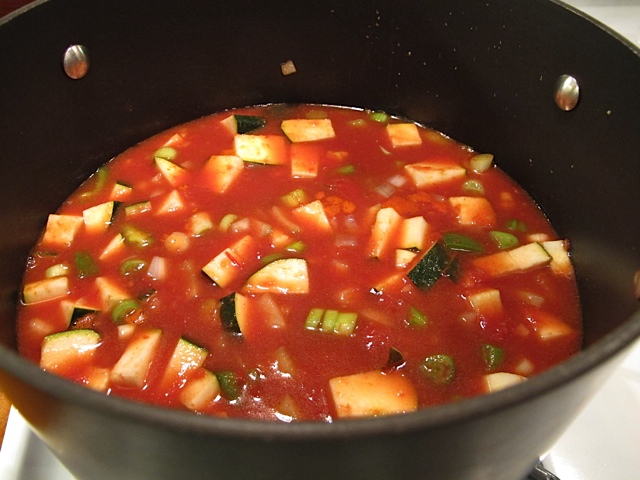
Gumbo cooking away

One Pot Gumbo

Serves 10-12

pf-icon2

Ingredients
  • 2 Tbsp flour
  • 1 Tsbp oil
  • 1 Tbsp butter
  • 1 medium size white skinned onion, chopped ¼ inch
  • 1 bunch green onions, green part too-sliced ¼ inch across
  • 1 ½ green peppers – chopped 1/4 inch
  • 2 stalks chopped celery-same size as aove
  • 8 cloves garlic, minced
  • 3 medium carrots, sliced ½ inch
  • ½ tsp sea salt
  • ½ tsp turbinado sugar (raw sugar)
  • 3 cups homemade chicken broth-in a pinch use bouillion + water
  • 2 cups of tomato juice
  • ½ tsp or more of cayenne pepper
  • 2 bay leaves
  • 1 Tbsp fresh oregano, slivered
  • 14 ounces can whole tomatoes, with juice ( undrained-break apart with your hands)
  • 2 cups zucchini, cubed ¾ inch
  • 2 chicken leg quarters, (2 legs + two thighs)-skin removed
  • 1 lb medium shrimp, deveined and shelled
  • ½ tsp habanero sauce -use Marie Sharps
  • 4 cups cooked brown rice or quinoa
Instructions

Combine flour and oil /butter in a large pot or a 5 quart Dutch oven. Cook over medium heat, stirring frequently, until a dark reddish-brown roux forms (about 20 minutes). Stir often.

Remove from the heat and add the white and green onions, green peppers, celery, and garlic. Stir well and return to heat and stir frequently for 5 minutes until vegetables are tender.

Add carrots, chicken broth, tomato juice, salt, sugar, bay leaves, cayenne pepper, tomatoes, oregano and zucchini. Add chicken leg quarters. Bring to a boil, cover, and reduce heat to low. Simmer for an hour, stirring periodically. Remove chicken from the pot and cool it, shred the chicken meat and add it back into the stew, discarding bones. Once off the burner, add the shrimp to the soup–they will quickly cook from the retained heat of the broth.

Remove the bay leaves and stir in the habanero sauce; add salt or seasoning to taste.

Serve in a large soup bowl topped with a scoop of cooked quinoa or cooked brown rice for a very very filling meal!

You can substitute spicy chicken sausage for the chicken or cubes of firm fleshed fish in place of the shrimp (i.e. swordfish). The original recipe called for frozen okra in place of zucchini–I was more than satisfied with the zucchini version but okra would be fun to substitute as well. If you wish to try it, add 1 lb of frozen okra and be sure to cook it with the chicken and tomato base for the entire hour.

Share
Posted in Fish & Seafood, Poultry, Soups | Tagged , | 2 Comments

Happy Anniversary

January in Belize with my grandson

It’s May…my website has been “up” for a year now. And this month is my 40th wedding anniversary! Unbelievable to me… So, I’ve decided this week is author’s choice and I am writing this post openly and honestly about my personal relationship with food and with my body.

I don’t know if I have written that I don’t have, and in fact have never had, food “rules.” I grew up in a household where we were allowed to have leftovers from dinner at breakfast time and where homemade baked cookies were always around. I never step on my scale – I only use it to weigh my luggage so I can avoid paying extra fees. I don’t count calories – in fact I’m somewhat clueless about caloric content of many foods. I have never dieted. My weight doesn’t cycle up and down  and my tighter fitting items of clothing usually feel the same. I am happy with my weight and my body. I am not perfect by any means – I have a substantial tushy, cellulite on my thighs and my waist is definitely bigger than it was 10 years ago. But I think my body looks good for someone my age. I secretly believe the reason I don’t have facial wrinkles is  because I have never dieted and I am not too skinny. All of this is most likely part of why I love to cook; I enjoy not only the process, but I like to eat too.

I realize my story is not the norm. It always makes me unhappy when friends put themselves down and talk about being fat, having to go on a diet, or needing to go to the gym to burn off calories.

So I thought I’d share my credo:

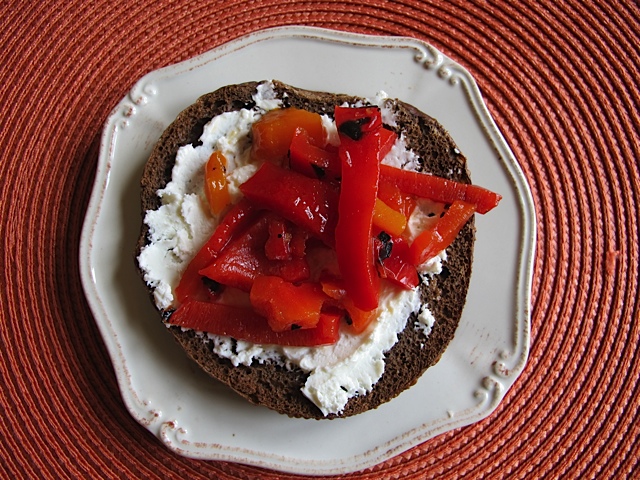
I eat only when I am truly hungry. And I try to eat what I crave at the time. I sometimes eat every three hours or sometimes two times a day (usually not). Nine times out of ten I have a very distinct sense of what it is I want to eat. For example, yesterday’s breakfast consisted of a rye bagel smeared with ricotta cheese and topped with marinated smoked peppers – with some fresh fruit salad and my latte, of course. That is what I craved and it tasted great.

The perfect breakfast!

I never, ever eat or drink “diet” foods like diet soda, low calorie cookies, artificial sugar substitutes,” light” this or that. I do not own or keep clothing that is too small, or too big. My personality is such that I love variety in food, so I don’t have the same breakfast or lunch every day. The exception is that I adore leftover food and might have the same soup for lunch three days in a row if that sounds good to me. Otherwise I give my extra food to friends or family, or freeze it for later if it is something that freezes well.

As an aside, I gave my kids free reign with food from a very early age. I never remarked about them gaining weight or looking fat. I had my children make their own lunches to bring to school from the time they were about seven or eight. They gave me weekly shopping lists and they could pack anything they wanted for school as long as they did this without my help – it could be cold pizza, cookies, candy, sandwiches…whatever they wanted. Other parents were horrified and thought I was lazy and irresponsible. My daughter would make elaborate concoctions to take to school. My youngest son really disliked school lunches and didn’t like sandwiches, so he would take odd combinations of food. Guess what? I found out that my middle son would take candy and cookies, then trade it for sandwiches and healthful foods his friends’ mothers packed. Many of his classmates were not allowed to have sweets, and because Daniel could have sugary food at his discretion, he didn’t really care about eating it. To him, it was a bartering tool. Fast forward to today: all three of my kids are normal weight, no one has ever had food issues and all three eat pretty healthfully. I can’t say this is 100% due to my wonderful mothering because genetically our families are not overweight, and we all exercise (but never obsessively) several times a week.  It is not pure luck that I am not overweight!

I don’t feel the need, ever, to finish my food. It isn’t helping the starving people in China, as they used to say. When I am full and satiated I stop eating. I leave food on my plate (gasp!).  I always told my kids and their friends that they didn’t have to finish food or “clean their plate.” Most people look at me like I am a lunatic when I say this.

I always have toasted nuts in a dish on my kitchen counter as well as a jar of homemade biscuits or cookies. They last a long time because everyone knows they will be replenished instantly once they are eaten. In other words, there is not a “charge” or awful feeling about eating something forbidden.

I don’t eat in the car, I never eat while watching television, I don’t walk around the house and eat, I don’t stand at the counter and eat…99 percent of the time I sit down, I set the table with a placemat, with cutlery, with a pretty plate and glassware and napkin and I make my meal or snack the focus of my attention. I really taste the food; I don’t talk on the phone and eat. I don’t read the paper and eat…I savor my food – sometimes with music in the background and occasionally I’ll even put a flower or two in a vase by my place setting.

I also know that if you grew up, as most do, with food rules and regulations and diets that it is hard to get beyond this and be guilt free with food, no matter what. I get that. I also beg young parents to think about the messages you give your kids when they see you constantly step on the scale, or berate yourself or your spouse for being fat. I wish everyone could be at peace with their body and with their food choices and stop obsessing about food and weight.

Enough … I’ll get off my soap box now. But I can’t help but end with this. Below is a picture of a pillow my  sister emailed to me. In my mind… it really is all about balance. And, of course, a bit of chocolate.

Share
Posted in uncategorized | 10 Comments