Ponegranate Salad

Click here to view recipe.

Beautiful Dubrovnik

It’s been two years since we travelled to Croatia with our dear friends Mark and Linda – but it feels like yesterday. On most of my adventures I have a pretty good idea of what to expect but I didn’t really know much about this region and was excited to get “off the beaten path.” I certainly wasn’t disappointed. As soon as we landed we were struck by the striking, ancient architecture and the sheer beauty of the land.

The trip was very loosely structured – we only reserved a hotel for the first two and final two nights. Other than that – we decided to wing it! The four of us met in Zagreb, Croatia’s largest city and its capital. After spending a few days in this beautifully preserved, historic city we rented a car and drove down the Dalmatian Coast and took ferries to visit the islands of Split, Korcula, and Hvar, ending in historic Dubrovnek, an old maritime city nestled on the Adriatic Sea. Along the way we stayed in “sobes” (pronounced SO-bay) which were rooms the locals rented out, usually featuring a small kitchenette and attached to a larger home where the owners lived.

Plitivice Lakes National Park

We took the ferry to the Adriatic island of Korcula, perhaps my favorite place. Up and down the hilly streets were red tile roofed houses and medieval sites. The island was amazingly clean, quiet and walkable with interesting beaches, restaurants and vistas everywhere we turned. We found lodging just by strolling up and down the streets and looking for signs that rooms were available. The unit we stumbled upon was actually an apartment with two bedrooms, a shared bathroom, a lovely kitchen and even an outdoor area.

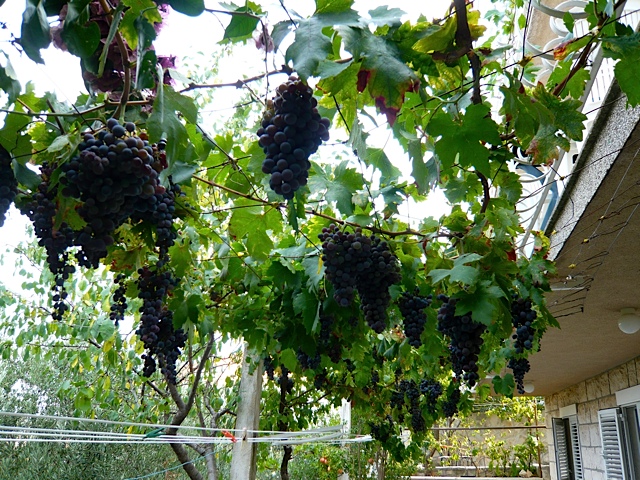
The sweetest grapes

Growing outside were fat, ripe purple grapes that were sweeter than any I’d ever tasted. Mediterranean herbs also grew wildly, making the air distinctly sweet and fragrant. My favorite feature of this sobe was the pomegranate tree. I’d never seen one before and it was exotic and colorful, laden with fruit that we picked ourselves. The owner of this beautiful home gave us a bottle of local herbal brandy that she made along with yeasted coffee cake – typical of Croatian fare.

Pomegranates right outside our window!

I’ve been thinking of this wonderful trip recently because pomegranates are everywhere I look – filling the produce stands and decorating holiday wreathes. And for years I’ve been making the most delicious pomegranate salad dressing so I thought I’d share it. The dressing and the salad I traditionally make alongside it are so fresh and bright-tasting – the perfect accompaniment to the many heavy dishes we eat during these cold months. I made it right after Thanksgiving and have served it at least five times since then!

Salad with Pomegranate Dressing

Pomegranate Dressing

Makes about 1 cup

Ingredients:
  • 3 Tbsp water
  • ½ tsp salt
  • ¼ cup canola oil
  • ¼ cup extra virgin olive oil
  • ¼ c pomegranate molasses*
  • 2 Tbsp-4 Tbs  honey (add enough to taste) I use 4 Tbsp or 1/4 cup because I like a sweeter dressing)

* Though pomegranate molasses might sound exotic and difficult to find – I’ve seen it everywhere – even at the grocery stores in Iowa! It’s delicious in all sorts of dressings and sauces so I hope you’ll buy a bottle and try it out.  The brand at my supermarket is “Cortas” and comes from Lebanon

Instructions:

Combine everything  in a small bowl and whisk together to emulsify. Add honey or molasses to taste. The salad dressing can be kept unrefrigerated for up to a week

Serve with seasonal greens or arugula, pomegranate seeds or pear slices, Marcona almonds or toasted nuts of any kind, or feta or goat cheese, or avocado. The salad pictured in this post contains baby romaine, roasted chopped hazelnuts, cubed feta cheese and pomegranate seeds. I like to begin by putting some dressing in the bottom of my wood salad bowl, then add the lettuce and toss until coated. I add the cheese and seeds at the end so they remain colorful.

Pomegranate and delicious seeds

Note: a trick I learned a while back is to cut the thick skinned pomegranate in half, then put both halves into a bowl of cold water. I then break it apart under the water and scoop out the seeds under the water as well. The white pithy stuff that floats to the top can be skimmed away, and I end by straining the seeds and drying them well. Using this method to retrieve the seeds, my hands are not stained red and there aren’t squirts of pomegranate juice all over my kitchen. The drained, dried off seeds stay in a covered container in the refrigerator for 10 days or so. I love pomegranate seeds in salads or used as a topping for hummus or other bean dips, and even on top of my granola with yogurt and honey.

Share
Posted in Europe, Salads & Dressings | Tagged , , , , | 2 Comments

Hot Fudge Sauce – A Gift From My Kitchen

Click here to view recipe.

The gift of chocolate!

Every holiday season I create a special surprise for a list of folks who are especially dear to me. Bottles of wine? Gift Certificates? No, I am a believer of gifting food items from My Global Kitchen. One year I made my Spice Rub, put it into fancy jars and distributed it throughout the city. Last year my friends received little bags of biscotti tied with festive ribbons. This year will be the Year of Hot Fudge. While it costs me far less money to make my own special gifts – my main reason for personally crafting these treats is much more important. I cherish my friends and want to take the time and care to make them something truly personal and unique.

This recipe has a funny history. My daughter Rachel’s day care provider, Mikaela, is an amazing woman on many levels. She is young (mid 20’s), smart, and manages to care for 6 youngsters in her home. I have watched this former Montessori teacher in action and she truly loves and appreciates each and every one of her charges. Her home is spotless and organized, and she peruses Craigslist and Goodwill for appropriate toys and does a fantastic job. Everyone’s birthday, Valentine’s Day, and Halloween are cause for serious celebration with the kids. Did I mention that every holiday season she makes a surprise FOR THE DAYCARE PARENTS?? Hot fudge sauce was the gift a couple of years ago, and when I tasted it, I went a little crazy. I am, admittedly, a chocoholic with no desire to come “clean”. I love my chocolate – the darker, the better. So I was in heaven.

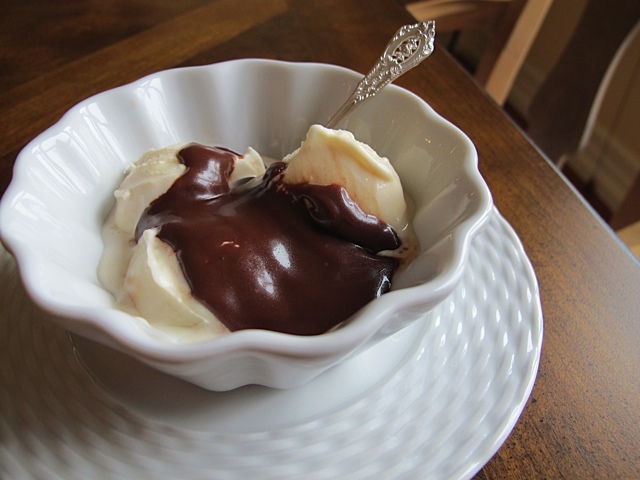
Fudge sauce drizzled over ice cream

Last year when I visited Iowa Mikaela shared her recipe. The original instructions call for a double boiler which Rachel doesn’t own, so we rigged one up using a stainless steel bowl that fit over a sauce pan. The fudge sauce came out great, but I wanted mine less sweet so I went home and reworked the recipe. In the middle of my preparations I got a frantic call from Rachel…she tried to make the fudge and two times the sugar crystallized. She searched the internet and found that most recipes utilize corn syrup! “NO NO, NO!” I cried. There had to be a solution. I paid special attention as I made this last batch pictured here and learned that the key is to use a very, very low flame and to be patient.

So here is my 2011 Gift from MY Global Kitchen. I’m dedicating this to Mikaela, and I hope she doesn’t mind that I use more chocolate and less sugar than she does!

Hot Fudge Sauce

Makes 4 half-pint jars

Ingredients
  • 1 stick butter
  • 5 squares of unsweetened chocolate (5 oz)* (Bakers or Hershey’s chocolate are just fine)
  • 1 -12 oz can evaporated milk
  • 1 ⅔ cups granulated sugar
  • 1 tsp of vanilla
Instructions:

Put butter and unsweetened chocolate into a double boiler over very low heat. (I do this on my Wolf Range lowest simmer n a heavy pan. If you don’t have this function on your stovetop, use a double boiler or a rigged up double boiler. Use the smallest burner on a low setting.)

Let them melt together in the double boiler or pan. As soon as the chocolate and butter are barely melted, stir in the entire can of evaporated milk. The mix will be flecked with chocolate and not emulsified at all. Do not worry.

Immediately start adding sugar 1 tablespoon at a time – stirring constantly. This doesn’t take that long, because once the sugar is incorporated you add the next tablespoon.

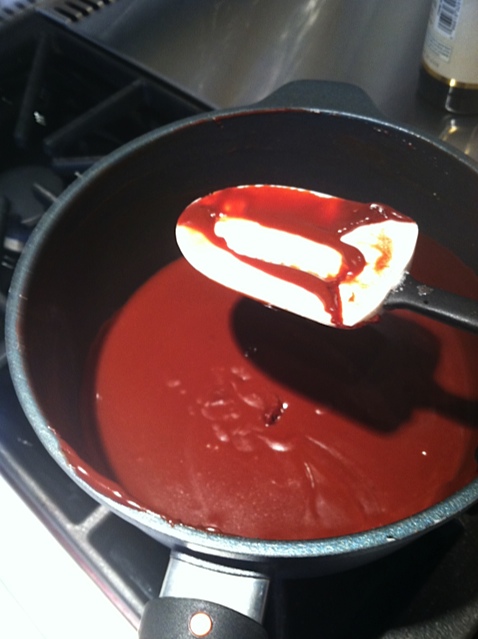
Once all the sugar is in, be sure it is still on low, low heat and keep cooking, stirring every 5 minutes or so until thickened. My batch took 30 minutes to reach this point and never reached above 150 degrees when I checked the temperature.

Sauce cooking on stovetop

Once thickened, remove from the heat, add the vanilla and cool a bit before pouring into half pint jars. Screw on the lids and store in the refrigerator for up to 3 months.

I usually cover the lid with fabric, write a cute label and gift it along with a pint of vanilla ice cream and a little bag of toasted almonds.

Share
Posted in Dessert | Tagged | 6 Comments

Marilyn’s Meatloaf

Click here to view recipe.

Truly comforting food!

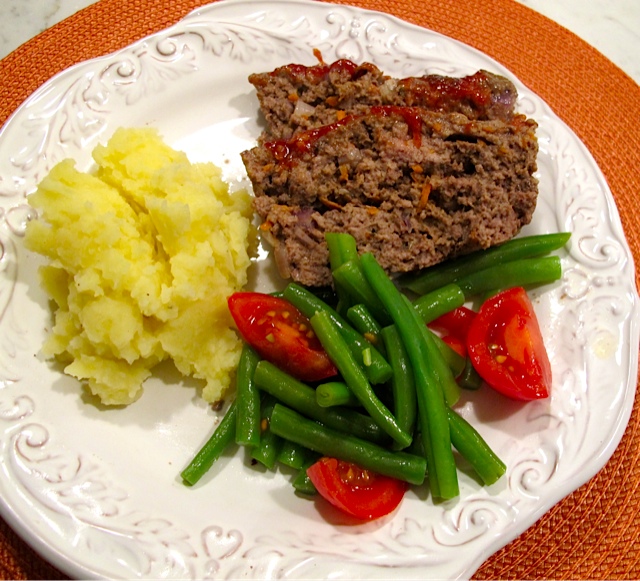
My neighbors just had a baby on Monday, and my gift to new parents is often a home cooked meal delivered within the first few days of new parenthood. I was thinking about this last night because I made my famous meatloaf, onion mashed potatoes and green beans coated with olive oil and tomato slices. It is nothing exotic or particularly gourmet – just good, old-fashioned comfort food!

I’ve been preparing meatloaf of at least 30 years and don’t even know where I found the initial recipe. My global adventures made me curious about the origin of this kitchen staple so I did a little investigating. Meatloaf, or some derivation thereof, has apparently been around since the 5th century. It is traditionally a German, Belgian or Dutch dish and my Italian friends adopted it to make meatballs. In America, German-Americans made it with scrapple – which was a mixture of ground pork and cornmeal. This doesn’t sound too appealing to me – but it was likely quite a treat back in the day. Meatloaf as we know it today didn’t appear in American cookbooks until the late 19th century and I can only imagine the hundreds of variations that have since been developed.

My own recipe has been tweaked over the years but the one thing I insist on is fresh, high quality meat. The butcher near my home has wonderful fresh ground chuck which I use without fail. Though many recipes call for it, I don’t combine pork or veal or any other meat with the beef. (I do make a delicious turkey meatloaf that is entirely different – I’ll reserve that for another post.) I don’t add any type of cheese or exotic ingredients. Everything that goes into the mix is always in my cupboard and fridge – eggs, bread, ketchup, carrots and so on. During the cold, dark winter nights this hits the spot and is an easy, last minute dinner for me to serve when I am not in a particularly creative cooking mood. (Yes, that happens even to me.)

A beautiful thing about this recipe is that it makes a large loaf and leftovers can be used in endless ways. I like to have meatloaf sandwiches with fancy mustard, greens, tomato, or slice and grill it and serve it as a “slider” or repurpose it open-faced with mashed potatoes and gravy for a slightly different twist. I usually double the recipe, even when I make it for the two of us and I leave one that hasn’t been baked in my freezer for times when I have no time or energy to cook.

Marilyn’s Meatloaf

Serves 6

Meatloaf Ingredients:
  • 1 slice of whole grain bread-cut off the crusts and tear into small pieces
  • ½ c tomato juice or soy milk or regular milk
  • 2 lb ground beef
  • 1 egg
  • ¼ c diced onion
  • ½ tsp. salt
  • ½ tsp ground pepper
  • 1 tsp dry basil
  • ½ c shredded carrots
Instructions for meatloaf:

Preheat the oven to 350 degrees.

Dump all these ingredients into a large bowl. Put on disposable gloves and gently mix the components together until they are combined. Remove from the bowl (don’t wash the bowl yet) and pat gently into a greased loaf pan. I bake it in my 40 year old 9 x 5 Pyrex meat loaf pan.

Before it goes into the oven

Slide the meatloaf into the preheated oven for 15 minutes, and while it is baking make the topping in the same dirty bowl.

Topping Ingredients:
  • 3 Tbs. brown sugar
  • ½ c ketchup
  • ¼ tsp nutmeg
  • Heaping tsp of dry mustard
Instructions for topping:

Mix the topping ingredients together well. After the meat loaf has baked for 15 minutes without the glaze, remove it from the oven. Gently cover the top with the ketchup-based sauce and bake another 45 minutes or until interior temp hits 160 degrees.

Rest for at least 10 minutes, the cut it into slices and serve.

Note: There is a lot of juice and fat that accumulates around the meatloaf when you bake it in a pan. Generally I pour all of this into a Pyrex measuring cup and remove the fat only, and then return the juice to the meatloaf pan. OR you can eat the meat loaf as is and refrigerate the leftovers. The next morning you will see an orange layer of fat that is easy to lift off with a spoon.

Some of my friends add ½ cup of Parmesan cheese to the meat mixture.

Share
Posted in Meat | Tagged | 2 Comments

Elderflower Martini

Click here to view recipe.

I love Chicago any time other than the cold winter when freezing wind comes off the lake to take my breath away. My son lived and worked in Chicago immediately following his undergraduate years of college. We didn’t get to visit often but when we did, we enjoyed touring the art museum and the waterfront and finding unusual restaurants in the variety of neighborhoods around town.

My Iowa daughter, 7 months pregnant, wanted a four day weekend away from her 2 ½ year old: away from work, household duties, and diapers. Just some relaxation and time for herself before baby #2 was born in June. She tried her best to recruit college friends, high school friends, and local friends to accompany her to Chicago for this weekend. No one could leave work or get out of family obligations – all of those things that make it difficult if not impossible for mid-30’s women to just “get away.” When her in-laws agreed to come to Iowa and help babysit, I promised to fly to Chicago and be the “friend.” I found us a great hotel bargain; we planned restaurant meals, shopping excursions, city tours. I even found a good airfare from Seattle to Chicago, a direct flight.

So imagine my disappointment and dismay when two days prior to this planned trip I woke up with excruciating, debilitating back pain. Herniated disc. I could not even walk to the car let alone navigate an airport or airplane. Flat on my stomach, I could not stand or even roll over without screaming out in pain. The following day I endured an emergency steroid injection. I HAD TO CANCEL MY TRIP. I HAD TO DISAPPOINT MY DAUGHTER. That part made it more awful than the pain.

Rachel & Kay

Enter my savior, Sister Kay. She loves Rachel, Rachel loves her, they both love Chicago. Kay agreed to fly from Maryland to Chicago, and take my place for the four days. Done. Whew! So even though I was in pain I knew Rachel was in great company (maybe even better company than the initial plan?). The two musketeers slept late, shopped together, ate amazing meals, and came home boasting of a cocktail they had than was made with St. Germain Elderflower liquor. I heard about said cocktail a LOT and looked up the restaurant menu, checked out the ingredients listed on the menu and made a very close approximation of this delicious martini. Pears remind me of fall, and this martini is GOOOOD even if you hardly ever drink martinis (I’m talking about Kay).

Rachel and her hubby maintain that I write too much for my posts, so this one is short just for Rachel with only a couple of pictures! No description of the architecture tour, miracle mile, art museums, restaurants, shopping, sleeping. Just the facts, ma’am.

Chicago Elderflower Pear Martini

“She She” Chicago Elderflower Pear Martini

Ingredients for homemade sweet and sour mix:
  • ½ cup water
  • ½ cup sugar
  • 1/3 cup fresh squeezed lemon juice
  • 1/3 c fresh squeezed lime juice
Instructions:

Boil together water and sugar until sugar melts and everything liquefies. Remove from heat, cool and then stir in lemon and lime juices.

This makes a lot more sweet and sour mix than you need, but keep it around for other uses.

Ingredients for the martini
  • 2 oz elderflower liquor (St. Germain brand)
  • 2 oz white grape juice
  • 2 oz sour mix (directions above)
  • 4 oz Grey Goose pear vodka
  • Green grapes for garnish (optional)
Instructions:

Place the martini ingredients in a shaker and fill to the brim with ice, Shake well, strain into a martini glass and garnish w/green grapes threaded onto a wooden skewer (see picture).

This is a very light and sweet cocktail and I like to pair it with something a little savory – perhaps salted nuts or crunchy crackers with goat cheese.

Share
Posted in Beverage, North America | Tagged , , , | Leave a comment

Turkey Wings in British Columbia

Click here to view recipe.

Eileen, Nanette & Me

Following a recent business trip to British Columbia, I had the pleasure of lunching with two dear friends, Eileen and Nanette. I’ll never forget how Eileen suddenly suggested that the three of us plan a short getaway back up to Canada for a birthday celebration for Nanette and me. Of course it took several emails back and forth to set the dates, and we divvied up the hotel reserving, driving, event planning and so forth among us. But it was a GO!! Eileen was the chauffeur, Nanette the map reader and navigator, and I was the event and restaurant planner.

Seattleites consider Vancouver, BC our back yard. It’s such an easy drive – only three hours including customs and immigration screening at the US-Canadian border. I was chomping at the bit to stroll through the Granville Market and eat at the numerous ethnic and seafood restaurants I’ve come to know and love throughout the city.

Because we had a car and a good map we toured the requisite places: Chinatown, Robson Street, Gastown. Every day we walked the city – to Stanley Park, the Aquarium and Bloedel Conservatory. The places to see seemed endless. I paid close attention to everything culinary from the minute we hit the streets, scouting around for new, fun restaurants.

A delightful bakery at Granville

The first morning after we had caffeine in our bloodstream at the Moda Hotel, we headed to the Granville Market. I had been there at least five times prior to this visit, yet it always thrills me to walk and observe the beautiful displays and stalls. Every food item imaginable is on display – everything from fresh fruits and vegetables, handmade pastas, ethnic delicacies, beautiful meats, fresh fish, delicious baked goods…as we strolled the stalls I couldn’t help but think what fun it would be to live nearby this market so that I could shop there daily and expand my culinary repertoire. Seven kinds of herring? Ten types of salmon jerky? The best bagels I have had in years? The grass is always greener, I guess.

Our first dinner was at Lift Bar & Grill, a beautiful restaurant along the promenade walk to Stanley Park. Each guest was given their own iPad as a menu …nice touch! We sampled many wonderful items including chicken livers, cottage cheese/heirloom tomato salad, beet walnut salad, spiced calamari, and veal cheeks. Every single item was cooked to perfection. Happy girls, following our decadent meal we walked to a restaurant lounge nearby to listen to a local guitarist for a couple of hours.

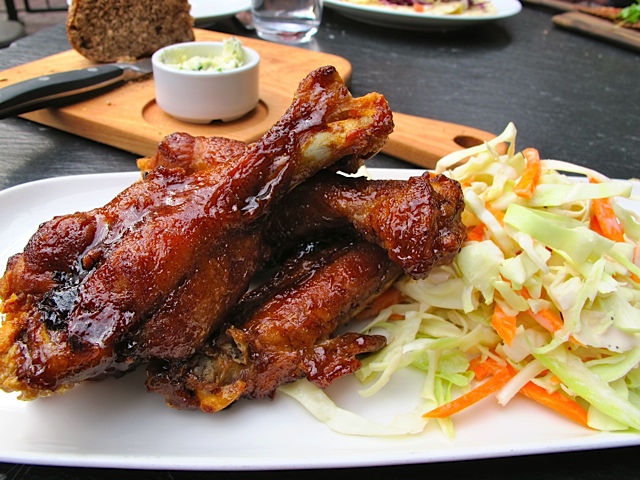
The following morning we strolled through Gas Town and ended up at a place for lunch by happenstance. The weather was nippy so as soon as I spotted my beloved turkey wings on the menu I knew what I was having. This meal reminded that these are so inexpensive and easy to prepare and inspired me to share my recipe with you. They are perfect cold weather vittles, and your kitchen will smell heavenly. So here is how I do it – easy peasy, braised until they fall off the bone.

My beloved Turkey Wings

Sweet & Savory Turkey Wings

Makes 2-3 servings

Ingredients for the spice rub:
  • 1/2 cup brown sugar
  • 2 Tbsp.sea salt
  • 1 teaspoon dried thyme
  • 1/4 cup paprika (smoked or sweet – I like smoked paprika)
  • 1-1/2 Tbsp. coarsely ground black pepper
  • 1 tsp. dried dill
  • ½ tsp dry basil
  • ¼ tsp. dried Cayenne pepper
Ingredients for the turkey wings:
  • 2 organic turkey wings, trimmed and cut in half (about 2 ½ lb total)
  • 1 Tbsp olive oil
  • 3 Tbsp smoked paprika spice rub
  • 3 ½ cups chicken broth
  • ½ orange or red or yellow bell pepper, chopped
  • ½ sweet (red or white) onion, peeled
  • Handful of fresh parsley, chopped
  • 1 carrot, unpeeled and cut into 2 inch pieces
  • 2 celery stalks, cut into 2 piece segments
Instructions for the rub:

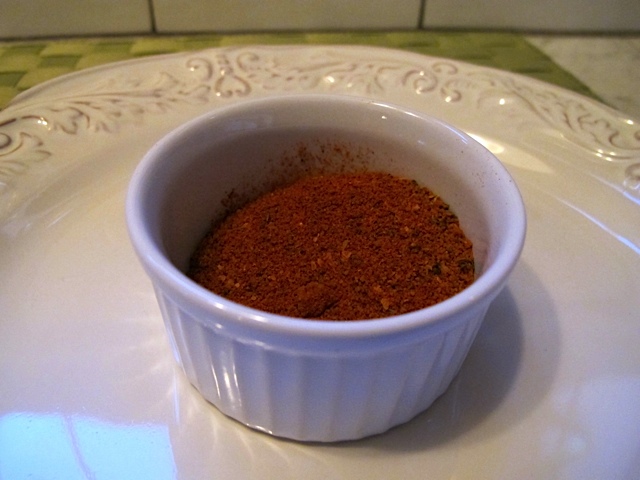
Mix all together well and store airtight at room temperature for up to 6 months. I use it on poultry, fish and even vegetables. The brown sugar and paprika give a beautiful brown color to anything that is seared or sautéed. I even put this in jars to bring to some of my special friends!

Spice Rub Mix

Instructions for the turkey wings:

Preheat oven to 450 degrees.

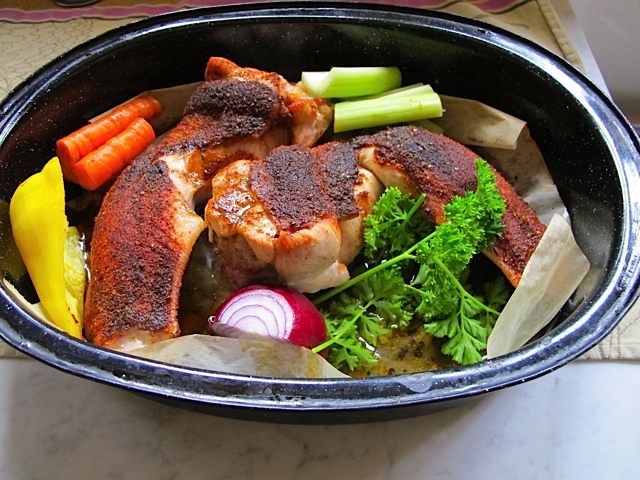
Cut turkey wings at joints and discard tips. (If you can’t cut them in half don’t worry – they will fall off the bone when finished cooking.) Rub with the olive oil and then pat the spice rub liberally onto the skin of the wings. Arrange the wing portions in a roasting pan. Bake without a cover at until golden brown, about 30 minutes.

Turkey wings seared with added vegetables

Add vegetables, poking them among the wings and pour chicken broth into the bottom of the roaster. Cover, continue baking at 350 degrees for 2 hours, or until extremely tender. Baste with the juices once or twice toward the end.

The juice becomes very flavorful and I like it over quinoa or mashed root vegetables of any kind. You could thicken the gravy if you prefer it this way. Note: in electric roaster, 1/2 hr at 450 then 45 min at 350 with 1 1/2 c broth and veggies under.

My own version of Turkey Wings – served with mashed sweet potatoes, yukon golds and yams

Share
Posted in Meat, North America | Tagged , , , | 6 Comments

Post-Thanksgiving Turkey Soup

Click here to view recipe.

The Thanksgiving Table

One bit of sage advice I can give to parents and parents-in-law is this: from the moment your child marries, sit down and mutually decide where holidays will be celebrated.  Even if your entire family lives in town, it is nice to “own” one or two events.  My daughter Rachel suggested this a couple of years ago and, as she aptly put it, “if you don’t reserve one or two holidays for our family, no one will bother to consider the day sacred in terms of always including our siblings and their families.”

We all decided that Thanksgiving and Passover would be our family get-togethers. Ever since Rachel and Jonathan got married five plus years ago, we have gathered together – committed to making these times meaningful. My three kids reside in three states: Iowa, Washington State and California. I know that they look forward to seeing each other as much or more than they anticipate sharing the day with us, the parental units.

For the past six years we have made Thanksgiving a three or four day celebration. One year our brood was comprised of twenty people including three generations, several toddlers, and a few turkey-obsessed dogs. Everyone loads up their cars full of food and family and drives ninety minutes through winding roads to my brother’s remote “cabin.” He built this expansive log structure himself and we always set up extra mattresses and create sleeping areas to accommodate everyone. The log walls lend it a lovely, rustic feel and overstuffed furniture nestled around the wood burning fireplace creates a very comfortable atmosphere.

The in-town family has assignments for food which we bring ready for the oven, grill or table.  I always have a large “to bring” list as I arrive with the most extended family.  Last year I pulled up to the cabin with nine pretty hefty eaters – so I brought a lot of food! The kitchen is, of course, the centerpiece of the house and my brother built it to be much larger than the one in his home in Seattle.  As soon as we arrive we load in bags and pots and containers of food, filling every square inch of kitchen counter space. Then we get to cooking.

Every year we have our “tried and true” dishes front and center – yam casserole, mashed potatoes and Black Bottom Pie.  But we inevitably try new recipes. I can’t recall how many versions of cornbread stuffing and cranberry sauce we’ve cooked.  Last year we decided to experiment with the turkey. We bought a turkey fryer and dropped the entire 12-pound bird into the vat of boiling peanut oil.  A mere 90 minutes later we had a beautifully browned, perfectly moist turkey to enjoy. In fact, we had three turkeys last year – fried, roasted and smoked!
Brother Kal – the Deep Fry Guy

One tradition I started years ago is the creation of a huge pot of turkey soup. It’s often hard to imagine eating after the hours-long, early afternoon Thanksgiving meal. We often push back from the table, vowing to never eat again! Regardless, every year I head into the kitchen to attack what is left of the turkey. I break apart the carcass and pull apart the bones and begin simmering my soup.  This past year we were treated to an early snow so my kids headed outside to build an army of snowmen and others hiked the tree-lined trails around the property. Several of us huddled around the fire reading, knitting, visiting and napping. By the time the sun set, the kids were wandering into the kitchen, lifting the top off the pot of soup and inquiring about our next meal. Everyone helped pile leftovers into mismatched dishes and Rachel threw together a huge salad. As soon as I settled the steaming pot of soup in the middle of the table, everyone dug in.

Thanksgiving is truly a day filled with gratitude. I can’t imagine any Thanksgiving celebration more wonderful than ours, particularly because we spend three days sequestered in the mountains, eating, playing and just being together. Cheers to the fourteen of us last year (21 this year!) and especially to my brother Kal who organizes this get-together!

Marilyn’s Turkey Soup

Serves 10-15


Ingredients
  • Carcass and bones remaining from 7-10 pound turkey
  • 2 cups leftover turkey meat
  • 1 large yellow onion, peeled but left whole
  • 5 medium carrots, peeled and sliced into ½ inch pieces
  • 3 stalks celery, diced into ½ inch pieces
  • 1 ½ cups of pearl barley, rinsed
  • 1 cup dried brown lentils
  • 1 cup dried split peas (yellow or green)
  • 1 ¼  cup dried large lima beans (or northern beans)
  • Salt and pepper to taste


Instructions

Prepare the turkey carcass by ensuring there is some meat left on the bones if possible.

Place the carcass into a large soup pot and cover with water by 2 inches.  Bring to a boil, lower heat and skim off grey matter that floats to the top.

Add remaining ingredients except salt and pepper. Cover and cook on low heat for 2-3 hours.

Open lid and remove onion.  Season with salt and pepper.

The soup thickens after it stands and cools and is really better the next day, although we never wait.  This makes enough for 14 of us with a bit left over!!

Note: if your turkey is larger than 10 lbs, just cut it into pieces and use as much as will fit in your soup pot with the other ingredients.  The rest of the carcass can be frozen for up to 2 months when you can make the soup again.

Share
Posted in North America, Soups | Tagged , , , | 4 Comments

Rugelach (roo’ -gu -la)

Click here to view recipe.

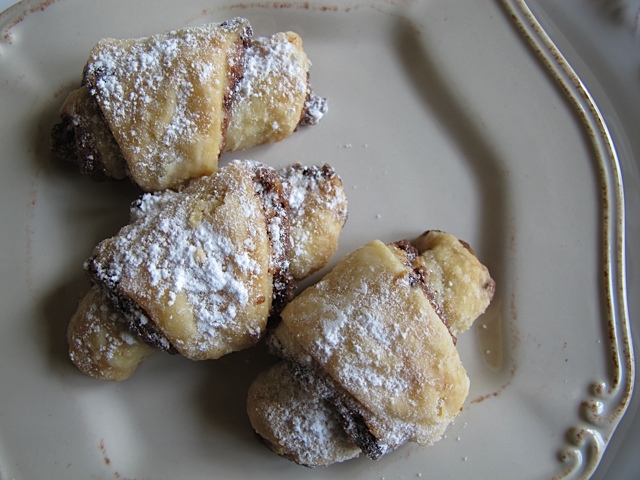
Rugelach

I got a phone call from my daughter Rachel last weekend. She had been reviewing my recipe for crescent shaped rugelach on her computer but the directions were terrible and the ingredients for the filling weren’t correct either. Unfortunately my recipes are cursory at best with little detail because I cook from memory most of the time. “Mom,” she said “If you don’t want your recipes to die with you, you really need to write down or videotape exactly what you do.” Hmmmm… Food for thought (forgive the pun!).

My mother was an excellent baker but never made rugelach. When I moved to Seattle in 1980, I met Anita – another young mother who lived two blocks away. Her son Eli was Rachel’s age (3 at the time), they became best buddies and still are great friends to this day. For the next 30 years Anita and I had a baking date with each other.

Anita and I were a team. I must say that she was, and still is, way more precise than I and always had her ruler out so she could cut everything just so. Our 5-hour long baking days provided us with time to catch up with each other’s lives and ended with enough pastries and cabbage rolls to feed an army.

Rugelach is actually a Yiddish word; they have been around since the 1800’s and are Eastern European, perhaps Viennese, in origin. They have a butter and cream cheese dough and can be filled with poppy seeds, jam or dried fruit filling. The initial recipe for this cookie was Anita’s and it was made with mini semi-sweet chocolate chips and much less filling than I use today. I always place the chocolate mixture inside as written below rather than the more traditional fillings. They are exotic in appearance, fairly easy to make and nearly fail-safe. The dough is very forgiving, too. These cookies never fail to impress and are a lovely gift to package when I am invited to dinner at someone’s home or when one of my friends has a birthday. Along with a cup of tea, they are sweet but not too sweet, beautiful to behold and they inevitably satisfy my own chocolate cravings.

So no worries, Rachel, Daniel and Jake (my kids). This recipe will live on forever in cyberspace! Now I have to get busy and document the other special things you love. Send me your lists!

PS: Some of you readers are probably shaking your heads because there isn’t a whole lot in these rugelach that is good for you. Cream cheese, butter, white flour, granulated sugar… But one or two occasional treats like these certainly won’t hurt you. Believe it or not, my entire family eats healthful food 85% of the time, and when they indulge in rugelach it isn’t something they devour at one sitting. The cookies are too rich and filling for that!

Rugelach

Yield: 64 pieces

Ingredients for the dough:
  • 8 oz regular cream cheese
  • 2 sticks softened butter
  • 2 tsp pure vanilla extract
  • 2 cups all purpose flour (+ more for rolling them out)
Ingredients for the filling:
  • ¾ c sugar
  • 1 ½ c walnuts
  • Heaping ¾ c bittersweet chocolate chips (Ghirardelli is my favorite)
  • 2 tsp ground cinnamon
  • 2 Tbsp melted butter
Instructions:

Preheat oven to 375 degrees.

Put flour, cream cheese, butter and vanilla in a Cuisinart. Pulse until combined and stop when dough starts to stick together – do not over process. Remove carefully from the food processor; the dough should still be sticky. Refrigerate at least 2 hours or up to a week. I have even frozen the dough for a month and it is just fine.

You don’t need to wash the food processor! Just pulse all filling ingredients except butter in the Cuisinart together until pretty finely chopped. Remove to a bowl and stir in the melted butter. Again, I have successfully frozen the filling for 2 months but if you do this, let it come to room temperature the day you plan to bake.

Remove dough from cold refrigerator about 15 minutes before you want to bake the cookies. Divide dough into fourths, and roll each fourth into a smooth ball on the counter with a little flour on your hands.

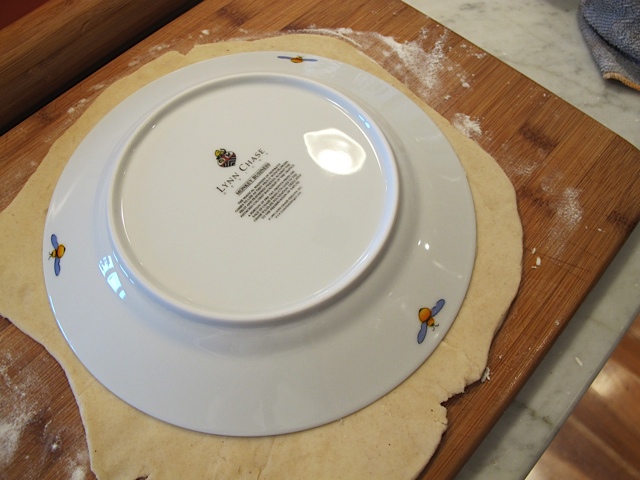
Use a large floured cutting board. Flatten one dough ball into a 3 inch disc, then use a lightly floured rolling pin to roll this ball of dough into a 9-10 inch circle. I get a little compulsive here and actually trace ½ inch larger than an upside down 8 inch salad plate to make a perfect circle. (see photo)

Dough shaped with salad plate

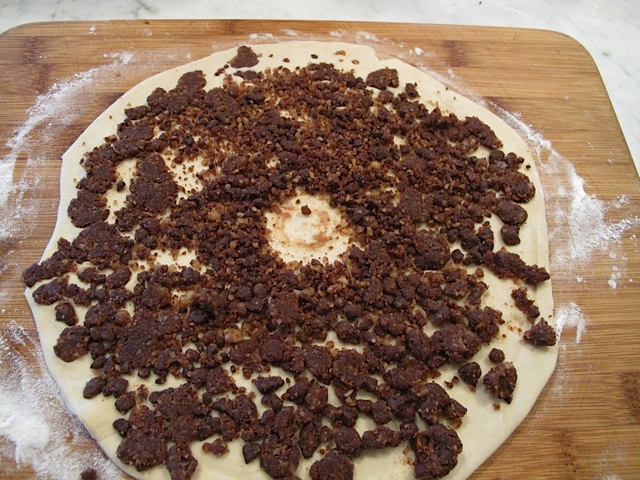
Put ½ cup of filling in the center of the round circle you have just rolled and spread the filling evenly to the outside edges. With your index finger clear out the center of the circle (1 inch or so) so there is no filling there.

Dough topped with filling - hole created in the middle

Press the nut topping into dough with your palms or lightly roll it so it sticks to the dough with your rolling pin. Using a pizza cutter or a knife (I like the pizza cutter) cut into 16 pie shaped wedges. Cut the circle in fourths, then the fourths into ½ and so on. (I know this is too much information, but you kids wanted the details!) Roll from the outside or large part of the circle to the center point without filling.

Rolling the dough with the filling

Tuck the point of the crescent wedge underneath the cookie and place on a parchment-lined cooking sheet. They should be one inch apart because they do puff and spread as they cook.

Bake at 375 for15-20 minutes or until barely golden. Cool on the cookie sheet for 15 minutes.

Sift powdered sugar on top when cooled. These freeze very nicely for 2 months. Re-sprinkle with powdered sugar when serving them – it covers up any errors and make the rugelach look quite professional. Enjoy!

Fresh out of the oven!

Share
Posted in Dessert | Tagged | 6 Comments

Belizian Chicken – The Ultimate Comfort Food

Click here to view recipe.


Making Belizean Chicken

Click here to view on YouTube.

When shopping for groceries in the United States, we are lucky to have access to a huge variety of foods in our local supermarkets. I’ve heard that the average American superstore contains nearly 39,000 items! Americans fortunately retain the ability to choose from a wide array of cuisines – from everyday American to Chinese, Indian, Italian, Middle Eastern or Japanese to name a few. Belize, I have learned over the years, operates in a different way. The culinary repertoire of the average Belizean appears quite limited; chicken, rice and beans emerge as the mainstay of one’s diet in this small country.

Anyone who has visited Belize and eaten at a “local” restaurant anywhere within its borders has undoubtedly tried stewed chicken, rice and beans. Most native Belizeans consume this in some form every morning, noon and night. Sometimes they mix things up by adding tortillas for breakfast or dinner. Or, because it’s the “main” meal, their noontime lunch might feature the side dishes of coleslaw or potato salad.

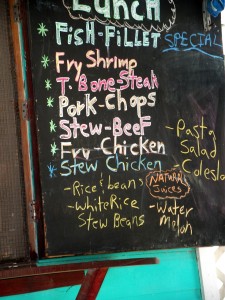
Stewed Chicken is on every menu!

Chicken, rice and beans surface as the ubiquitous local dish available at most every “fast food” stand. Most of the cooks in households I’ve visited begin their day by putting on a pot of stewed chicken. They crowd their tiny stove-tops with additional vessels containing simmering beans and steaming white rice flecked with fresh grated coconut.

As I noted, popular additions include mayonnaise-based potato salad and coleslaw. Mashed potatoes, a popular alternate side dish, emerge on menus as well. I must say that my preferred garnish remains lightly fried plantains. Balanced on top of the succulent, savory chicken, these crisp and somewhat sweet delicacies provide a lovely textural and color contrast.

Traditional Belizean stewed chicken presents with a very reddish color due to the addition of ricado, for which the country is famous. Ricado seasoning (often spelled recardo or racardo),a type of spice used in many Central American dishes, originates with the lipstick plant. Coincidentally I initially learned of this plant in Fiji nearly 15 years ago. Ricado occurs in two forms: black and red. Both smell vinegar-like. The red variety might be added as a meat or poultry seasoning while the black becomes an ingredient in many local soups. I have not personally cooked with black ricado but it remains on my “to do” list. If you vacation in Belize or find a Latin grocery store, look for it on the shelves; I often bring back a package of this exotic spice to my American friends. (If you cannot find ricado, substitute one tablespoon of regular paprika and some McCormick’s all-season.)

The following is my “Americanized” version of stewed chicken. I add potatoes, carrots and peppers and serve it with brown rice, refried black beans and healthful, vinegar-based coleslaw. I don’t know what my friends in Belize would think of my personal recipe, but it’s a favorite in our household!

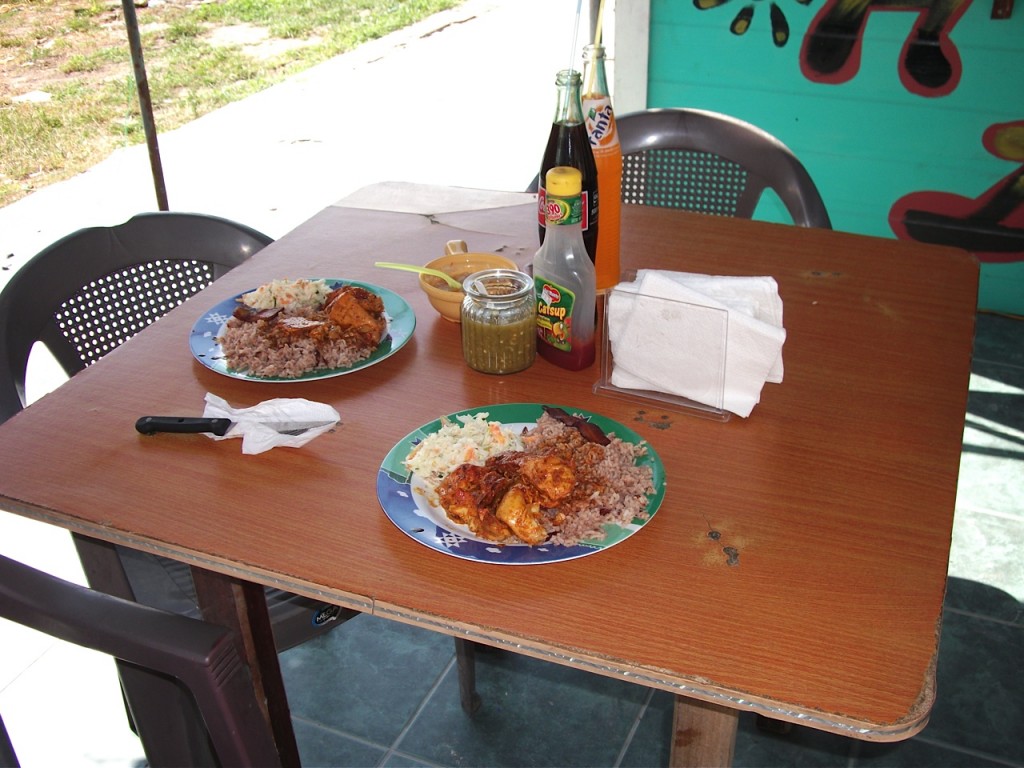
Belizean Chicken at one of my favorite spots

Belizean Chicken

Makes 4 generous servings

Ingredients:
  • 1 large white onion, sliced into rings
  • 4 cloves garlic, peeled and coarsely chopped
  • ¼ cup vegetable oil
  • 1 chicken fryer, cut into small pieces-dry and season liberally w/salt, pepper and season salt (I use my homemade spice rub: a salt/brown sugar/paprika based concoction that I always have on hand at home and in Belize).
  • 5 large carrots, peeled and cut into 2 inch pieces
  • 2 potatoes cut same size as carrots
  • 1 large red pepper, cut same size as carrots
  • 1 portion of ricado (1 ½ Tbsp)
  • 2 tsp chicken bouillon (or ½ cup chicken broth)
  • ½ cup hot water -only if you use bouillon in lieu of broth
  • Juice of 1 lime
  • Juice of ½ orange
Instructions

Heat oil in a large, deep fry pan. Sauté onion and garlic until slightly brown. Remove to bowl.

Add seasoned chicken (I remove skin from most of it) and sauté for about 1/2 hr until nicely brown.

Meanwhile, put veggies including onion/garlic in a crock pot or heavy pot on low. Everything in the pot is cooked over low heat until it is done.

When chicken is browned, add ricado and chicken bouillon and hot water (or broth) and mix well so the ricado dissolves. Bring to a boil and turn chicken so it is coated with the ricado mix.

Place the chicken on top of veggies, add lime and orange juice, cover and cook in the crockpot for 8 hours on low or until soft, stirring occasionally. Belizeans just cook this dish on top of the stove in the same pot over low heat-usually about 2-3 hours.

Once the chicken is fork tender, remove the poultry and place it in a bowl. Pour all juice (it will have thickened) in a measuring cup and put it in the fridge until cold, then remove the fat. (The fat will solidify on top and can be easily discarded) Once it’s degreased, pour the gravy back with the chicken to reheat.

Serve with Arroz con Plantanos or brown rice and beans, cubed mango and my previously posted coleslaw with purple cabbage. Accompany with Marie Sharps so everyone can adjust the spiciness.

Share
Posted in Central America, Meat | Tagged , , | 3 Comments

Granola – Wellington Style

Greek yogurt, granola and chopped apples

New Zealand. New Zealand. The name rolls off my tongue because I have been there two times, so far. I’m going back for certain, hopefully sooner than later. Our first trip, which I call “New Zealand 101: The Introduction” took place in October 2006. As usual, when my husband and I take a long trip, we travel during the “off season” or low tourist time. Happily we were able to use our free mileage on this trip. Understand that I am willing to sit in “economy” seats – I’ll cram myself anywhere in an uncomfortable place for a long plane flight to explore the world. I even put my belongings in a small carry-on bag (never checked) for overseas flights. And you know from my previous post that I always bring my own food. Obviously, I’m quite a low maintenance traveler!

Seasons are flipped in New Zealand so fall in Seattle equals spring in New Zealand. As usual, we only made hotel reservations for the first two nights where our trip began – Auckland, the country’s largest city and its commercial core.

After touring this beautiful place and outlying areas, we claimed our rental car and decided we wanted to get a basic overview of this amazing country so we headed up North and then headed to the South section as well. Cars drive on the left side of the road, and the driver sits on the right side of the car – exactly opposite of how we drive in the U.S. Thankfully, my fearless, confident husband drove. He also managed most of the navigation because I am, admittedly, map-reading-challenged. I was excellent company, though!

Hanging out by a beautiful Kauri tree

Armed with two basic guide books and a decent map, we drove north through Kauri tree forests and took a ferry across to the sunny beach town of Nelson. We then drove back south, stopping at small wineries, restaurants and museums. Most of the places where we dined were actually attached to wineries, and the food everywhere was beyond wonderful. For most of our trip we primarily stayed in bed and breakfast establishments, deciding at the last minute where we would end our day and phoning ahead to see if there was space for us. The final destination for the North Island was Wellington, the national capital. The city has so many excellent museums, parks, and activities that we stayed two nights at my favorite B&B of the trip – Thorndon House. Located in a central part of Wellington, our room was spacious and über clean, and the owners knew so much about the city and where to go!

Hiking the hills above Nelson

Imagine waking up that first morning to the aroma of fresh brewed coffee, ambling down the curved stairway and sitting down at a small white kitchen table. Sun filled the modern kitchen, and we were presented with a huge array of eggs any style, hot and cold cereals, yogurts, homemade breads – a veritable feast. Part of my chosen meal included the most wonderful, toasted granola I had ever had, and Gabby, the charming proprietress of Thorndon House B & B, made a copy of her recipe for me.

My version of her granola formula always fills a container in my kitchen with back up in the freezer, and I have had numerous requests for the exact recipe. It is adopted from Gabby’s printed recipe. I reduced both the oil and honey from the original recipe and sometimes I change out the type of nuts I use. Lately I have been adding about a cup of  shredded coconut and ½ cup of sesame seeds to the “basic” recipe. This is a ubiquitous go-to snack and condiment in our family.

And, this is one of my favorite uses of parchment paper so there are no messy, sticky cookie sheets. This recipe makes a large quantity but I often freeze it and take out a few cups at a time. I top my morning oatmeal with a tablespoon or two of granola and chopped fresh fruit, or create an instant dessert with grilled or roasted pineapple or peaches, vanilla yogurt and a bit of this wonderful concoction. Just the other day I layered, plain thick Greek yogurt with this granola and chopped apples…YUM!

I know many people make their own, favorite granola, but I am telling you that this one is a basic, no nonsense, easy to make recipe that can be used as an accompaniment for many foods. It has a distinctive crunchy and chewy texture and, unlike many of the store bought versions, it’s not too sweet.

Be forewarned that you need to buy UNSALTED, UNROASTED pumpkin seeds and sunflower seeds and nuts – this really makes a difference. Store nuts in the fridge or freezer, not on the shelf as they can become rancid.

My Global Granola (Never before published or revealed to anyone besides family)

(Makes about 20 cups)

Ingredients:
  • ¾ cup grapeseed or canola oil (measure first so honey will come out when you measure it in the same liquid measuring cup)
  • ½ cup honey
  • 18 oz of regular (old fashioned) oatmeal or same weight kamut flakes or a mixture of oats and kamut
  • Heaping cup of raw pumpkin seeds (NOT salted or roasted)
  • Heaping cup of raw sunflower seeds
  • Heaping cup coarsely chopped raw almonds, pecans or walnuts
  • 2 tsp ground cinnamon
Instructions:

Preheat the oven to 350 and put racks near the middle.

Mix the oil and honey in a saucepan over medium & gently heat it to combine for about 2 minutes; do not let it boil.

Mix the dry ingredients in a huge mixing bowl. Then add oil/honey mixture until everything is moist. I put on disposable gloves to thoroughly mix the honey/oil mixture into the dry ingredients. Do this for at least 3 minutes so everything is evenly coated.

Divide onto 2 cookie sheets (lined w/ parchment) and form into rectangles so mixture is the same thickness. Bake for about 25-35 minutes – rotating cookie sheets halfway through. The mixture should be golden, and the room will smell like heaven.

Granola cooling on a pan

Let it cool on the cookie sheets for about 1 hour (it might stick together but will come apart). Then dump it back into the large mixing bowl and break apart. (I wear disposable gloves for this part too)

Let granola cool another hour once broken up so it is 100% cooled off.

End Notes:
  • Pecans and walnuts are softer nuts and easier to chop than almonds, but I seem to end up using almonds most of the time
  • Freeze in zip locks or sealed containers for up to four months.
  • Doubling the recipe makes 3 cookie sheets worth…bake 25 minutes or until it looks finished.
  • I have a plastic bench scraper that is great for this recipe. It is rounded on one side (great for scraping dough out of a bowl) and straight on the other side (for evening up edges and cutting soft dough).
Share
Posted in Breakfast | Tagged , , | 10 Comments

Cinque Terre and Minestrone Soup

Dining in Cinque Terre

I truly believe I was Italian in my former life. I love everything about the country — the people, the wide-ranging and often awe-inspiring scenery, the rustic architecture and particularly the fresh, local food. To date I have traveled there on four separate occasions and I certainly intend to return. Every dining experience I’ve had in this beautiful country has been sublime – save one. My then college age son was spending a semester in Rome and my sister-in-law and I traveled over for a ten day stay. We didn’t realize that Monday is often the day of the week that smaller local restaurants are closed.  Shelli and I ended up at a large hotel dining room in Florence, and the food was just so-so – the spaghettini was no different than what I can get in Seattle and didn’t taste half as wonderful as the other pastas we ate during our trip.

I first saw a slice of Italy on my honeymoon 39 years ago and it was not love at first sight. I was too young, too rushed, and the trip was too structured. My fiftieth birthday took me back to Italy – when I truly fell in love with the country. My hubby and I planned a trip that included a brief stopover in Milan, several days of hiking along the Cinque Terra trail, and the city of Florence — with stops between. We began in  Milan and flew out of Florence, and the rest of the time we were transported by train or on foot. The rail cars were not full at all as we vacationed in the “off” or non-tourist season in the fall.

Cinque Terre Hillside

Cinque Terra, translated, means five lands. This foot trail winds along the Italian Riviera and vistas of the sea loom around each corner. While hiking, we observed loads of trees laden with bright yellow lemons, olive trees draped with netting for the harvest, and other local crops I couldn’t quite identify. It was interesting to visit the hillside mausoleums, too. Many of these monuments were hundreds of years old, yet were still lovingly tended to by generations of families. Not surprisingly each town along the trail boasted tiny eateries with fresh seafood on the menu. Also not surprising, these charming “trattorias” were my favorite places to hang out. It was in one of these delightful restaurants that I first spotted Pepperonata – a sumptuous vegetable dish that would become part of my own Global repertoire.

As expected, different regions of Italy offer foods that are local to the area. Shellfish and fish by the sea, meats and cheeses farther inland. The evening dinner prior to our hike we selected a small place in Santa Marguerita and experienced warming minestrone soup, homemade pesto (a specialty of the Liguria region) and heavenly focaccia bread. Of course the meal ended on a sweet note with a scoop of Nutella gelatto.

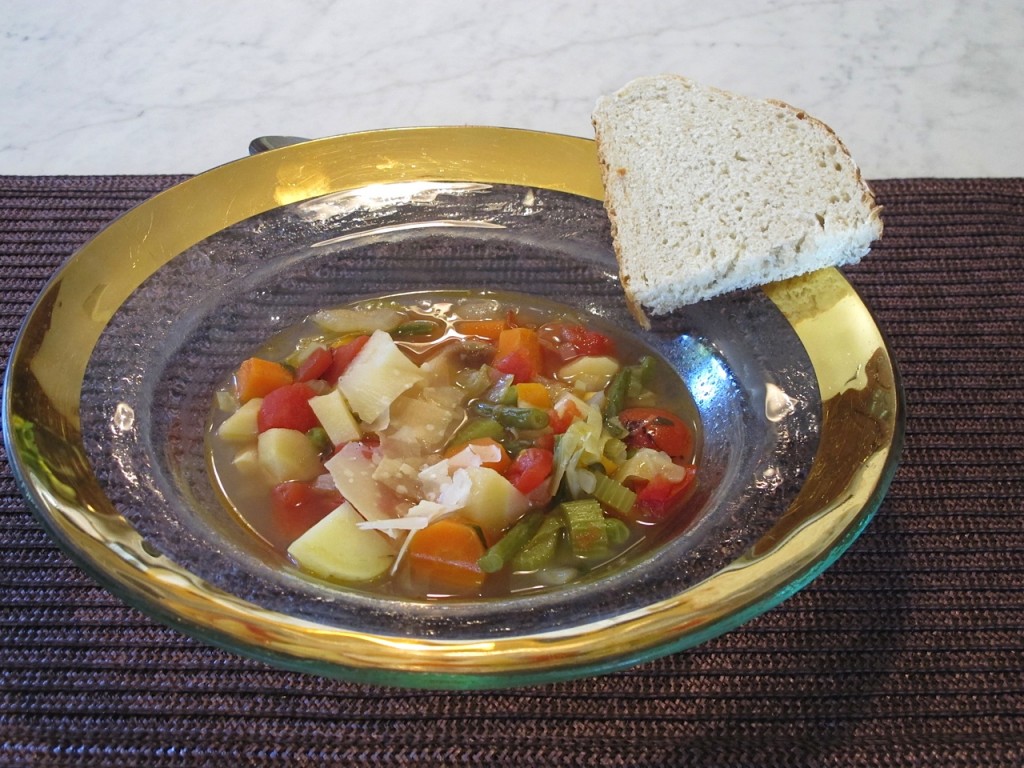
While at the tiny local eatery I jotted on a napkin the items I could see and taste in the minestrone: broth, orzo pasta, fresh shelled peas, carrots, onion…and when I returned to MY global kitchen I tried to replicate the taste and flavor of Italy. Surprisingly I hit it the first time and I have been making my easy version ever since. The crisp, fresh vegetables pair beautifully with the tender beans and pasta. It can be a meal in itself – though I like to accompany it  with good, crusty bread. And I can’t help but dust a touch of Parmigiano-Reggiano on top!

Delicious Minestrone

Marilyn’s Minestrone

Serves 8

Ingredients
  • ½ medium yellow onion, peeled and diced ½ inch
  • 3 Tbsp olive oil
  • 1 small yellow zucchini, diced ½ inch
  • 2 large carrot, peeled and sliced ¼ inch
  • 1 small parsnip, peeled and sliced ¼ inch
  • 2 celery, sliced ½ inch
  • 1 cup cabbage, thinly sliced
  • ¼ cup fennel root, diced ¼ inch
  • 1 medium yukon gold potato, peeled and cubed ½ inch pieces
  • 1 ear corn, kernels cut from the cob
  • 8 cups chicken broth (or water)
  • 2 cups fresh spinach, chiffonaded
  • 1 Tbsp tomato paste
  • ½ cup frozen or fresh shelled peas
  • ½ cup orzo pasta uncooked
  • ½ cup cooked fresh beans if available, or canned beans (I often use garbanzo beans or white beans)
  • Parmigiano-Reggiano
Instructions

In a large, heavy pot, sauté onion until soft and translucent, about 5 minutes. Add the rest of the vegetables (except spinach, peas and beans) and sauté an additional 5 minutes.

Add broth or water and bring to a boil. Reduce heat and cook 15 minutes.

Add spinach, tomato pasta, peas, pasta and beans.

Cook briefly until orzo is done. Serve with fresh grated Parmigiano-Reggiano cheese on top and some slivers of fresh basil (if it is summer).

A couple of cook’s notes:

  • I often add a bit of tomato paste to soups to deepen the flavor and so I buy a tube of tomato paste at the supermarket in lieu of a can. Napoleon makes a fairly generic version.
  • Sautéing the vegetables rather than just simmering them raw imparts a deep, sweet flavor.
  • Feel free to add vegetables such as green beans or parsnips when they are in season.
Share
Posted in Europe, Soups | Tagged , , , | 3 Comments