Chicken Wings

With the Beautiful Bride & Groom

“It’s too complicated, and you could never explain it.” These were my husband’s words when I asked him if he thought it would be a good idea to write about Maria and Jose’s wedding in Belize. Despite his misgivings, I decided to challenge myself and bring a slice of the experience to my readers. There were just too many funny, interesting and goofy things that occurred at our house before, during and after the celebration, I felt compelled to share!

I have never hosted a wedding in my home before, but in my former life I catered many parties and know the downside and the merits of doing so. On the one hand there’s the possibility of bad weather and the 50 strangers traipsing through my house. However, the cost savings and personal touches and intimacy of having a wedding at my own home were too tempting to pass up. Especially considering the couple getting married was Jose, our trusty handyman who lives downstairs and dear Maria, one of my favorite people in Belize (she taught me my favorite recipe for Arroz con Plantanos).

Jose rented tables for food served outside, and procured a caterer – the ever popular Palapa Bar down the beach, owned by friends Jodi and Scott. He found a Justice of the Peace and arranged for Maria’s family to come by Water Taxi from Corozol to San Pedro and to stay at AkBol Yoga Retreat, a short walk from our house.

Fast forward to the day before the wedding. We moved all the furniture out of our living room to make room for dancing and the DJ. Chairs and tables were delivered after a lot of negotiating with a taxi-van. We really had to guess as to the numbers of guests since Maria didn’t ask for RSVPs and had invited about 30 couples/families. Her informal attitude about the guest list should have tipped me off about how things would transpire…

I must admit I feel out of sorts if I don’t have a timeline and checklist for hosting any kind of event. So when I looked at the clock and it was only two hours before the 4 pm wedding, I was alarmed to note that Maria didn’t have her hair fixed, her dress was still hanging in the closet, the outside serving tables were not decorated, and bags and bags of paper goods were still down in her apartment . I kept telling myself, “This is not your wedding. You are not in charge.” Easy to say but I felt very, very uneasy with how things were going down.

Miraculously, the police officer’s wife came and decorated all the tables inside and out, a hairdresser down the road arrived with her hot curlers, tables were set and the wedding came together. The only glitch was that we forgot to tell the bride when it was time for her to make her appearance! After a few minutes, this was remedied as well. I was thankfully reminded that, in Belize, time moves more slowly and everything always works out.

Everything In Its Place

Another difference between weddings in the U.S. and down in Belize – the menu. When I think of weddings I imagine decadent buffet tables lined with beautiful appetizers or fancy china laden with artistic, faultlessly plated fare. The food at this wedding could not have been more different. Yet it was, in its own way, perfect. Here’s an idea of what we all enjoyed:

  • An array of dips (sausage dip, bean dip and pico de gallo)
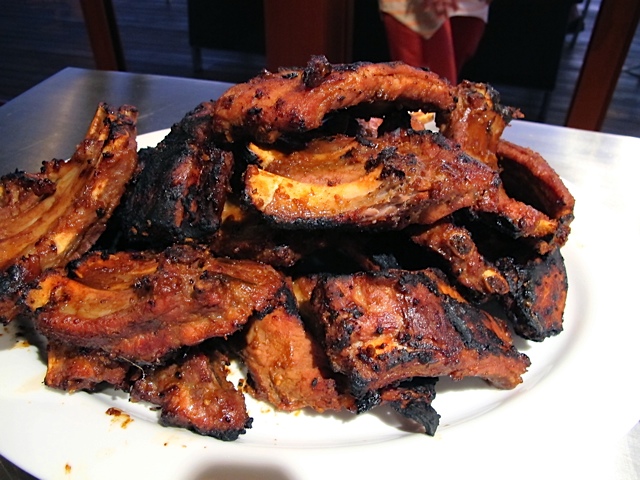
  • Smoked chicken drummettes rubbed with seasonings (my own recipe is below)
  • Steak tartare
  • Smoked beef (well done for the Belizeans, who won’t touch it if it’s even close to pink
  • Roasted beef with rolls for sandwiches and some in Fajita sauce with tortillas on the side
  • Fruit salad
  • Mashed potatoes
  • Cauliflower and broccoli medley
  • Coleslaw
  • Wedding cake (handmade by a friend in Corozol and brought via water taxi)

Now, a glimpse into some Belizean wedding traditions:

  1. The bride, seated in a chair, is hoisted above the crowd — much like Jewish weddings. However, she holds an open bottle of tequila and pours it down the throat of everyone who lines up for their “shot.” (I complied and gave it a try – but asked for “just a little shot.”)
  2. When the bride throws her garter, the man who catches it has to replace it on the leg of the single woman who has caught the bridal bouquet…WITH HIS TEETH. I am not making this up.
  3. After each wedding toast, the crowd chants “BE-SA, BE-SA, BE-SA” (meaning “kiss, kiss, kiss”) and the bride and groom have to kiss.

The Garter Experience

The ceremony began about 40 minutes later than planned and after hors d’oeuvres, a few toasts and delicious meal the party got into full swing around 7:00 pm and didn’t end until 1:30 am. Whew. What a night!

The next day, it took four of us six hours to clean, mop the floors, replace the furniture, and get the house back in order. But it was all worth it. I don’t know that I’ll ever have the occasion to hold another Belizean wedding in my home and my husband and I were honored to help this beautiful couple celebrate the beginning of their married life together!

And now for my own recipe for Spicy Chicken Drummettes:

The Wedding Buffet

Spicy Chicken Drummettes

Ingredients (per 5 lbs. chicken wings or drummettes or a large cut up chicken)
  • 4 cloves minced garlic
  • 2 minced medium sized shallots
  • 2 tsp. salt
  • 1+ Tbsp. 5-spice powder (available in most markets)
  • 2 tsp. regular paprika
  • 1 tsp. dry or 1 Tbsp. fresh rosemary
  • ½ tsp. cayenne or to taste-add more or less
  • 3 Tbsp. canola oil
Instructions

Mash garlic and shallots with salt.

Mix in the rest of listed ingredients and coat the chicken. Marinate a minimum of four hours or overnight in a covered container or zip lock bag in the refrigerator.

Remove chicken from marinade. Place on foil lined or parchment lined rimmed baking sheet.

Bake wings at 425 for 25-30 min or until brown. (Whole chicken pieces needs to be baked longer, about 50 minutes to one hour.) You can make this a day ahead then cover with foil and reheat.

Garnish with rosemary sprigs and sliced lemons to serve.

Note: The chicken wings or pieces can also be grilled on a barbeque, which I often do in the hot summer months.

Share
Posted in Appetizer, Central America, Meat, Poultry | Tagged , , , , | 5 Comments

Cuban Night


The Band at St. Clouds

Click on this link to view on YouTube

Earlier this summer, I received an email for a special dinner at a local eatery – St. Clouds in Seattle. The invitation read “we are strong supporters of and believers in the workers of the world (starting with our crew at St. Cloud’s) and taking a cue from our neighbors to the South in Cuba and Latin America who celebrate International Workers Day, we’ll serve Cuban food specials, Mojitos and Cuba Libres, and party all evening with the Supersones – the hottest Latin band we know, purveyors of gyratable Cuban son music, Latin salsa, and the best in celebratory music.” How could I resist?!? Community minded, the wonderful owners of St. Clouds have sponsored a cooking-for-the-homeless day every third Wednesday of every month (ten years and counting) to prepare meals for the homeless. They invite volunteers to assist with shopping, cooking and packaging the food.

I asked my friend Eileen to join me for this celebratory dinner to support the cause. And to have some fun! Always spontaneous, she agreed to accompany me and I was anxious to introduce her to one of my favorite Seattle neighborhood restaurants. It was a rare, balmy Seattle evening, and we were seated in the courtyard underneath an outdoor heater. It felt like we were attending the Oscars; we gawked at men with fedoras, women with short red dresses and even ladies older than the two of us as they arrived in their dancing attire. One of the many things I love about St. Clouds is the variety of patrons. On any given night I’ll see everything from families with rambunctious two year olds to hipsters adorned with tattoos. The owners seem to know and talk to their “regular” customers but greet everyone who enters with warmth and joviality.

After our extravagant dinner followed by apple pear pie for dessert, we were beyond full. We just wanted to sit and relax. Yet the band was playing incredible music and Eileen and I found ourselves dancing in a tiny space by the band. Soon the wait staff and many other patrons joined us on the dance floor! We burned a few calories and stayed until well past 10:00 pm.

Beautiful architecture in Havana

My youngest sister Kay traveled to Havana, Cuba in December 2010; she sent these pictures so I could get a sense of the city. She told me that, back in the 1940s, Havana was much like Barcelona – very European and featuring gorgeous architecture throughout the city. Today Havana is very run down – buildings are not maintained at all and 90% of them are quite dilapidated and in need of restoration and repainting. There are very few cars due to the cost and pervasive poverty; the taxi cabs are apparently old, large cars from the past. Regardless, I hope to travel to Cuba some day. In the meantime, I am fortunate to have the wonderful food at St. Clouds.

Old cars in Cuba

Speaking of food … I must write about the delicious dishes we sampled during our Cuban Night. We ordered one of the “specials”: “Cuban-style” braised, pulled beef flank steak served with a mound of stewed black beans, jasmine scented rice, fried plantains and cubed mango. The textures and colors and aroma were out of this world. And the taste…the taste. My taste buds were dancing. Sweet, salty, sour, bitter – the meal fired on all cylinders. I cornered owner John Platt and asked him how the meat was prepared; already the wheels in my mind were turning and I planned to try to create the flank steak in a simpler way at home using a chuck roast and my trusty pressure cooker. He was kind enough to jot down a kind-of-sort-of-guestimate of how he cooked and seasoned the meat. I then went to MY global kitchen and made a darned good rendition of pulled beef. Below is my version – I encourage you to put on some loud, Latin music and give it a try!

Delicious Cuban-style beef with beans, rice and mangos

“Cuban-Style” Pulled Beef

Serves 8

Initial Ingredients:
  • 1-3 lb beef chuck or beef round roast, trimmed of extra fat and cut into 1 ½ inch thick slices
  • 2 large cloves garlic, peeled and cut into slivers
  • 3 Tbsp extra virgin olive oil
  • ½ cup roughly chopped celery
  • ½ cup roughly chopped yellow onion
  • ½ cup roughly chopped carrot
  • 2 cups of beef stock, homemade or canned
  • Salt and ground pepper to taste
Ingredients after the meat is cooked:
  • ⅓ cup fresh squeezed lime juice
  • 3 Tbsp fresh orange juice
  • 1 large red pepper (cut into 1/4 inch slivers)
  • 1 medium yellow onion, cut into ¼ inch slivers
  • 2 jalapenos, seeds removed and cut small
  • 2 fresh diced Roma tomatoes
  • 2 cloves fresh garlic
  • 1 tsp cumin
  • ½ tsp ground cinnamon
  • ¼ tsp ground cloves
  • 2 Tbsp rinsed, drained capers
  • 1 large mango

(Note: the following instructions are given for making this in a 5-quart pressure cooker. However you could alternately braise the meat in the oven in a covered roasting pan at 350 until tender and use the same ingredients and method. It will most likely take 3-4 hours until the meat is tender enough to shred.)

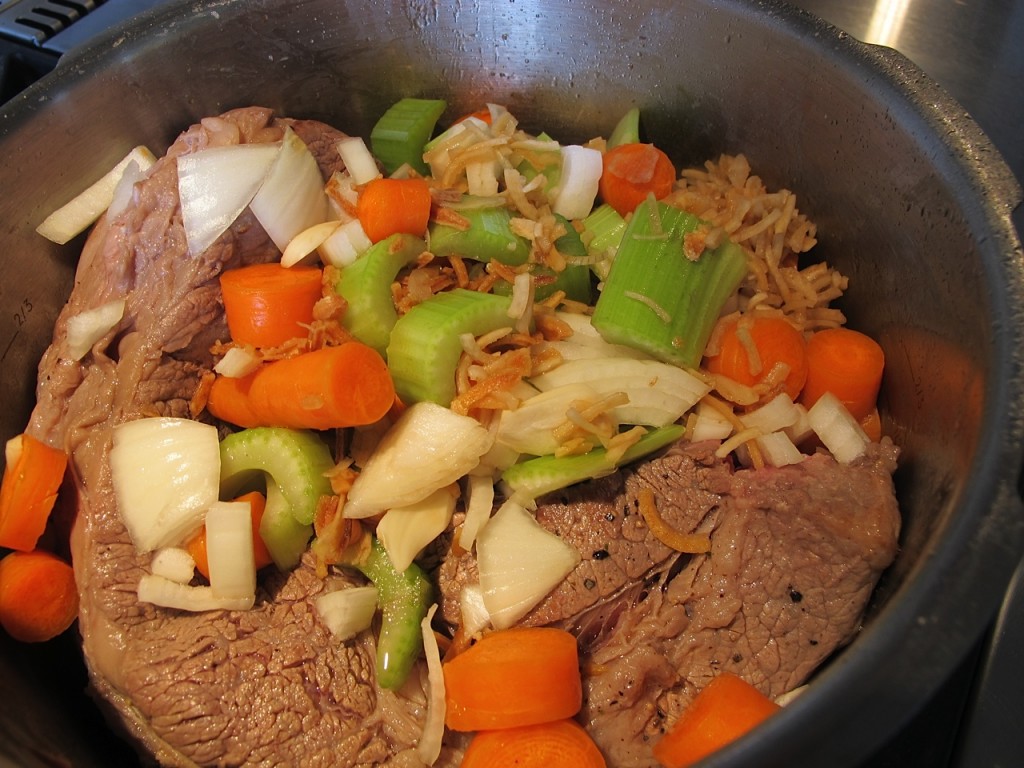
Beef and vegetables in the pressure cooker

Instructions:

Heat empty 5-quart pressure cooker for a couple minutes on medium high, add oil until it is hot. With tongs, add meat and brown on both of the large sides, each for about 3 minutes. Gently lift the meat out of the cooker, and season both sides with just a little salt and with ground pepper.

Put rack in bottom of the cooker and pour 2 cups of beef stock (homemade or canned if you must — if canned broth, use one 14.5oz can and add water to equal 2 cups) under the rack. Place the meat on top of the rack, adding the chopped carrot, celery, onion and garlic in between the slices. Cover with lid and bring to full pressure. Let it cook for 1 hour. Have the pressure come down on its own (15 minutes or so) then open the pressure cooker and remove the meat to a serving dish with sides. (The roast should be able to be shredded easily and be fork tender, or cook it another 5 minutes and let the pressure drop on its own again.) Remove all the juices and place in a measuring cup in the fridge (after it cools – remove the fat from the top). Also remove the rack. (Don’t clean the pressure cooker yet because you get to use it once more at the end of the recipe.)

Shred the beef and drain off most of the liquid (add it to the cup of juice in your fridge). Combine the shredded beef in a large glass bowl with about half of the lime and orange juices.

Meanwhile, use the same pressure cooker to sauté the rest of the vegetables – pepper, onion, jalapenos, garlic and tomatoes – until glossy and soft. (Note: I highly recommend wearing gloves to chop your jalapenos! I didn’t and, even though I thoroughly washed my hands, my eyes BURNED when I took out my contacts that night.) Add the shredded beef that was marinating with the rest of the lime/orange juice. Add about ½ cup of tomato/pepper mixture with the listed spice and enough beef juice from your initial pressure cooking or oven roasting to make the beef stick together. Serve topped with chopped fresh cilantro. To be authentic, accompany with steamed rice (I always do brown jasmine, which is not authentic – oh well) and stewed black beans and cubed mango. Bon Gusto!!

A few end notes:

  • I use leftovers chopped into hash with leftover red beets and potatoes – like red flannel hash. I like to top this with poached eggs – YUM!
  • Leftovers freeze well for up to 6 weeks
  • I always freeze the extra juice from the meat and use it as a base for vegetable soup. It’s an enriched, highly flavorful beef stock.

Check out more at Wanderfood Wednesday!

Share
Posted in Central America, Meat, North America | Tagged , , , | 2 Comments

My Global Challah


How to Make Challah

Click here to view on YouTube

Nearly every Friday morning for the past 40 some years, I have made challah – a special, braided bread eaten by Jews for the Sabbath and other holidays, although now it is fairly mainstream and I notice “Challah French Toast” on menus everywhere. I love the process of starting with four main ingredients – flour, egg, water and yeast – and ending up with a sweet, wonderful loaf of bread.

As empty nesters, my husband and I finish a large (2 ½ lb) loaf of bread by the end of the weekend. We slice it with soup or have it with dinner Friday night. Saturday morning the challah often morphs into French Toast, and the rest of the weekend sliced challah makes an appearance in all kinds of sandwiches. If there is a bit left over, I make bread crumbs and store them in the freezer. Whenever I visit my grandchildren, I inevitably end up baking at least one challah! (My children do this even when I am not there, but I like the grandmotherly touch.)

Somewhere long ago I recall reading that the smell of freshly baked bread is important for young children…maybe I made this up or dreamed it, but there is nothing like the smell that emanates from the kitchen when challah is in the oven. I have never found a “store bought” challah that tastes half as wonderful as mine.

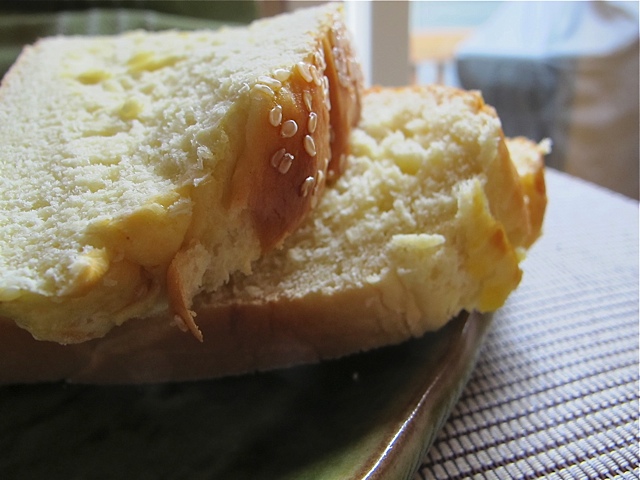
Light & Airy Sliced Challah

I first learned to make challah in my early twenties, working as a nurse in Iowa. I attended a cooking demonstration, and at that stage of my life I was baking all kinds of bagels and rye breads and was anxious to learn yet another type of bread. My mom really didn’t bake bread often; she had five of us under foot. I recall that the recipe I wrote down from the class and the braiding technique worked out the first time through, yet I didn’t love the taste of that challah. It wasn’t sweet enough or dense enough for my palate.

The recipe that follows is truly my own, and believe me I have tried roughly a dozen various formulas. I like a sweet, less eggy loaf. The amount of flour you need varies with the size of the eggs and with the weather. For example, if it is rainy you might need a bit more flour. Baking bread is an art, not a science. I began making this bread by hand, and then transitioned to a stand mixer or Cuisinart. At this point in my life, I stir and knead the bread without the help of a machine because I love the feel of silky dough on my fingers. You can easily double this recipe if you would like two large loaves (you can even freeze one) or one large loaf and a pan of cinnamon rolls. Bread making is one of my favorite past times, and I make all kinds of 100% whole grain breads, cinnamon rolls, oatmeal-honey bread, pumpernickel, buttermilk bread … you name it. The principles are the same.

This can be even simpler if you are pressed for time. You can make the dough, cover the bowl tightly with plastic wrap and leave it in the refrigerator overnight. The next day, take it out (it will have risen), braid it, let it rise for an hour and bake it. This is more manageable for those of you with a hectic, busy life; I know my children employ this technique because they are rarely around for 3 hours in a row. I realize that this is not the most healthful bread because it calls for white flour and sugar. I tried experimenting with whole wheat challahs and somehow it doesn’t seem the same. So for challah, I make an exception to my “at least 50% whole grain bread.”

You can view the video I included for a tutorial that includes instructions for braiding a round loaf. You can make a 3 braid, 4 braid (my go-to type) or a 6 braid loaf (my sisters do this). The dough can produce two smaller loaves or you can bake a smaller loaf and a pan of cinnamon rolls or pull aparts. Endless possibilities!

Beautiful Challah

Marilyn’s Global Challah

Makes one large or two small loaves

Ingredients
  • 1 1/4 c warm water
  • 1 package or 2 slightly heaping tsp dry yeast – not the quick yeast for bread machines (each package varies, so check yours.)
  • ½ teaspoon sugar
  • 2 eggs, room temperature (1 for the dough and reserve the other to glaze it)
  • Dash vanilla
  • 2 Tbs. (1/4 stick) very soft butter, soy margarine or canola oil
  • 1 ½ tsp. salt
  • Scant ½ cup sugar
  • 3 cups bread flour + 1 more cup measured out
  • Sesame or poppy seeds (optional)
Instructions

Whisk together warm water, yeast and sugar and wait 5 minutes until it bubbles.

Add 1 egg, vanilla and butter to the liquid yeast mixture.

Mix up the salt, sugar and 3 cups of flour in the large mixing bowl. Slowly add liquids into flour mixture. If needed, add the last cup of flour or you may need less depending on the weather, the size of the eggs and so on.

Finish kneading on the counter on a little flour. The dough should be a little sticky. Put in oiled large bowl and let rise covered with a dish towel or plastic wrap for one hour. Punch down and let it rest for five minutes. Put in large braid (2 ½ lb loaf) OR two smaller loaves (1 ¼ lb each) on parchment paper. Let it rise another 50-60 minutes covered with a tea towel or plastic wrap.

Brush the top with egg wash (1 egg + 1 Tbsp of water) mixed w/a little vanilla and sprinkle w/sesame or poppy seeds if desired. Brush seeds again with egg wash so they don’t come off.

Bake at 350 for 32 minutes for a huge loaf or 28-30 minutes if you’re making smaller loaves/rolls. The internal temperature should be 190 degrees if you have an thermometer to test the center of the loaf. (Round braided loaf takes 35+ min)

Remove from the baking sheet onto a rack to cool. Wait at least ½ hour to cut. Do not wrap in a plastic bag or freeze for at least 5 hours so the core is completely cool.

Check out more at Wanderfood Wednesday!

Share
Posted in Breads | Tagged | 15 Comments

The Best Belizean Barbeque


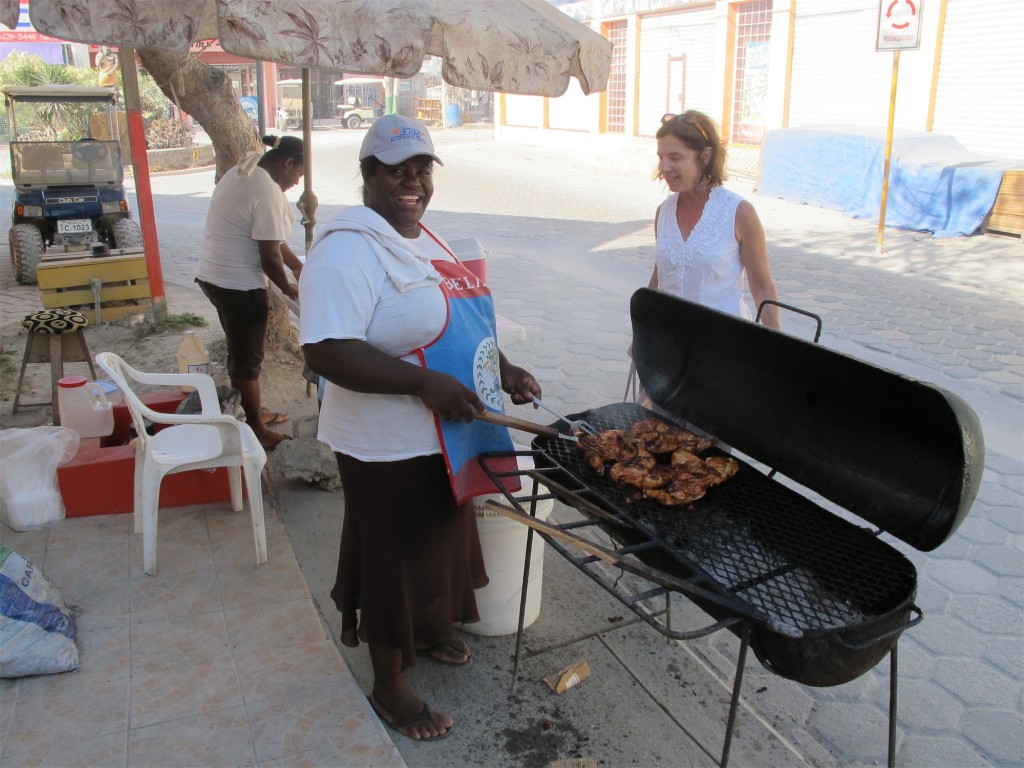
Stephanie and her Barbeque

To view on YouTube – go to http://youtu.be/enqq7hQXf_0

There are many, many “fast food” stands in San Pedro that sell “local” foods. Almost all of them feature three ubiquitous staples – chicken, rice and beans. And I am lucky enough to have what I believe is the BEST Belizean barbeque chicken stand right near my home.

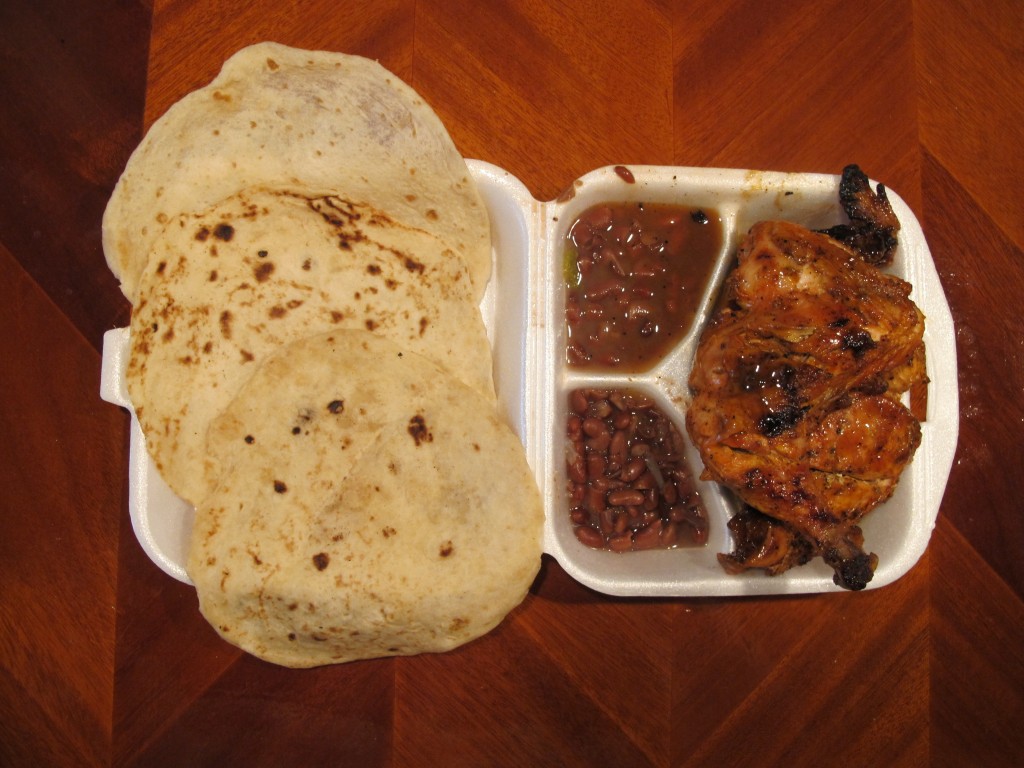
Every Sunday, a lovely local woman and her daughter set up their barbeque grill and coolers in front of the popular Belizean-owned grocery store. The sweet, smoky aroma from their cooking permeates the street and I rarely pass by without picking up some delectable chicken and beans. I order white meat (a quarter chicken) that she redips in barbeque sauce – and I choose a double order of “stewed” beans only, no rice. Flour tortillas are as large as a dinner plate and she kindly wraps them separately in a bag for me. A very filling meal for $5 USD!

Watching Stephanie at the grill.

During my last trip I decided to introduce myself and learn more about their little operation. Stephanie is the name of the woman who runs the show. She has five children and four grandchildren. The day I made the video that accompanies this blog, she told me she had risen early in the morning to buy 32 chickens that she quartered to make 128 pieces. Once the chicken was prepared she started on her huge, boiling pots of red kidney beans and rice and her daughter Bernice chopped countless heads of cabbage for fresh coleslaw. And of course she makes her own tortillas. She sets up around 9 am and usually sells out before 5 pm – sometimes as early as 1 pm. .

Delicious BBQ - chicken, beans & fresh tortillas.

The beans. Oh, the beans are so flavorful. Stephanie begins with fresh dried red kidney beans. She doesn’t soak them at all like I do but cooks them with onion, garlic and sweet bell peppers until the sauce thickens. She told me this takes her about 1 ½ hours, not long “if the dried beans are fresh.” The barbeque sauce is not homemade although she adds “special seasonings.”

She begins the tortilla making with 10 pounds of flour, and by the time we arrived at 2 pm she was out of tortillas and had to buy more handmade ones at the grocery store. Bernice was chopping additional cabbage to replenish their morning’s cooler-full. By my estimation Stephanie had only 10 or so more orders until her grill would be empty and she could go home and rest until next Sunday.

Below is my Barbeque sauce recipe that I make when I’m in Belize. I brought some to Stephanie, eager to get her opinion. She was pretty surprised that I would bother to create a homemade sauce for her, but I could tell that she was flattered nonetheless. I have changed some of the original ingredients that I use in the U.S. so that it is easy to find the components in the tiny grocery store in San Pedro. You can make it spicier with more red pepper flakes or habanero, sweeter with added honey, or less salty with less soy sauce. I am a sweet barbeque sauce fan but everyone has their individual tastes. To me a recipe is just a starting point, so make it your own.

Homemade Barbeque Sauce

Makes about 1 ¾ cups of sauce

Ingredients
  • ¾ c catsup
  • ¼ -1/3 c honey (or turbinado sugar if there isn’t honey at the Belizean markets)
  • ¼ c white vinegar
  • ⅓ c tamari or soy sauce (I prefer tamari but have to use soy in Belize and I use less)
  • 1 tsp crushed dry red pepper flakes or to taste
  • 1 tsp regular yellow mustard (dry mustard is good too)
  • ¼ tsp ground black pepper
Instructions

Using a medium sauce pan, heat all together for 5 minutes or until it just comes to a simmer. Remove from the stovetop and add more honey or crushed red pepper to taste.

Cool and store in the refrigerator for up to 1 month.

Use to marinate meats, for basting BBQ chicken, for sloppy joes, in salad dressings, etc.

Check out more at Wanderfood Wednesday!

Share
Posted in Central America, Condiment | Tagged , , | 4 Comments

Beet Pistachio Salad

From time to time, all the stars align to produce the perfect meal; this infrequently coincides with a rare, beautiful Seattle night. We just don’t have many “perfect” evenings where a group of friends can sit on the deck in sleeveless tops and shorts, and enjoy a balmy night from early evening until well past 10 at night. Truthfully, I can count the times this has happened on one hand. Thankfully, just such a night transpired this past weekend.

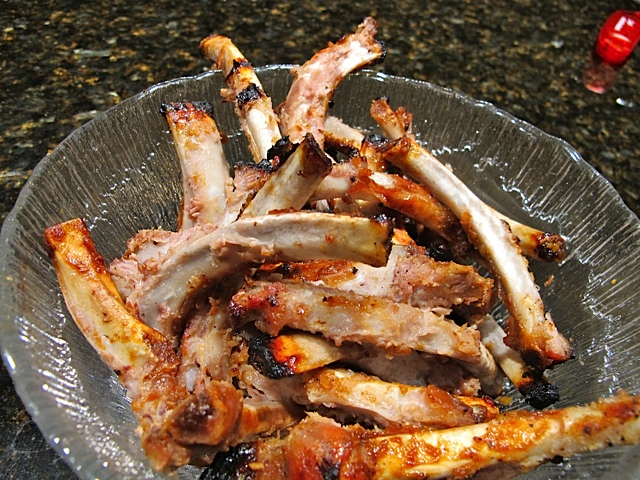
Delicious Ribs

This perfect meal revolved around my girlfriend’s heavenly ribs. They are, in my opinion, the best ribs this side of the Mississippi. She labors over them – boiling the ribs the day before serving in chicken broth with lots of garlic and ginger, then draining and marinating them again before they finally find their way to the barbeque grill. She admits it’s a lot of work but the sighs of delight from her family and guests make it oh-so-worth-it. Luckily I get invited around once a year for this memorable meal and it usually happens in conjunction with  a rare weekend visit by her adult kids. Double bonus!

The Aftermath

Champagne in hand, we sat on the deck visiting and watching the gorgeous sunset as we gazed west toward Seattle. The buildings downtown were bathed in red and orange and the Olympic Mountains seemed to glow as the setting sun peeked out behind rose and purple colored clouds. My friends compared this to the Hawaiian sunset. All I know is that it was beautiful beyond words.

Extraordinary Seattle Sunset

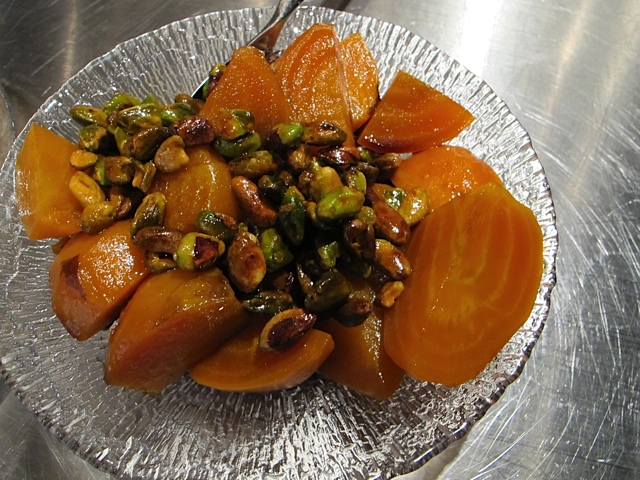
No one was in a hurry to eat, but around 7pm we reluctantly migrated inside to enjoy the ribs, Caesar salad and fresh beets. I am crazy for beets and eat them shredded and raw as a slaw, in beet borscht (soup), as part of main dish salads, sautéed in a little olive oil, or as a stand-alone salad. The beets were not on the menu, but I brought about 3 cups of roasted organic orange beets from my fridge since I was leaving at the crack of dawn the next day and couldn’t bear to throw them away. I intended for her to have them later in the week. Upon seeing the fresh, jewel-colored beets, my friend cried, “Let’s serve them!”

I didn’t want to plop them in a bowl without any embellishment, so I looked through her cupboards and dressed them lightly with thick, fruity balsamic vinegar and good olive oil, then liberally sprinkled in roasted, shelled pistachio nuts and fresh ground pepper. I was looking for walnuts to roast but couldn’t find any in the cupboard, so pistachio nuts were the default – and their bright green color and salty crunch were the perfect addition! I only wished I had some red beets for even more color. I thought about adding crumbled feta cheese but decided less was more. In addition to their vibrant color and pleasing taste, beets contain many healthful properties and are excellent for your heart and high in antioxidants that can reduce inflammation. Pistachios contain potassium, magnesium and phosphorus, so the beet salad I prepared ended up packing quite a nutritional punch!

Fresh Beet Salad

Everyone was good and hungry when we got in line at the informal buffet in the kitchen. The plates were piled high with ribs and large servings of Caesar salad, and to my delight the guests were very excited about the beets. We all had seconds of everything and folks wanted to know what I did to make the beets so wonderful. To me, fresh but simple preparation of vegetables always is best — and I will make these beets again for certain.

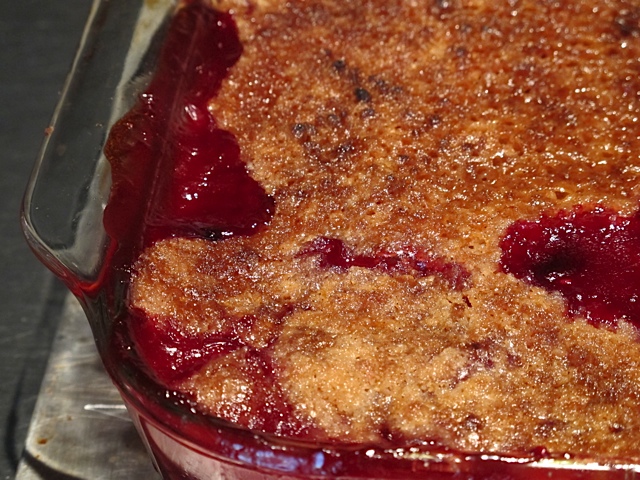
When dinner was over we pushed ourselves away from the table to relax outside. After an hour or so of chatting and mingling, we were ready for dessert – a freshly baked berry crisp topped with ice cream. The perfect ending to a perfect meal.

Heavenly Crisp

As a birthday gift to my friend’s son Matt, I let him choose what type of cookie he wanted and sent a list to him before the dinner – giving him several options – from chocolate chip to gingersnaps. As I predicted he wanted snickerdoodles, so I presented him with a large bag of about three dozen cookies. He quickly hid them upstairs in his room. I wonder how long they lasted!

Fresh Beet Salad

Serves 4

Ingredients:
  • 1 large bunch of organic beets
  • 1 Tbsp extra virgin olive oil
  • 1 Tbsp good quality balsamic vinegar
  • Sea salt and fresh ground pepper to taste
  • ½ cup shelled roasted pistachio nuts
Instructions:

Preheat your oven to 400 degrees. (I always use my toaster oven so I don’t heat the entire kitchen.)

Remove the beet greens and reserve for cooking later on. Scrub the beet bulbs well, trim off the root and stem ends and wrap them tightly in aluminum foil.

Place the wrapped beets in the oven for 50 minutes to one hour, until tender.

Remove from the oven and let cool for about 15 minutes inside the foil. Unwrap and put on kitchen gloves. The peel should be easy to slide off.

Cut into serving pieces (about 4-5 wedges per beet) and store covered in the refrigerator.

When ready to serve, bring them to room temperature. Add the mixture of olive oil, balsamic vinegar and salt/pepper. Place in serving bowl and top with the pistachio nuts.

End Notes:
  • Be sure to save the beet greens and sauté in a little olive oil for a delicious and healthful side dish.
  • This could morph into a salad too – I would combine some seasonal greens or arugula with the same vinaigrette and place the dressed beets and pistachios on top!
  • As mentioned, you could make this dish with traditional red beets or a combo of golden beets and red beets.
  • Chopped parsley would look nice on top.
  • Toasted walnuts or toasted pumpkin seeds would be a nice substitute for pistachios.
  • Alternately you could add some crumbled feta on top of the beets.

Check out more at Wanderfood Wednesday!

Share
Posted in North America, Salads & Dressings | Tagged , , | 2 Comments

Zucchini Soup– Main Street, U.S.A

Beautiful Clear Lake, Iowa

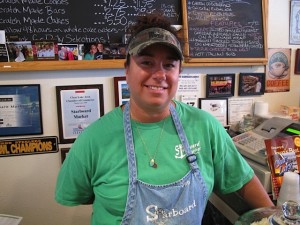
“Wow! They have red velvet cupcakes! Look at all the desserts!” My daughter was beyond delighted to discover Starboard Market – a charming little cafe on Main Street in Clear Lake, Iowa – just the type of place for which we had been searching. The front door reads: open between 11 am-ish to 3 pm-ish. At least 15 people stood in line to place their orders at the tiny restaurant when we arrived at 12:30. We knew we were in for a treat even before we entered the front door.

The handwritten menu board was extensive and it was difficult to choose between all the delicacies listed in sprawling cursive. We sampled a variety of sandwiches, soups (my favorite: corn-bread cheddar), salads and desserts. On display where we placed our order were more than 20 types of salads from the more pedestrian egg salad to a hearty bulgur with roasted vegetables and a healthy looking broccoli-raisin-sunflower combination.

Cupcakes on Display at Starboard Market

As we selected our desserts and paid our bill, I asked Jennifer Coffman (the owner and manager extraordinaire) if the pastries were homemade. “Yes, every day!” she replied. “Can I come early tomorrow to photograph you and talk to you about your food here?” She happily agreed, cautioning, “Please keep in mind that our website isn’t too good because in addition to the baking I am the I.T. director.”

Camera in hand, I knocked on the door the next day at 10:30 am. Four other women were carefully cutting bars, frosting cakes, stirring dressing into salads, and pureeing soups. Like cogs on a wheel, everyone worked together seamlessly. Jennifer told me she is not a “trained chef” but happens to be a good businesswoman who has worked in this industry for 21 years; Starboard has been open for 12 years, and was established in 1999 by Jennifer’s parents. After her mom and dad retired due to health issues, Jennifer and her sister worked alongside each other until a few years ago when her sister gave birth to twins. Jennifer is now alone at the helm, and begins her days at the restaurant at 6 am.

Starboard Market's Amazing Owner & Manger - Jennifer Coffman

Everything on the menu is made from scratch. You can visit their website to gaze at the countless dishes they serve. Besides running the restaurant she does some catering and has a small takeout counter serving gourmet dishes and treats. Jennifer and I really connected since I co-owned my catering business for 15+ years and know how efficient one has to be to produce good quality, consistent food day after day. On top of everything, during the tourist summer season she hosts seven Thursday night prix fix meals and patrons bring their own wine, beer and stemware (Starboard doesn’t’ have a liquor license). These special themed meals are always sold out.

“Port Out, Starboard Home!” is printed on the front of the menu. I wondered what that meant (I knew starboard refers to the right side of a boat when one is facing forward). Many use the acronym P.O.S.H .and the phrase simply means swanky or elegant. Next time I visit Starboard Market I’ll ask Jennifer, the cooking maven, if that is what she had in mind.

Following our lunch #1, we bought a slice of six layer African Chocolate cake covered with white frosting and heath bar bits. I am going to try my version of this cake for our Thanksgiving Bash this year. Jen also served a chocolaty, sweet bar called “death by Oreo cookie” – an Oreo laced brownie topped with a frosting that resembles Oreo filling then sprinkled with crumbled Oreos and drizzled with chocolate. It took four of us to polish off one bar! We loved Starboard so much that we returned for lunch and stood patiently in line for three consecutive afternoons (Jen called this a “trifecta” – I think it was more of a perfecta).

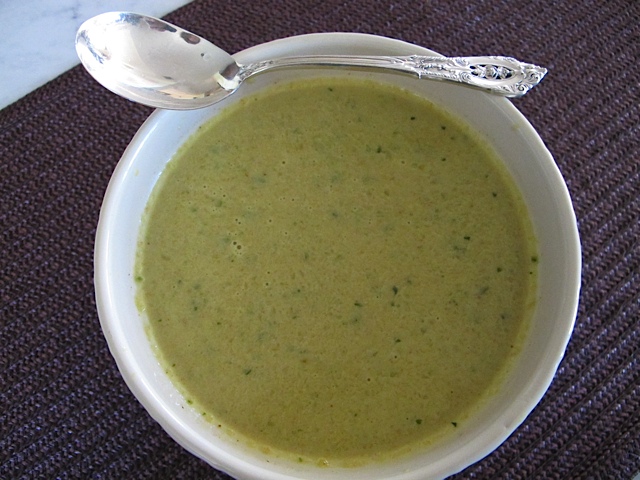
For our final meal in Clear Lake we ordered our sandwiches and desserts to go, then took everything to the City Park for a picnic. Jennifer included some curried squash soup and pumpkin cake with a rich cream cheese, almond scented icing for me to try, “on the house.” The soup delighted my taste buds, so before climbing into the car for the drive to the Minneapolis airport, I hoofed it back to the store to find out why the soup was so perfect. My new friend Jennifer kindly described it to me, explaining that this soup is created with “simple ingredients but made with love.” It was almost bisque like, with a beautiful color.

I am pleased to report that, upon my return to Seattle, I was able to make my own version that was close to Jennifer’s recipe. One thing I know for sure – I’ll be returning to Clear Lake next summer to try out more of Starboard Market’s delicious creations. Mark my words!

Zucchini Bisque

Zucchini Bisque

Serves 6-8

Ingredients:
  • 2 Tbsp butter
  • 1 1/2 lb large diced (1/2 inch) zucchini squash-I used a combo of 2 yellow and 2 green
  • 2 medium sized shallots, diced
  • 1 Tbsp curry powder
  • 3 cups seasoned chicken stock (canned or homemade)
  • Salt and white pepper to taste
  • 1/2-3/4 cups heavy cream
Instructions:

Heat butter in a 3 qt soup pot, and sauté squash and shallots until beginning to soften, about 5 minutes. Add curry powder and continue cooking and stirring for 1 more minute. Pour in chicken broth and bring it to a simmer, covering and continuing to cook for 10 minutes. Let soup cool a bit then place in food processor or use immersion blender to puree soup. Place blended soup into the pot and add cream salt and pepper to taste.

This can be frozen if desired before adding the whipping cream. Also, the whipping cream could be replaced with buttermilk for a tangier soup. Next time, I might even try replacing the whipping cream with coconut milk and add a squeeze of fresh lime to give it a Malaysian flare!

I served this with garlic bruschetta topped with fresh garden tomato and basil. The perfect summer dinner!!

Check out more at Wanderfood Wednesday!

Share
Posted in North America, Soups | Tagged , , , | 2 Comments

Fresh Tortillas with Summer’s Bounty

Domingo’s Tortilla Factory

To view on YouTube – go to http://youtu.be/dNuPZccWaxE

Tortillas, which mean “little cakes,” date back to around 10,000 BC. Initially made of native corn, today they are a staple of most Central American countries. Tortillas come in a number of different sizes and are often used in place of utensils to scoop up food or gravy.

There are several signs indicating tortilla “factories” in most towns in Belize. A factory might be a small shack with one woman hand patting dough on a cast iron slab, or a crude machine manufacturing this ubiquitous food.

Whenever I drive my golf cart to town in San Pedro for groceries, one of my favorite stops is our local tortilla joint – Domingo’s Tortilla Factory. Open from early morning until 2 pm, it is a hub of activity and I usually encounter a line of people waiting to purchase corn tortillas, flour tortillas, and fresh corn chips. This is also on my “must see” places for visitors to Ambergris Caye! Everyone delights in watching the steps involved in producing the corn tortillas from fresh Masa flour. It’s such a popular stop on my “tour” that I decided to shoot the video that accompanies this post.

Tortilla Factory

For $1.00 (USD) one can purchase a 1 pound package of the 5-inch, very thin tortillas, which usually contains about 40 individual flatbreads. They can be used for tacos, burritos, tortilla chips, flautas and enchiladas. I prefer the corn tortillas, which are more fragile and smaller in diameter than the higher gluten flour tortillas. My grandsons absolutely adore warmed tortillas with melted cheese –”more tortillas please” becomes their mantra.

I love eating the steaming little tortillas plain when they are still fresh, so I try to make this my final grocery stop before heading home for lunch. Otherwise I gently warm them in a frying pan with a little water to keep them soft. I then melt grated cheese on top and layer fresh tomato, cilantro and some shaved cabbage on top. A few drops of hot sauce make this an easy appetizer. The only downside is that corn tortillas don’t have much of a shelf life (1-2 days in the fridge at most).

Below is a fancier version of what I create for lunch or appetizers while I am in Belize. All the ingredients are readily available at nearly every produce stand throughout the town, and if you’re making this in the US, you could certainly improvise and exchange vegetables depending on the season. In place of avocado, you could use refried beans too. Also, Maseca (instant cornmeal flour) is easy to find at most supermarkets in the US. The recipe for tortillas on the back of the packaged corn meal is simple to follow too. I have made them in a cast iron skillet, and was shocked at what a breeze it was. Of course they turn out about ¼ inch or thicker instead of paper thin like the factory tortillas.

Bon Gusto!

Fresh Tortilla Tapas

Tortillas Tapas

Makes around 10

Ingredients:
  • 1 fresh avocado-scooped out of skin and mashed with fork
  • 1 cup shredded carrots
  • 1 cup ripe tomatoes – seeded and chopped
  • ½ cup zucchini – shredded
  • 1 Tbsp Extra Virgin Olive Oil
  • Juice of 1 fresh lime
  • ¼ cup chopped cilantro
  • Salt and pepper to taste
  • Fresh white cheese – about 1 Tbsp per tortilla
  • Hot sauce (Marie Sharp’s habenero is my favorite)
Instructions:

Mash avocado with a fork and add a bit of lime juice while continuing preparation of the rest of the veggies.

Combine shredded carrots, zucchini, and tomato with olive oil and the remaining lime. Add cilantro, salt and pepper to taste and set aside so the flavors combine for ten minutes or so.

Take a fresh tortilla, spread with some of the mashed avocado, then top with the vegetable mixture. Grate some fresh white cheese on top (In Belize I use Edam, but any soft cheese would be great). Garnish with fresh cilantro sprigs and a few drops of hot sauce.

See more at Wanderfood Wednesday.

Share
Posted in Breakfast, Central America | Tagged , , , , | 4 Comments

Perfect Plantain Pancakes

Making Plantain Pancakes

To many, plantains might look like ugly, black, oversized bananas. However if you’ve spent any time in Central America, you have hopefully been fortunate enough to enjoy this deliciously exotic and sweet fruit. Though I became enamored with plantains in my beloved Belize, I am thrilled to see them pop up more frequently on local menus in the States. Whether roasted and served alongside savory dishes or incorporated into decadent desserts, plantains are, in my opinion, one of the most versatile and delicious fruits around!

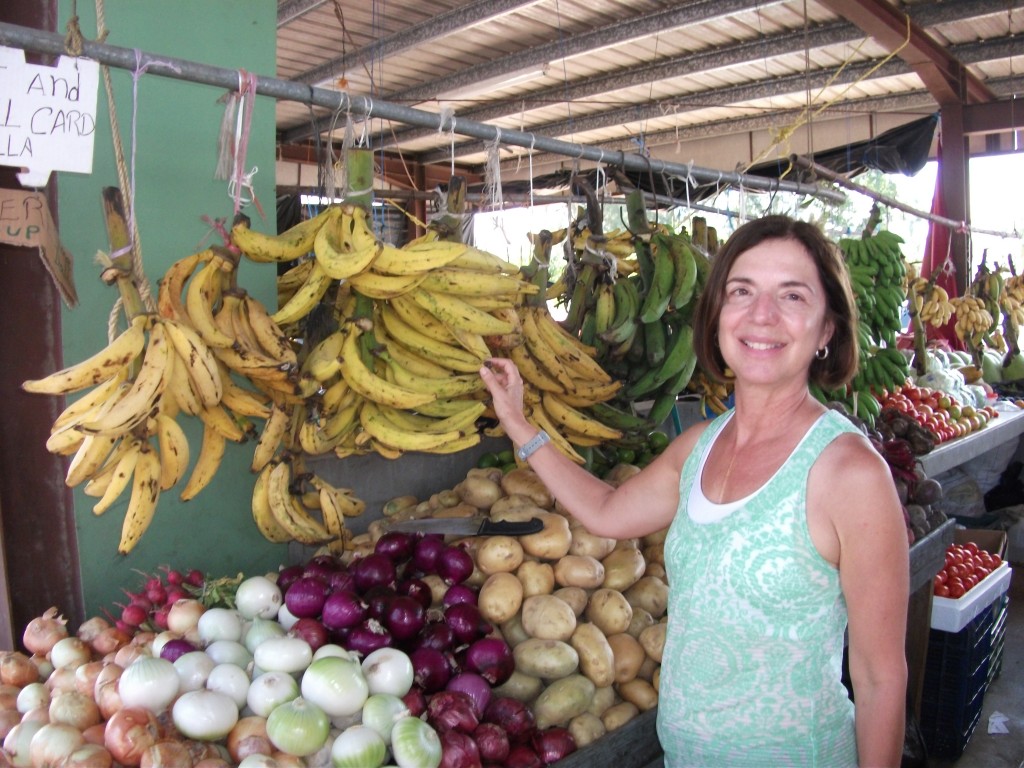
Beautiful plantains in Belize

A staple in tropical regions throughout the world, plantains and various types of bananas are ubiquitous in Belize. In addition to the pancake recipe I’m featuring below, my recipes for Arroz con Plantanos and other dishes are centered on this popular food. Firm fleshed plantains are generally used for cooking, and in contrast to the bananas most of us have peeled and eaten since youth, plantains are rarely eaten raw as they contain less sugar. In fact raw plantains are actually unpleasant to eat. Yet when prepared appropriately – they are heavenly. They can be cooked when they are green and unripe or further along in their evolution – when they turn black, soft and sweet. I love them fried, roasted, grilled or sautéed. And I was excited to learn that they are extraordinarily nutritious too! They are packed with potassium and vitamins and very easy to digest. They have been used as a staple in healthy diets throughout history.

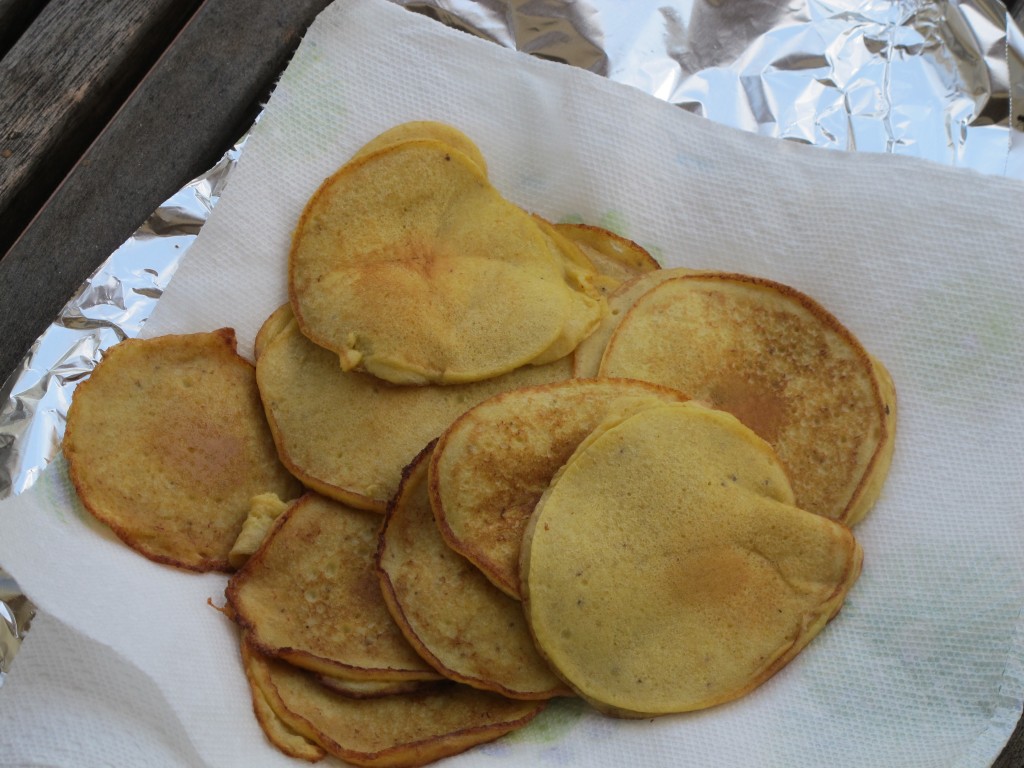
My favorite preparation is plantain pancakes. My husband was the first in our family to learn how to prepare these delectable breakfast treats. Nearly ten years ago our contractor brought some to work and Wayne was hooked. For years Wayne insisted on preparing them himself – never letting me near the kitchen while he fried stacks of pancakes for every guest who visited us in Belize. He would whip them up and I would serve these delicacies paired with local honey or pure maple syrup, freshly squeezed orange juice, tropical fruit and chicken sausage. Only recently did my husband share the exact ingredients and method with me. Of course, I’ll let him continue to make his special dish – but I was thankful that he was gracious enough to share the recipe with me so I could, in turn, share it with you.

Plantain Pancakes

Wayne’s Plantain Pancakes

Makes approximately 8 pancakes

Ingredients
  • 1 very ripe, black colored plantain-peeled and chopped into 1 inch pieces
  • 1 egg
  • 1 Tbsp all purpose flour
  • 1 Tbsp evaporated milk
  • 3-4 Tbsp grapeseed or vegetable oil
Instructions

To prepare the plantains, score the skin lengthwise with a sharp knife, and then easily remove the peel.

Put all ingredients except the oil in a blender and process until nearly smooth. If you like thinner pancakes, add more evaporated milk. For thicker cakes, additional flour can be incorporated to the batter.

Heat a large frying pan with about 1/4 inch of grapeseed or vegetable oil over medium high heat. Once the oil is hot, pour the batter into pancake shapes – about 3-4 inches in diameter. Fry until very dark on one side, flip and finish frying the other side.

Keep covered with foil to retain warmth. These are super sweet and good alone or with a smidgen of pure maple syrup, honey or fruit jam. Quickly reheated, any leftover pancakes taste almost as good the next day.

A few notes: If you can’t find overly ripe plantains, buy them when they are green or yellow and leave them in a paper sack until they are quite black. Also – I think you’ll learn that this super quick and tasty recipe luckily it can be doubled or tripled easily.

Check out more at Wanderfood Wednesday!

Share
Posted in Breakfast, Central America | Tagged , | 5 Comments

Orange Coated Nuts/Travel Food

Boarding a plane to Chitabe Lediba Bush Camp in the Okavanga Delta, Africa

I have been a traveling fool of late. Over the past few months I’ve journeyed to Belize, Iowa and California and soon I’ll head back to the Midwest and then up to Vancouver, Canada.  Some days I feel like I don’t even know which city I’m in, yet spending time with those I love makes it all worthwhile.  I have always been on the go; I am an eager explorer, seated in an airplane most every month of the year.

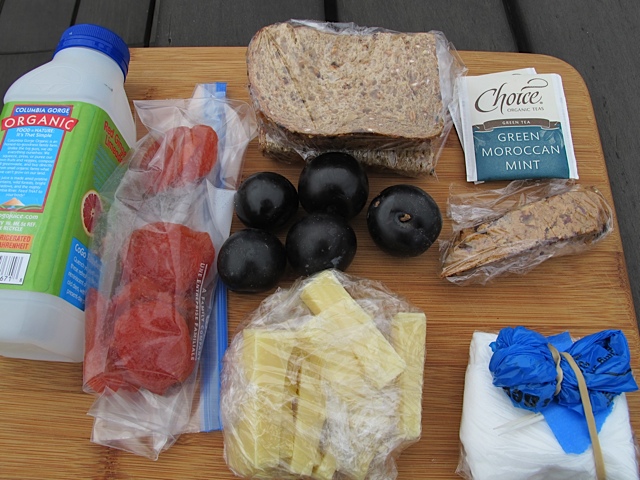
Because I consider myself to be an experienced traveler, I have, over the years, refined the way I prepare for my trips. And it should come as no surprise that food prep is on the top of my list. One might even say I am food obsessed before I head to the airport. Multiple Ziploc bags of healthy and tasty treats are stowed away to help stave off hunger. Whether I’m at home or on the go I tend to eat lots of small meals throughout the day and get crabby when I am hungry. So I know I travel best when I have a good variety of snacks and meals on hand.

I admit I am a “food snob.” I don’t eat fast food or prepared food or packaged foods with too many ingredients if I can help it. I rarely find anything of interest on the in-flight menus and can’t stomach the thought of paying $15 for some stale crackers and mediocre cheese. I haven’t found the edible items sold in airports to be any more appealing. That said, I have been known to purchase a candy bar if the mood strikes me.

Never fear, I have a formula. I only pack foods that aren’t perishable and can withstand twelve hours in my backpack. I always take things with me that are both healthful and tasty. Unfortunately, I have found myself sitting on a runway for two hours waiting for takeoff more often than I care to recall. I have been bumped from flights late at night when even airport restaurants and food chains are closed. This past weekend I was on a flight home over dinner and nothing was available AT ALL. NOTHING! No nuts, no boxed “snacks”, zero.

So the following is my list of what I have in my trusty Ziploc bags. I gather everything the night before my travels. I even affix a Post-It to my backpack as a reminder to fetch everything from the refrigerator before I depart.

Ready for my next trip!

Marilyn’s Trusty Travel Foods and Paraphernalia
  • Wet wipes and napkins and an extra plastic bag for garbage
  • Floss/toothpicks (I never use them in public but sneak into the airplane bathroom after my meals. There is nothing worse than a bright green piece of spinach sticking in my front teeth!)
  • PB and J on whole grain bread, each half wrapped separately. If it is breakfast time (many of my flights leave at 6 am) I pack a homemade scone in lieu of peanut butter and jelly.
  • Dried apricots, figs or unsweetened cherries and a handful or two of glazed nuts (see recipe below). These last for weeks in a tightly sealed bag.
  • An apple cored and quartered and rubbed with a little lemon juice. (It’s just too hard for me to eat an entire apple without having the peels stick in my teeth.)
  • Some type of homemade, non-crumbly cookie (they aren’t messy, they satisfy my sweet tooth and they last for days).
  • Cubed sharp cheddar cheese (good for your dental health, according to my dental student son).
  • Tea bags of my choosing so I can actually drink something other coffee that is luke-warm.
  • An empty water bottle that I fill after going through security.

Here is my recipe for Glazed Nuts. They travel well – even when it is hot outside. I bake these in my trusty toaster oven because there’s no need to heat up my large oven for just a few nuts!

Glazed nuts

Glazed Nuts

Ingredients
  • 3 Tbsp real maple syrup
  • 2 tsp orange zest (I have used lemon or lime or grapefruit too)
  • 2 pinches of table salt
  • 3 cups mixed nuts (almonds, walnuts or pecans)
Instructions

Preheat toaster oven or regular oven to 300 degrees. Cover the flat baking sheet for the toaster or for your oven with aluminum foil.

Mix maple syrup with orange zest and salt. (I recommend using a microplane grater for grating the citrus zest. Feel free to add more or less.)

Add the nuts to the bowl and mix all ingredients together until everything is coated.

Transfer to the flat pan that goes into a toaster oven (or to a regular cookie sheet for the oven). Bake at 300 degrees for 18 minutes.

Remove from oven and allow to cool for 5 minutes, then transfer the nuts to a bowl. They are sticky and might be hard to remove and they take a while to cool thoroughly, so keep breaking the pieces apart.

I always keep a cup of these on my kitchen counter and I freeze the rest for up to two months.

Check out more at Wanderfood Wednesday!

Share
Posted in Odds & Ends, Travel | 2 Comments

Chilling with Horchata

Making Horchata

Most take-away food stands in Mexico and several taco trucks on the west coast of the United States include horchata (pronounced “or CHA ta”) with their beverage choices. When I first saw it I was a bit skeptical. It has a milky appearance and is usually contained in a huge glass barrel and doled out using a large ladle into plastic cups filled with ice. But the second I tasted it I was hooked. Its sweet creaminess provided the perfect relief from the hot afternoon sun.

Roadside sign for Horchata

Horchata varies throughout Latin America and each country utilizes unique flavors. Every location seems to have their own version – making use of  everything from ground seeds and nuts to rice and other grains. In Mexico, horchata is always made with rice and cinnamon and from time to time there is a hint of vanilla. Puerto Rico, Venezuela, Nicaragua and Honduras also serve horchata but flavor it differently depending on the country. Horchata, together with tamarind and hibiscus flowers or jamaica (pronounced “huh MY ick uh”), are the three typical drink flavors of Mexican aguas frescas.

My grandson drinking Horchata

Though it is available in both ready-to-drink (shelf-stable or refrigerated) and powdered form in many grocery stores throughout Central America, my daughter learned how to make it from scratch. She used turbinado sugar from the tiny grocery store close by and we made tray upon tray of ice cubes to cool it down. It’s quite simple and can be made in large batches to keep us cool on hot, sticky days. My grandson had a permanent horchata moustache on his face – asking for this cool drink (which he called hor-chakka) every time he returned from the beach.

Mexican Horchata

Makes approximately 2 quarts

Ingredients
  • ½ cup sugar
  • 1 ½ cups white rice
  • 5 cups water
  • ½ Tbsp ground cinnamon
  • ½ Tbsp vanilla
  • 1 cup full fat milk (some people prefer rice milk)
Instructions

Make a simple syrup by combining ½ cup sugar with ½ cup water in a saucepan and bringing to a simmer until the sugar dissolves. This can be made in advance and stored in an airtight container in the refrigerator.

Check your rice for debris and rinse it well under cold water and drain. Put washed rice with 2 cups water and ground cinnamon in the blender along with the simple syrup (above) and blend on medium high for 1 minute. Add remaining 3 cups of water so it all gets ground together. Let sit at room temperature for at least three hours or refrigerate this mixture overnight in a covered container.

The next day or three hours later, strain the mixture and discard the rice. To the remaining liquid, add the milk and vanilla. Keep refrigerated until ready to drink, then stir well before pouring and serve over ice.

Horchata is such a refreshing drink and is the perfect accompaniment to spicy foods!

Check out more at Wanderfood Wednesday!

Share
Posted in Beverage, Central America | Tagged , | 2 Comments