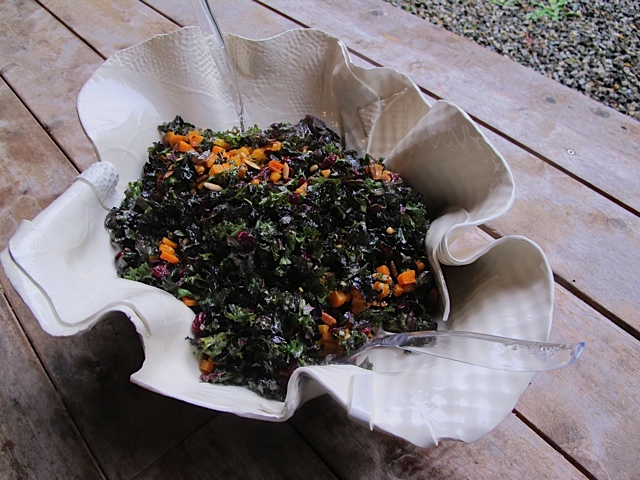
Click here to view recipe.
A Sinful Slice
My youngest son celebrated his 29th birthday at the end of February – the 21st to be exact. Each year I ask him what kind of cake or pie he’d like. I’ve told you before how much I adore birthdays, how loved I always felt as a child when my birthday rolled around, and so I try to make the day extra special for my kids and grandkids. Since Jake is the only one of my three children living in Seattle right now, he gets the added bonus of a birthday dessert of his choosing.
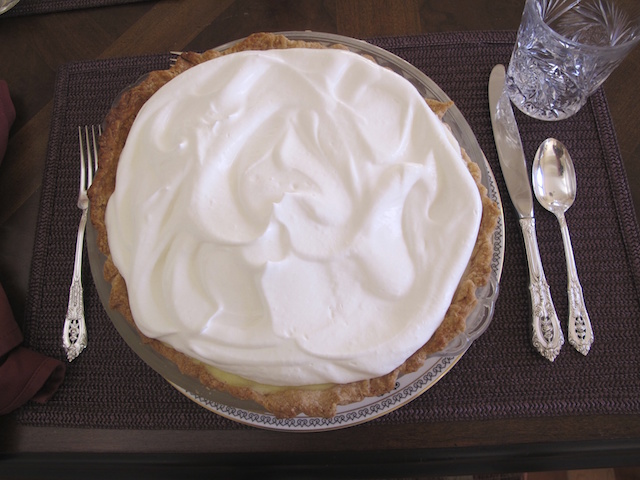
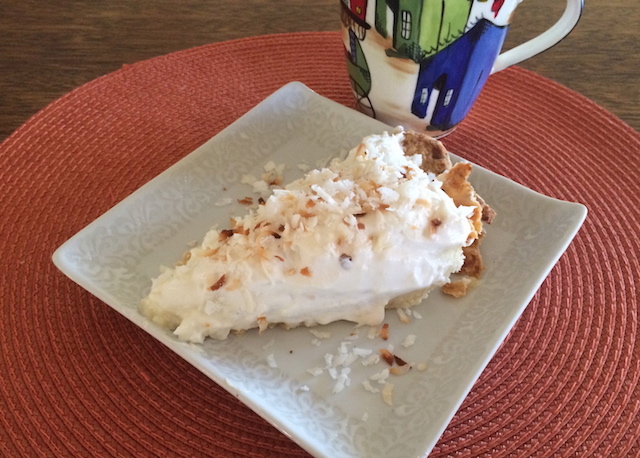
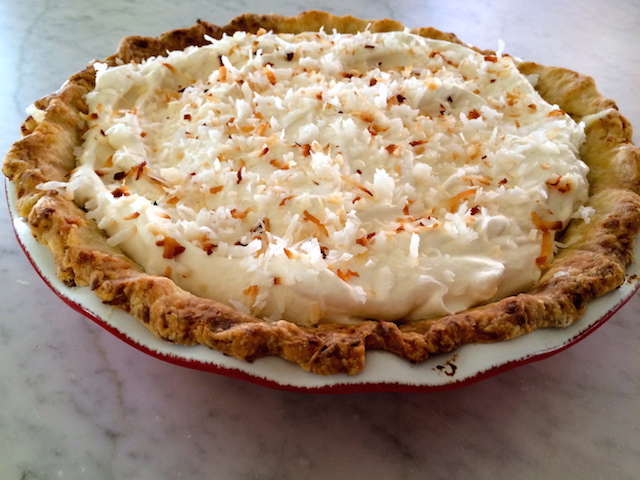
It always tickles me to hear his requests because he’s not a chocolate fan …hardly even a sweets fan. Granted, he does like an occasional warm homemade chocolate chip cookie or a slice of lemon bread but most often he passes on dessert. When forced to choose, Jakey Boy tends to like creamy, comforting types of pies or desserts: tapioca, banana cream pie (last year’s request) and such. This year, he asked for a coconut cream pie fashioned after Seattle restaurateur Tom Douglas’s creation.
The Perfect Pie
So I got to it. I started with a quick internet search and bingo…I found the transcript of a local TV cook’s show that included this recipe. Of course I decided to make it a bit easier by eliminating anything I would have to buy for the sole purpose of the recipe; for instance, I didn’t use large coconut shreds to garnish and I did not even consider making white chocolate curls (in my mind, white chocolate isn’t chocolate but just overly sweet goop!). And 2½ cups of cream to whip for the topping? That is so excessive for me. I used a lot less – with less sugar too. By the way, the original recipe says it serves 6-8; in my world I could no more eat an entire slice of this pie than kiss the tip of my elbow. I’d say it serves 10 easily… 10 normal eaters who don’t gorge themselves. In case you are interested, here is the link to the original recipe I found online.
Despite the intricacies of the original, I must admit that this just wasn’t that hard to make. The crust was easy for me – I had to practice patience by sticking around and waiting to roll it out, then wait another hour or so to bake it. The bottom line is that I would make this coconut pie again – it’s not as time consuming as other desserts I’ve mastered. I’d put bittersweet chocolate curls on top but that wouldn’t be very authentic, would it?
And as the youngest (by 6 ½ years) of my three children, Jakey Boy tagged along to baseball games, attended high school and college graduations, fixed numerous computer glitches, and he’s been an on call babysitter and ski instructor for his nephews and niece…so it’s about time he gets what he desires. Cheers to my Jakey Boy. I’ll always make him the dessert of his dreams on his birthday!
Coconut Cream Pie
Original Recipe by Tom Douglas; Updated by Yours Truly
Serves 10

Ingredients
1 Pre-baked and cooled 9-inch Deep Dish Coconut Pie Shell (See recipe below)
Coconut Pastry Cream Ingredients
- 1 cup whole milk
- 1 cup canned unsweetened coconut milk, shake well before opening
- 2 cups shredded sweetened coconut
- 1 vanilla bean, split in half lengthwise (substitute 1 tsp pure vanilla extract if you must)
- 2 large eggs
- 10 tablespoons (½ cup plus 2 tablespoons) sugar
- 3 tablespoons all-purpose flour
- 4 tablespoons (1/2 stick) salted butter, at room temperature
Whipped Cream Topping Ingredients
- 1 cup heavy cream, chilled
- 1 ½ Tbsp granulated sugar
- ½ teaspoon vanilla extract
Garnish Ingredients
- ¾ cup sweetened coconut flakes, toasted until lightly brown in the oven (300 degrees for 10 minutes or so. Watch carefully!)
Instructions
To make the Coconut Pastry Cream, combine milk, coconut milk and shredded coconut in a medium saucepan over medium-high heat. Using a paring knife, scrape seeds from vanilla bean and add both scrapings and pod to milk mixture. (Note if you don’t have a vanilla bean, add one teaspoon of pure vanilla extract). Stir occasionally until mixture almost comes to a boil.
In a medium bowl, whisk together eggs, sugar and flour until well-combined. Temper eggs by pouring a small amount (about 1/3 cup) of scalded milk from the mixture you are cooking stovetop into egg mixture while whisking. Then add the warmed egg mixture to the saucepan of milk and coconut. Whisk over medium-high heat until pastry cream thickens and begins to bubble. Keep whisking until mixture is very thick, four to five minutes more.
Remove saucepan from heat. Add butter and whisk until it melts. Remove and discard vanilla pod. Transfer pastry cream to a bowl and place it over another bowl of ice water. Stir occasionally until pastry cream is cool. Place a piece of plastic wrap directly on surface of pastry cream (to prevent a skin from forming) and refrigerate until completely cold. The pastry cream will thicken as it cools. When pastry cream is cold and you are within a few hours of eating this dessert, fill cooled pastry shell, smoothing the surface with a rubber spatula.
To prepare Whipped Cream Topping, in an electric mixer fitted with a whisk attachment, whip heavy cream with sugar and vanilla extract to peaks that are firm enough to hold their shape. Spread on top of pastry cream, and sprinkle top with cooled toasted coconut. Refrigerate until serving.
Cook’s Notes:
A step ahead: If not serving immediately, keep the pie refrigerated, covered with plastic wrap. The finished pie should be used within a day.
The coconut pastry cream can be made a day ahead and stored in the refrigerator, covered with plastic wrap as described above.
Coconut Pie Shell Instructions
Serves 8 – 10
Note: You will need to ‘blind-bake’ the pie shell, which means bake the unfilled pastry-lined pan. Use dried beans to weight the bottom of the crust and keep it from puffing up during baking. You can store your ‘pie beans’ in a jar and use them over and over. Very cold butter will give you a flakier crust. If your butter is not very cold, you could set the diced butter in the freezer for 10 minutes before making your dough.
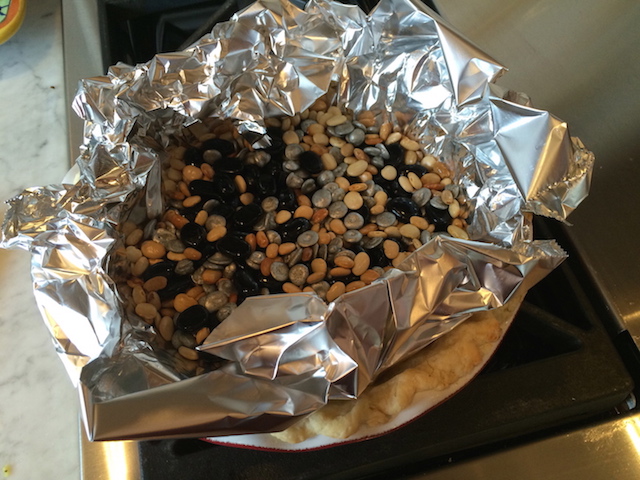
Baking Beans!
Pie Shell Ingredients
- 1 cup plus 2 tablespoons all-purpose flour, plus extra for rolling dough
- ½ cup sweetened, shredded coconut
- 8 tablespoons (1 stick) cold unsalted butter, cut into ½-inch dice
- 2 teaspoons sugar
- ¼ teaspoon kosher salt
- ⅓ cup ice water, or more as needed
Instructions
In the bowl of a food processor fitted with a metal blade, combine the flour, coconut, diced butter, sugar, and salt. Pulse to form coarse crumbs. Gradually add the water, one tablespoon at a time, pulsing each time. Use only as much water as need for the dough to hold together when gently pressed between your fingers. Don’t work the dough with your hands, just test to see if it is holding. The dough will not form a ball or even clump together in the processor, it will still be quite loose.
Place a large sheet of plastic wrap on the counter and dump the coconut dough onto it. Pull the plastic wrap around the dough, forcing it into a rough flattened round with the pressure of the plastic wrap. Chill for 30 minutes to an hour before rolling.
To roll the dough, unwrap the round of coconut dough and put it on a lightly floured board. Flour the rolling pin and your hands. Roll the dough out into a circle about 1/8-inch thick. Occasionally lift the dough with a board scraper to check that it is not sticking and add more flour if it seems like it’s about to stick. Trim to a 12 to 13-inch circle. Transfer the rolled dough to a 9-inch pie pan. Ease the dough loosely and gently into the pan. You don’t want to stretch dough at this point because it will shrink when it is baked. Trim any excess dough to a 1- to 1 ½-inch overhang. Turn the dough under along the rim of the pie pan and use your finger to flute the edge. Chill the unbaked pie shell at least an hour before baking. (This step prevents the dough from shrinking in the oven.)

Coconut Crust
When you are ready to bake the pie crust, preheat the oven to 400 degrees. Place a piece of foil or parchment in the pie shell and fill with dried beans. (This step prevents the bottom of the shell from puffing up during baking.) Bake the pie crust for 20 minutes, or until the pastry rim is golden. Remove the pie pan from the oven. Remove the foil and beans and return the pie crust to the oven. Bake for an additional 10 to 12 minutes, or until bottom of crust has golden brown patches. Remove pie crust from the oven and allow to cool. completely.
Cooks Notes:
The dough can be wrapped in plastic and stored in the refrigerator for a day or two, or frozen for a few weeks. Also the dough can be rolled out and fitted into a pie pan, and the unbaked pie shell can be wrapped in plastic and refrigerated or frozen for the same amounts of time. Frozen pie shells can be baked directly out of the freezer.