Low Fat Salad Dressing!

Hiking and Hanging out with Rachel, Kay & Susan

Sometimes I enjoy being the eldest of the three girls in my family of origin. That said, I often feel like I serve as the guinea pig for my younger sisters, Susan and Kay. I was the first of us to have trouble reading small print, the first in my family to have a child apply to college, the first to put on a wedding, the first (and only so far) to become a grandmother.

I would describe my mom, Merry (yes, she spelled it like that) as a “force.” She married after knowing my dad only three months and she was in her thirties, which back in the 1940’s was like being an old maid. She had four older sisters and four older brothers, and felt extremely close with three of the sisters – Esther, Tilly, and Lena. They called each other by affectionate “code” names ; mom’s designated name was JET LEE. Perfect for her.

Sadly, my mother died at the very young age of 71. Age 38 at the time, I didn’t have friends who had lost their mothers. Her death came as a shock to me. Besides being fun, energetic, capable and smart, my mom left a legacy of closeness with her sisters and brothers. We girls adopted her strong focus on family and for 20 years so far, have made a point of arranging a trip together sans husbands and kids at least yearly if not more often. Sure, we have our cat fights and squabbles but we three know that if we needed our sisters for any reason, we would get on a plane and be there with each other in a heartbeat.

We also were reared in a family that LOVED birthdays. In my youth, that day was so special because we chose what variety of cake (my favorite was angel food with pink buttercream frosting!!) we wanted to have mom bake, we selected our favorite dinner menu, and all through the house were pasted notes on mirrors, in drawers, on our pillow (no Post-It notes back then) with affectionate “I love you” and “Happy Birthday sweetheart” messages written in bright colors with hand drawn smiley faces. To this day, I still love my birthday.

It followed suit that my two sisters gave me the choice for a destination to celebrate my 60th birthday. I wanted an easy place for our journey. I searched for a location where the weather was warm and the stress nonexistent. I chose The Enchantment in Sedona, Arizona. On the surface, definitely not the most exciting or exotic locale, but I knew we could partake of tasty meals, hike, bike, swim, exercise, walk around in our bathrobes, read, knit and experience a great time. As an extra bonus my daughter Rachel, whose 33rd birthday fell two days after my 60th, surprised me and accompanied us for three of our five days while my husband babysat her 22 month old son. Acts of kindness such as this are the reason I have stayed married to him for 39 years and counting.

Cocktails with Susan

We all shared a room and slept two to a bed. My three children sent me a beautiful bouquet of unusual flowers EVERY SINGLE DAY. Kay and Susan sang songs with made up lyrics, showered me with cool gifts and made my birthday so very special. We shared meals at the spa and had dinner and happy hour about half the time at the Enchantment Resort’s Tii Gavo.

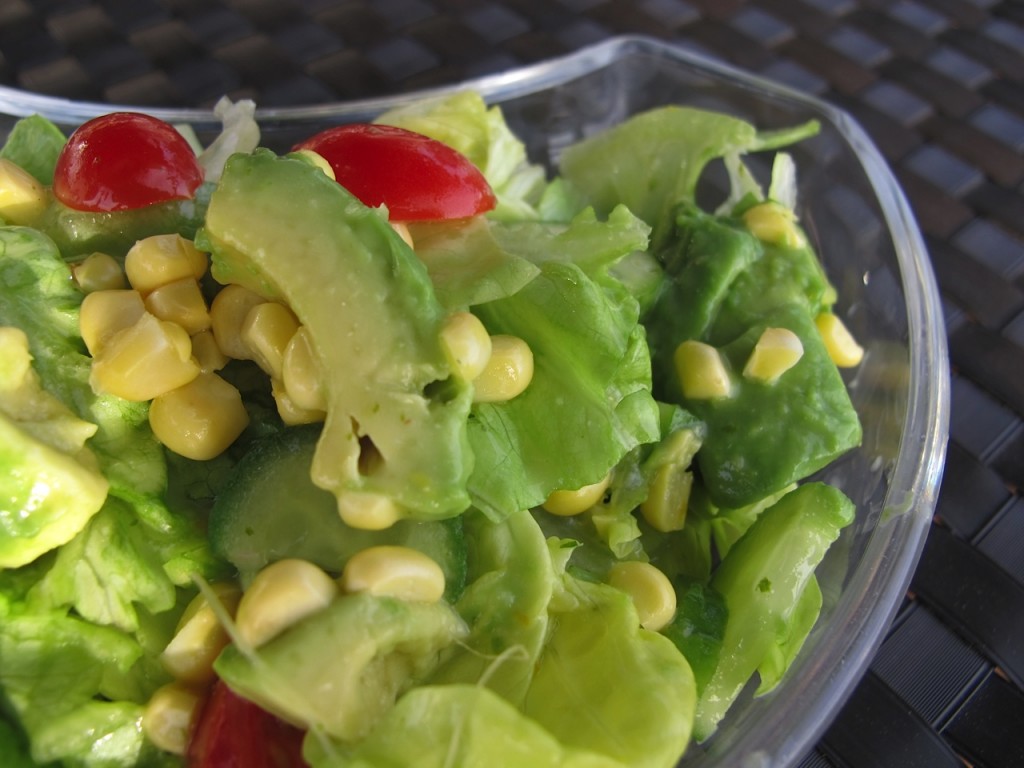
Every day we participated in numerous activities and one of my favorites was an afternoon cooking class at the spa restaurant. The lesson turned out to be quite entertaining, and the chef demonstrated a delicious, low-fat salad dressing. I never eat low-fat anything yet I absolutely adore this dressing and make it often – surprising friends and family by telling them that it’s healthful. Instead of using tons of fat in the dressing, much of the oil is replaced with “thickened” water (see recipe below). This information and methodology interested me and I think you’ll agree if you make this recipe that it is a pretty cool concept. I use this salad dressing to top seasonal or delicate greens with sliced grilled chicken, fresh steamed asparagus pieces and avocado, sprinkled at the end with toasted sunflower seeds. The pale green dressing, its flavor punctuated by citrus juices, wasabi and mustard also tastes amazing drizzled over a piece of halibut or salmon, and even on top of grilled veggies.

Fresh Salad with Mii Amo Citrus Vinaigrette

Mii Amo Citrus Vinaigrette (with my changes)

Makes 3 cups of dressing*

Ingredients
  • 1 garlic clove
  • 12 sprigs of fresh cilantro (about 3 Tbsp)-stems and leaves both
  • 1 medium sized shallot
  • 2 tsp. dry mustard
  • 2 tsp. dried wasabi powder
  • ½ cup seasoned rice wine vinegar
  • 1 lemon, zest and juice
  • 1 lime, zest and juice
  • 1 orange, zest and juice
  • 1 ½ cups “thickened water” (2 Tbsp cornstarch & water – see below) **
  • ½ cup canola/olive oil mixed together (or just olive oil)
  • Salt to taste
  • Honey to taste (if you like it a bit sweeter)

Instructions

** Prepare the “thickened water” by making a slurry of 2 Tbsp cornstarch whisked into 2 Tbsp of cold water, then slowly add to 2 cups of boiling water in a saucepan. Simmer until thickened for one or two minutes. Refrigerate until cool.

Place all ingredients except oil into the blender. Slowly drizzle the oil into the blender while it is still running to emulsify. The dressing will be fairly thin. Store in the refrigerator for one week to 10 days.

*You can easily cut this recipe in half if you don’t want three cups – or make it all and give some to friends!

Check out more recipes at Wanderfood Wednesday!

Share
Posted in Condiment, North America, Salads & Dressings | Tagged , , | 2 Comments

Coleslaw in Ambergris Caye

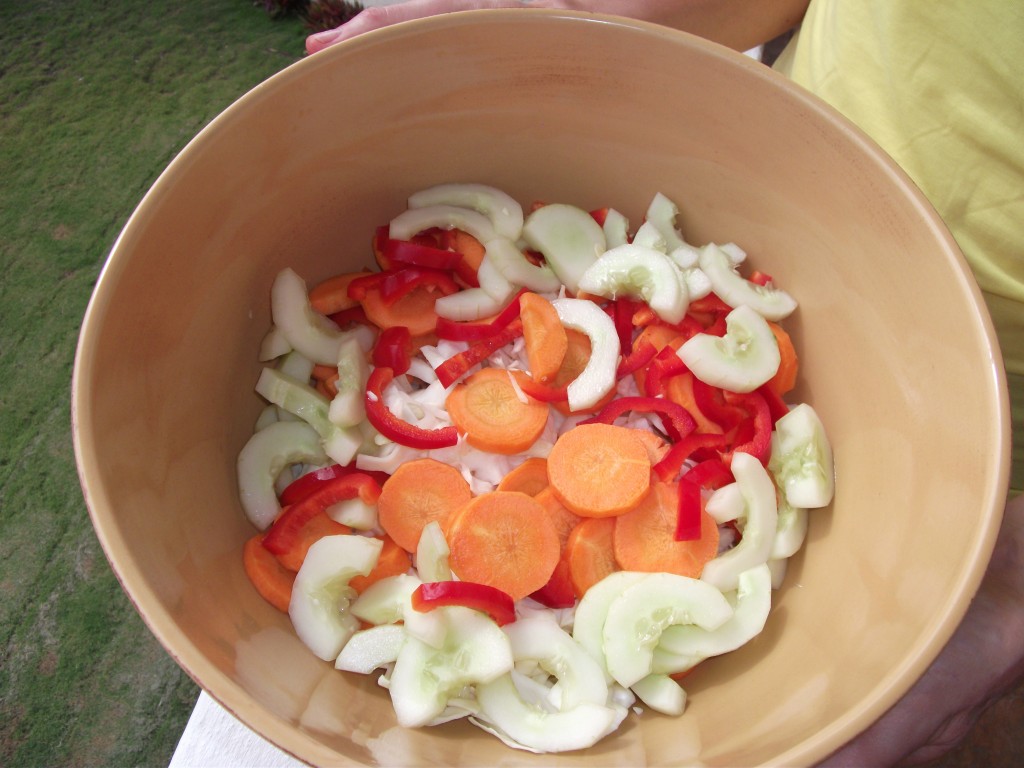
Mom's Cole Slaw

I have mentioned that Belize is my second home. I live there nearly three months out of every year and I have collected many stories about this part of the world – nearly all of them involving travel, food, friends and family.  And I know in my heart that this collection of memories will only grow and expand with time.

If I had to describe my life in Belize, the first word that comes to mind is “unplugged.”  There is no daily newspaper delivery so we often lose track of world events. We receive little mail aside from a few monthly bills.   We do have wireless internet so I can try to stay in touch with my family – yet I spend very little time on the computer each day and when there’s no connection available (which happens quite frequently), I don’t scurry off to a wireless café in search of WiFi. I merely close my laptop and head back out into the sunshine.

Preferred mode of transportation

To get to “town,” we walk or bike or use our trusty golf cart. The stores carry very basic ingredients, and when items are imported they are often two to three times as expensive as in the United States. These prohibitively excessive prices coupled with my natural curiosity about local cuisine makes it easy to try out the foreign food that crowds the market: large orange fleshed papaya, various beans, plantain or casava chips, freshly squeezed juices, fresh corn tortillas and habanero peppers, “ugly” carrots (knotty and obviously organic) to name a few.

Learning that I can easily incorporate these local ingredients into the many dishes I prepare confirms my core belief about cooking. Namely, you don’t need fancy salts or truffle oil to produce great meals.  That said, I have learned to bring along a few staples without which I would be lost. Bags of homemade granola, whole grains and my beloved Cafe Lladro coffee often take up a bit of  my packing space.  I am, admittedly, a snob when it comes to my caffeine.

Without fail, I make a huge batch of coleslaw within the first day of arriving at our house.  I learned this recipe from my mother and it’s an old standard by now. It is the most basic of the twenty or so coleslaw recipes that I make. Thankfully, the ingredients are available at every single fruit stand and grocery store on the island of Ambergris Caye, Belize. I would imagine that they are even available everywhere else in the world!

Many who visit us and eat this salad ask for this recipe, which is a little embarrassing given that it is so simple.   The result tastes much better than it sounds and here in Belize we eat this salad morning, noon and night.  I greatly prefer this slaw to more traditional Belizean recipes which often incorporate lots of mayonnaise and few if any additional vegetables to the cabbage.

Mom’s Coleslaw

Serves 10-12

Ingredients
  • 1 medium head of cabbage (you can use half purple and half green if desired or all purple) -washed and cut into 1/8’s, then sliced into 1/4 inch strips
  • 1 red pepper, cored and seeded then sliced into 1/4 inch strips
  • 1 yellow pepper, cored and seeded then sliced into 1/4 inch strips
  • 7 medium carrots, peeled and thinly sliced ¼ inch pieces
  • 3 medium cucumbers, peeled and cut lengthwise.  Remove seeds and slice the half rounds into ¼ inch half moons (In the US I use English cucumbers which do not need to be peeled.)
Dressing Ingredients
  • ½ cup white vinegar
  • 4 tsp table salt
  • ½ cup olive oil or canola oil (the olive oil was my addition to mom’s recipe)
  • ⅓ cup sugar (I use turbanado sugar in Belize;  in the states you can substitute granulated sugar)

Instructions

Place all cut up vegetables into a large bowl.

Whisk all ingredients for the dressing together and pour over the vegetables.  Mix together and marinate in a covered container in the refrigerator; stir every few hours.  Add more sugar or salt to taste.  This stays crisp and fresh for at least 3-4 days.  Drain before serving.

Variation:  For Thanksgiving or for a hearty winter salad, replace the carrots, cucumbers and peppers with ½ cup of sliced red onion and 2 cups dried cranberries or dried unsweetened cherries. If you’re not a fan of cabbage, you can even make this slaw with just cucumbers, peppers and carrots and throw in some thinly sliced celery.  Sometimes I add cilantro to give it a different flavor!

I love to serve this slaw with my beloved Belizean Chicken (recipe to be posted once the warm weather starts to disappear).

Check out Wanderfood Wednesday for more great recipes!

Share
Posted in Central America, Salads & Dressings | Tagged , | Leave a comment

Jungle Oatmeal in Botswana, Africa

Family of baboons

Situated on a remote island close to the Okavanga Delta, Little Vrumba camp Botswana is a magical place. My husband and I stayed in one of six stand-alone tented rooms that featured an indoor and outdoor shower along with a private deck that overlooked the Savannah.  Each morning we were awakened at 5:30 am and 30 minutes later “continental” breakfast was served. Soon after we began our day we listened to the rustling of the family of baboons that made themselves at home on the wooden walkway that led from our quarters to the open air dining hall. We would hear them scattering about – likely keyed up by the delicious smells emanating from the kitchen. The breakfast served each morning exceeded my expectations of pastry, juice and coffee.   There was a self-serve buffet with hot and cold cereals, juices, fruit salad, toast, muffins and sweet breads, coffee, tea, and even eggs and meats upon request. I thought I had died and gone to heaven!

Giraffe on safari

By 6:00am, following our hearty breakfast, we were ready for a game drive or walk.  Our trusty guide Gordon was excellent at tracking elephant, leopard, lion, and numerous birds. He would see a footprint in the sand and identify which animal was passing through. Gordon could immediately detect which direction they were headed and never failed to lead us to the animal itself!  After hours of tracking we took a break during the heat of the early afternoon and when it started to cool down we departed again for an evening game drive, stopping at sundown for drinks and appetizers. We continued “off road” to search for animals in the dark with an infrared spotlight until 7:30 when the Land Rovers returned to camp so we might freshen up for our 8:00pm dinner with the other visitors. The 12 or so guests engaged in lively conversations during the meal and compared notes about what we had seen that day!

Throughout our stay, I found my focus returning to the camp’s kitchen. During our down time we enjoyed a brunch featuring an array of salads, omelets, hot dishes, cheeses, and exotic fruits. Only a few hours later, following a restfult nap, we prepared for high tea and the table was laden with choices of sweet and savory foods to enjoy.

Vamping with the cooks

Though I was enamored of all the wonderful food, I was even more charmed by the camp manager Alice and her kitchen staff. These women produced the most delicious dishes – everything from crème caramel and fresh baked breads to liver pate and wonderful meat dishes. They allowed me to observe them cooking, singing and enjoying their work.  At one point I started taking pictures and they got so excited they started to vamp for the camera.  When I got back to the states I printed out all the photos and sent them back to my new friends.

One recipe Alice shared with me was “jungle oats.” I grew up eating oatmeal that my mom prepared with water, a little butter, salt and milk, so I was used to a savory version of the dish.  I usually do not like sweet cereals, but my special, early morning indulgence of jungle oats quickly became a new favorite.   The camp cooks couldn’t give me an exact recipe but described to me how this was made.  When I got home I tested a few versions and came up with a pretty close rendition.  While it’s not the same as eating while gazing at the savannah, enjoying these jungle oats never fails to remind me of my time in Botswana. It has become my standard weekday breakfast.  Just a half-cup serving of these healthy whole grains with a little milk keeps me satiated for several hours!

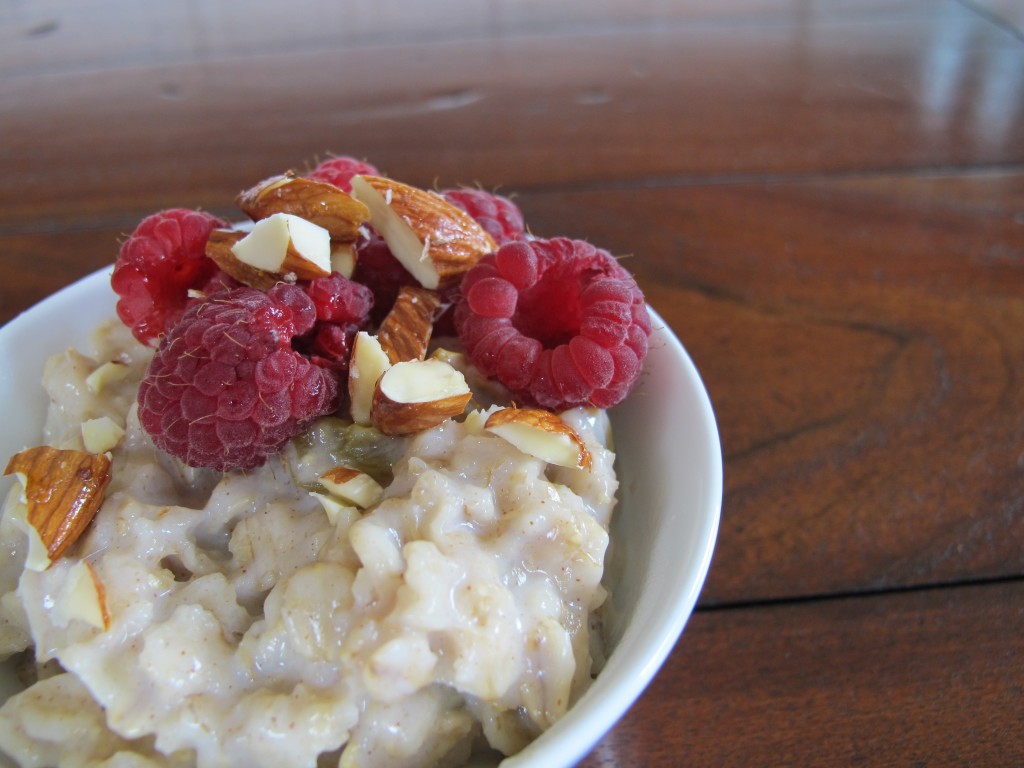
Jungle oats with seasonal raspberries and crisp almonds

Jungle Oats

Serves 4-5

Ingredients
  • 1/2 cup nonfat or regular dried milk (I could have used regular milk, but since the bush camp used powdered I figured I wanted to be authentic)
  • 3 cups cold water
  • 1 ½ cup rolled oats
  • ½ tsp ground cinnamon
  • ½ cup golden or dark raisins
  • Dash of salt
  • 1 tsp turbinado sugar or brown sugar
Instructions

Whisk together water and powdered milk until no lumps remain. Pour mixture into heavy sauce pan and bring to a simmer over medium heat. Stir in oats, raisins, cinnamon, sugar and salt.  Simmer on low for 5 minutes then remove from the heat and cover.  Let rest for 5 minutes.

This is enough for a few days so I refrigerate the leftovers and simply reheat my Jungle Oats, adding more milk or water if it is too thick  for the next couple of mornings.

Variations:  I often top this with about ¼ cup of homemade granola and chopped apples.  This would be great with diced dried apricots, or cut up dates or diced figs in place of the raisins.  If you prefer, use a bit of maple syrup, honey or agave syrup in place of the sugar.  I have also made the hot cereal substituting Bob’s Red Mill 8-grain cereal for the oats. I’ve tried toasting the oats before cooking, which gives them an earthy, nutty flavor.  Inspired by another safari camp, I have even substituted coconut milk for half of the milk and the taste was subtle and exotic.

◊     ◊     ◊     ◊     ◊     ◊     ◊

End note: If you are interested in learning more about the bush camp in Botswana – you can contact Africa Calls or Wilderness Safaris.

Check out Wanderfood Wednesday for more great recipes!

Share
Posted in Africa, Breakfast | Tagged , , , | 9 Comments

Pico de Gallo: San Ignacio, Belize

San Ignacio Farmers Market

I have mentioned Belize in several posts. Our family is fortunate to have a house on the beautiful island of Ambergris Caye off the eastern coast of this wonderful country. This lush, tropical area has quickly become our second home – a place where our children and grandchildren often visit to play in the coral sand and join us for huge family meals “al aire libre” (outside).

We recently spent three weeks in Belize and, recalling a favorite trip from ten years ago, decided to travel inland to the town of San Ignacio, the capital of the Cayo district in Northern Belize. As soon as we headed away from the coast the terrain became more rugged, green and mountainous. My excitement increased as we neared this teaming city. San Ignacio is more highly populated than Ambergris Caye – and I was hopeful that its food culture would be equally extensive.

One of my favorite things to do in any new city I visit anywhere in the world is to go to the local farmers market. When we arrived in San Ignacio, I spent three hours there and it was the real deal with farmers’ produce, local foods, and other odd products for sale. Baby clothes in every color of the rainbow hung on wire hangers in outdoor stalls. Other vendors were selling various items from used tires to American paperback novels. But it was the produce that really caught my eye. The fruits and vegetables were bright and fresh and a fraction of the price of similar produce on Ambergris Caye.

Beautiful Pitaya

I spotted a funny looking fruit at one of the stalls called Pitaya or dragon fruit. I learned from the locals that it grows on a cactus type plant with flowers that bloom overnight. Pitaya is covered in a bright red skin featuring thick scales and its creamy pulp resembles a vibrant pink pudding spotted with vanilla bean flecks. My new friends at the market explained to me that it is best sliced in half so that you can scoop out the pulp, or one can carefully peel the skin and slice the flesh into pieces.

I had the opportunity to taste this odd-looking discovery later that day. After our morning at the market we headed to Chaa Creek, a gorgeous resort in the mountains featuring thatched roofs and dark mahogany furniture perfect for lounging. Before renting a canoe to paddle down the river, we decided to grab a quick snack. Lo and behold, we were served some Pitaya as part of the fruit platter! The taste is sweet and somewhat bland, reminding me a bit of kiwifruit. Despite Pitaya’s relatively delicate flavor, its fluorescent, reddish pink appearance really jazzed up the otherwise ordinary presentation. And I recently learned that it’s the hot new thing in the culinary world. The New York Times Food section even dedicated a story to the ravishing dragon fruit!

Pitaya and fruit plate at Chaa Creek

Canoeing down the river back to town took about two hours. We ate a late dinner at Ervas – an authentic restaurant right off the main drag in San Ignacio. We enjoyed listening to locals chatter at nearby tables as we sat outside and feasted on spicy conch ceviche laced with fresh lime and a simple grilled snapper. Once we finished dinner we strolled down the road to dance at a local night club. I was, by far, the oldest female there. Young girls twirled around us as the music blared loudly from dilapidated speakers. Their partners threw them into the air, dancing wildly to the frantic beat of the local music. Even though I felt like a fish out of water, I decided on the spot that women my age should keep dancing and canoeing and having fun as long as we can!

I wish I could convey the tastes and smells we enjoyed in the market in San Ignacio. Luckily – it’s easy to recreate the fresh and exotic flavors right in your own kitchen. Below is my rustic recipe for Pico de Gallo (which translates to “rooster’s beak”).  I use it as a dip for tortilla chips, as a condiment for tacos and a lovely accompaniment for meats and fish.

Pico de Gallo and blue corn tortilla chips

Pico de Gallo

Makes 2 cups

Ingredients
  • 4 small vine ripe tomatoes or same amount of cherry tomatoes (about 1 lb.)
  • Marie Sharps habenero hot sauce-to taste for hotness
  • 10 sprigs of cilantro
  • 1 large garlic clove
  • 1/4 large purple (Bermuda) or white onion
  • Juice of 1 medium sized lime
  • 3/4 tsp salt
Instructions

Cut tomatoes into a ¼ inch dice. Place diced tomato into a 6 cup ceramic bowl. Shake in some Marie Sharp’s habanero sauce. Roughly chop the cilantro (stems and all) and add to the tomatoes.

Next, cut the onions into a ¼ inch dice and peel and smash the garlic with the flat part of your knife. Put the onions and garlic into a fine strainer, and run cold water over it to remove the bitterness. Shake well and add to the tomato mixture.

Taste and season with lime juice and salt, and let stand at room temperature so the flavors blend. Remove the smashed piece of garlic before serving.

Note – it doesn’t keep that well because the lime and salt cause the tomato to become watery. If you plan to keep it longer, remove the seeds before you chop the tomato. Fresh lime and fresh garlic prevent the growth of bacteria.

◊    ◊     ◊     ◊     ◊     ◊     ◊

End Notes:

If you every find yourself in San Ignacio – I strongly recommend you check out Erva’s restaurant. You won’t be disappointed!

And if you’re looking for a lovely place to stay – Chaa Creek is hard to beat.

Please check out more at Wanderfood Wednesday!

Share
Posted in Central America, Condiment, Odds & Ends, Travel | Tagged , , , , | Leave a comment

Making chili with the sisters!

three sisters

I grew up in a family of five children – two boys and three girls. I am the oldest of the sisters and the only grandmother so far.    Our mother taught us all basic culinary skills and we are constantly emailing recipes and new ideas back and forth.  When we get together – the kitchen is inevitably the place where we congregate, cook and catch up.

When I turned 40 my two sisters Susan and Kay decided to celebrate by taking me on a trip to San Francisco.  That first year we allowed Kay’s youngest son “Baby Joel” to accompany us and it’s hard to believe that he is soon going to be 21 years old. Every year since that first trip we’ve maintained this tradition. It has become sacred time for us, and we do not allow anyone other than blood sisters to come.  We haven’t missed a year – not once.

Throughout the years we have traveled  to places like Sedona, New York, Aspen, Baltimore and Virginia, to name a few. I have no doubt that the coming years will bring us to many new and exciting locales. Ironically, it was a vacation I was least enthusiastic about that remains one of my fondest memories.  In both 2008 and 2009 I was coerced into going to a knitting convention in Baltimore. I had in mind a gaggle of gray haired ladies, clicking away with their needles and gabbing ad nauseum about knitting and purling.  I was pleasantly surprised to find how entertaining and inspiring these women were. Many were young, some were older but the beautiful garments they created inspired me to focus again on knitting.

After the convention we drove to Virginia to a place called The Meander Inn and Plantation. Susan, Kay and I looked out the car windows at verdant, rolling hills and arrived at this magical place, feeling immediately transported to the old South. We stayed three nights, enjoying the historical feel of the town and the relaxing pace of life. We even experienced an indulgent wine maker’s dinner featuring wines from the region.

Susan, Kay & Marilyn in front of the Inn

For me, the highlight of the visit was the cooking school where we learned how to make “sophisticated, Southern cuisine.” There were two full days of classes led by their chef and Suzie Blanchard, executive chef and owner of the Inn. We learned how to prepare apple pie, stuffed butternut squash, English muffins, focaccia, apple cinnamon cheesecake, and a honey and pine nut tart.  Surprisingly, one of my favorite things we made was chili.  Chili is chili, you might think.  I quickly learned that this is not the case. The Meander Inn recipe has quite a kick.  It has lots of warm spices and yields a huge pot of satisfying, perfectly seasoned chili.

As with most dishes, I altered the chili recipe to make it my own. I decreased the cayenne and red pepper flake quantities for my family, and added black beans in addition to the red kidney beans; I use fresh cooked beans. This recipe makes an enormous amount which can seem overwhelming. However it freezes beautifully and is the perfect dish to defrost and reheat on cold winter days.

And now, here comes the chili!!

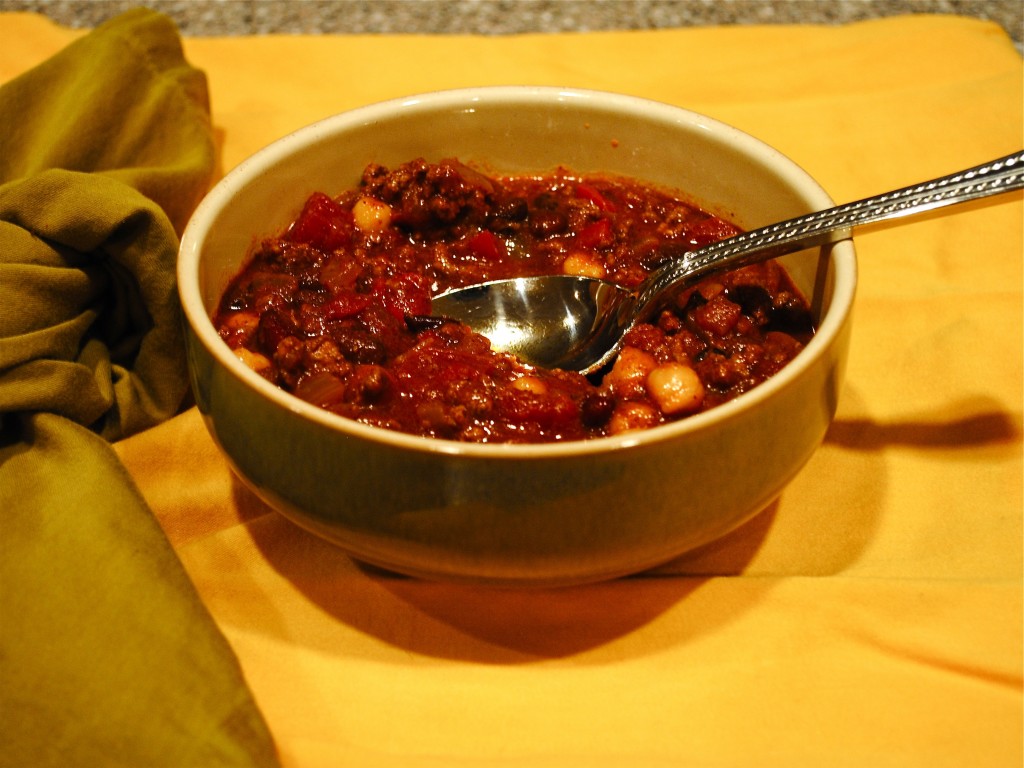
Chili Meander

Chili Meander

Serves 10-12

Ingredients
  • 2 Tbsp vegetable oil
  • 2 medium yellow onions, finely chopped
  • 1 red bell pepper, cut into ½ inch cubes
  • 6 medium garlic cloves, minced
  • ¼ cup chili powder
  • 1 Tbsp ground cumin
  • 2 tsp ground coriander
  • ½ tsp red pepper flakes (Use more if you like a lot of kick)
  • 1 tsp dried oregano
  • ¼  tsp cayenne pepper
  • 2 lb lean ground beef
  • 1-15 oz can rinsed black beans, or 2 cups fresh cooked
  • 1-15 oz can rinsed red kidney beans, or 2 cups fresh cooked
  • 1-28 oz can diced tomatoes with juice
  • 1-28 oz can tomato puree
  • Salt to taste


Instructions

Heat oil in very large dutch oven (or non stick large pot) over medium heat until shimmering. Add onions, bell pepper, garlic, chili powder, cumin, coriander, pepper flakes, oregano and cayenne and cook until vegetables are soft and beginning to brown, about 10 minutes.

Increase heat to medium high and add half of the beef and cook, breaking up pieces with a wooden spoon until no longer pink and just beginning to brown – about 3-4 minutes.  Add the rest of beef and cook, breaking up with a spoon until no longer pink, another 3-4 minutes.

Add beans, tomatoes, tomato puree, and bring to a boil, then change the heat to low and simmer, covered, for 1 hour, stirring occasionally.  Remove cover and simmer 1 more hour, stirring occasionally,   If it gets too dry, add a bit of water.  Adjust seasoning with salt.

This chili is especially delicious served with corn bread and a crisp salad!!

Share
Posted in North America, Soups | Tagged , , | 2 Comments

Discovering Pupusas

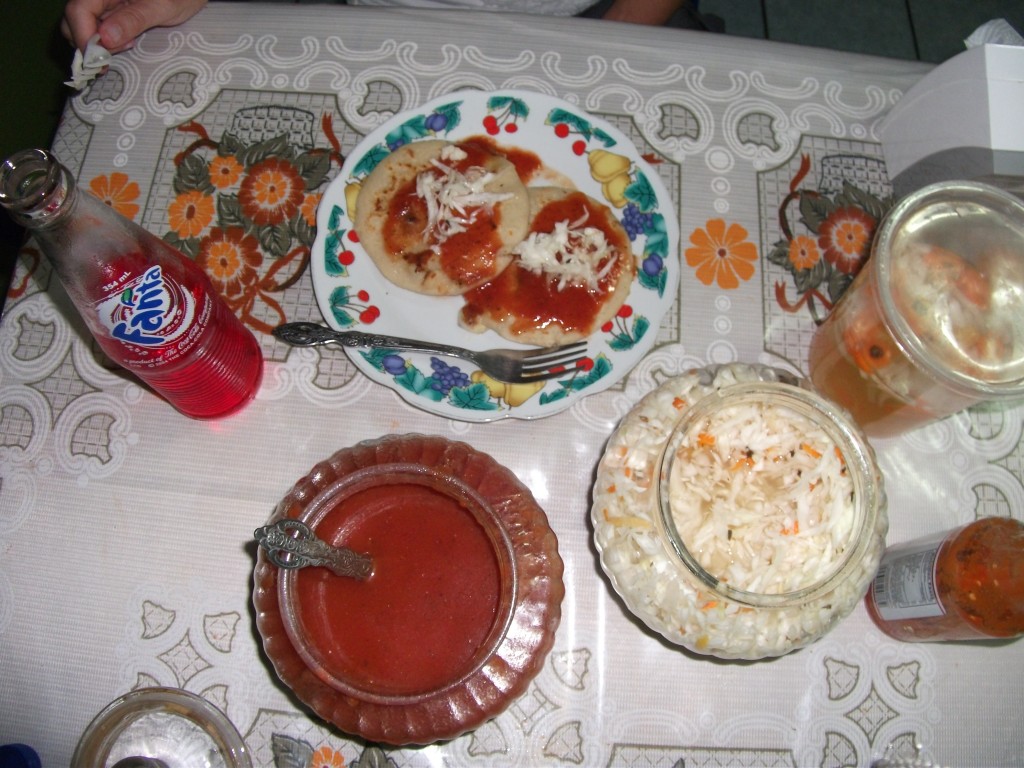
Pupusas and all the fixings

As you may have guessed, I am an adventurous eater. It should come as no surprise when I tell you that I was thrilled to learn that my grandsons (age 2 and 1) are equally daring when it comes to food. Zay and Levi love to eat and one of their most recent culinary discoveries were pupusas.

This flatbread-like delight originated in El Salvador but is served in many Central American countries, including Belize. Pupusas are similar to corn tortillas, only thicker and heartier and the kinds we enjoy most are stuffed with vegetables, cheese, beans or meat.

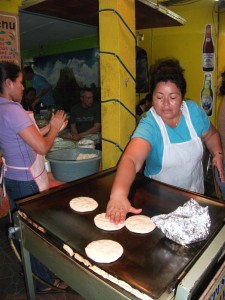
Woman making pupusa

There are two pupusarias two miles by golf cart from our Belizean home in the town of San Pedro. I prefer the more “local” place that is often filled with Belizean families. The last time I wandered into this restaurant, hand in hand with my grandsons, the women who run the place grinned with delight. We perched Zay and Levi on our knees so they could watch these ladies knead the dough and gently place the disks filled with cheese onto the hot griddle. Once we were seated, we ordered a feast featuring strawberry Fanta, pupusas of every variety, and a fried yellow snapper fish dinner that came with refried beans, salad and fresh tortillas. We could hardly finish it all and the bill came to just 15 dollars US!


Making Pupusas

Here is a simple recipe for pupusas that can easily be replicated in YOUR Global Kitchens!

Pupusas

Makes 8

Ingredients
  • 2 cups masa harina (a corn meal that is sold in the ethnic food aisle of many grocery stores; lettering may read “Maseca”)
  • 1 cup warm water
  • 1 cup filling (see variations below)
Instructions

In a large bowl, mix together the masa harina and water and knead well. Knead in more water, one tablespoonful at a time if needed, to make a moist, yet firm dough. It should not crack at the edges when you press down on it. Cover and set aside to rest for 5 to 10 minutes.

Roll the dough into a log and cut it into 8 equal portions. Roll each portion into a ball.
Press an indentation in each ball with your thumb. Put about a heaping tablespoon of the desired filling into each indentation and fold the dough over to completely enclose it. Press the ball out with your palms to form a disc, taking care that that the filling doesn’t spill out. Each disc should measure approximately 5 inches wide and about 1/4-inch thick.

Heat a cast iron or non-stick skillet or griddle over medium-high flame (you may want to lightly oil). Cook each pupusa for about 1 to 2 minutes on each side, until lightly browned and blistered. Remove to a plate and hold warm until all pupusas are done.

Variations

The fillings you can use are virtually limitless. My favorite is a combination of roasted and mashed butternut squash or yams topped with cooked spinach. Here are a number of other options:

  • Cheese: queso fresco, Swiss cheese or a combination. Add some minced green chile if desired
  • Fill with refried beans that aren’t too liquid
  • Mixed beans, cheese and roasted chilies
  • Any kind of ground meat like leftover pork or chicken or chopped soft fish like snapper – ensuring it’s not too liquid

These are traditionally served with a ladle of fresh tomato sauce and some vinegar-based coleslaw (stay tuned for recipe). I also have habanero sauce on hand to add a little zip!

Enjoying Authentic Pupusas

◊ ◊ ◊ ◊ ◊ ◊ ◊

End Notes:

Marie Sharps is my favorite brand of hot sauce. They have endless flavors and heat levels and are the perfect accompaniment for any kind of Latin American food.
As noted, masa harina is sold in many stores around the country. If you have a hard time hunting it down – Amazon also sells this brand.

You can use any non-stick pan for the pupusas. My favorite is my Swiss Diamond fry pan. I honestly don’t know how I would survive without it!

Share
Posted in Central America, Side Dish | Tagged , | 1 Comment

Cinnamon Scones

My oldest child and only daughter is 40 weeks pregnant and due to deliver my new grandchild any day now*. I decided to fly from Seattle to her home in Iowa City, arriving a week before the due date and planning to stay a week after she gives birth. This makes a total of 14 days. In case you aren’t doing the math…a looooong time for a mother to live with her daughter, son in law and 2 ½ year old grandson.

I am having fun, though, and my heart is full every morning at 7:30 am (5:30 am my West Coast body time) when I hear my grandson Zay call for me from his crib. So far, I feel like I am being helpful. I get Zay up every morning, help him get dressed and make a “shnack” (AKA breakfast). Then we plan some type of activity such as story time at the public library, walking to the city park, swimming in the city pool, reading books and so on.

Rachel's Hair & Feathers

Meanwhile, my daughter is keeping busy. She and I are a lot alike; we can’t sit still. She finished work 5 days ago and has done the following while I have been here: Eaten at least five organic hard boiled eggs each and every day, kind-of-sort-of taken a nap each afternoon for a wee bit, had her pregnant belly tattooed with temporary henna,  dyed her hair blueish purple (in places), woven red and beige feathers in her hair, had her toenails painted with floral embellishments, done some crafty arty activities, eaten every type of rhubarb dessert known to humankind, replaced a toilet seat, put on a light dimmer,  and so on. I think she will “pop” any day now. ANY DAY!

Home Ec

Today I needed to go downtown to “Home Ec“, a sewing/crafting/yarn shop that is second to none. This adorable space, owned by two young, ambitious women, has bolts of interesting fabric and upscale notions for sewing and quilting. The central area of the store bursts with irresistible yarns of every variety, weight, color and price point. Many of the spools are hand dyed right here in Iowa. The back room is littered with large tables – some set up with sewing machines, others for crafts. Classes of every kind are held throughout the week – everything from summer dress-making to doll-making classes for kids. They even rent out the space by the hour to people who don’t have enough room in their own homes. What a dream! And to top it all off, they also serve coffee drinks, teas and sweets.   I stopped by for yarn as they were finishing up rice crispy squares topped with caramel sauce and marshmallows! Too sweet for my taste buds but I guess the women here love these treats when they come to knit and chat.

After my interlude at Home Ec, I wandered over to the New Pioneer Coop. Whenever I visit my daughter and her family, I try to make dinners and a few other delicious favorites so that I am invited back. Now I know my way around this wonderful store. This time I purchased organic meat, chicken and assorted veggies I wasn’t able to find at the local farmer’s market. After the Coop I ran through the aisles of the local HyVee for other groceries, then to the dry cleaner to drop off a few items. As I drove back to my daughter’s house I passed by the daycare where I know I can drop off my grandson in the middle of the night if need be. WHEN the baby comes.

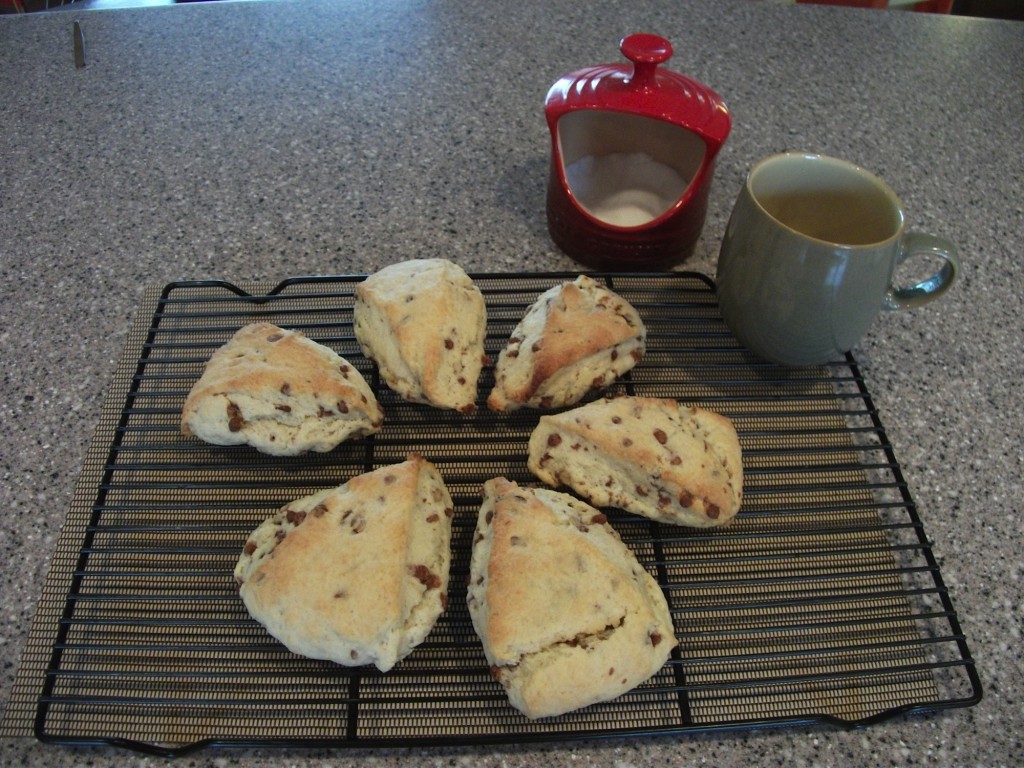
When I finally returned home, I decided to make Zay’s favorite breakfast: scones. I filled them with chopped pecans and miniature cinnamon chips from nearby Kalona, Iowa. Whenever I ask Zay what he wants to eat, he inevitably yells out “Shcones!” What is a grandmother to do?

Scones for Zay

Cinnamon Chip Pecan Scones (adapted from Cooks Illustrated)

Makes 8 large scones

Ingredients
  • 2 cups all purpose flour (or pastry flour if you can get it)
  • 1 Tbsp baking powder
  • 3 Tbsp granulated sugar
  • 1/4 tsp regular salt
  • 5 Tbsp cold salted butter, cut into 20 pieces
  • 1/3 cup chopped toasted pecans or any nuts you prefer
  • 1/3 cup small cinnamon chips (or diced dried apricots or currants)
  • 1 cup heavy cream
Instructions

With oven rack in middle position, heat oven to 425 degrees.

Place flour, baking powder, sugar, and salt in large bowl or work bowl of food processor fitted with a steel blade. Whisk together or pulse briefly until it develops a gravel-like appearance.

Remove the cover from the food processor and distribute butter evenly over dry ingredients.

Recover and pulse quickly 10-12 times.

Add nuts and cinnamon chips and pulse one more time. Transfer dough to a large bowl.

Stir in heavy cream with rubber spatula or fork until the dough begins to cling together, about 30 seconds.

Transfer the mixture and all dry, floury bits to countertop and knead dough by hand just until it comes together into a rough, slightly sticky ball, 5 to 10 seconds.

Pat the ball into an 8 inch circle and cut into 8 wedges with a bench scraper or knife. Place wedges on a parchment-lined cookie sheet.

Bake until scone tops are light brown, 12 to 15 minutes. Remove parchment and scones to a wire rack and let cool for at least 10 minutes. Serve warm or at room temperature.

These can be frozen when they are absolutely cool. Then they can be thawed completely and toasted briefly.

END NOTE: My daughter gave birth after this post was written. Zay now has a beautiful baby brother!

Share
Posted in Breakfast, North America | Tagged , | Leave a comment

Chocolate Chip Biscookies

My Own Global Kitchen

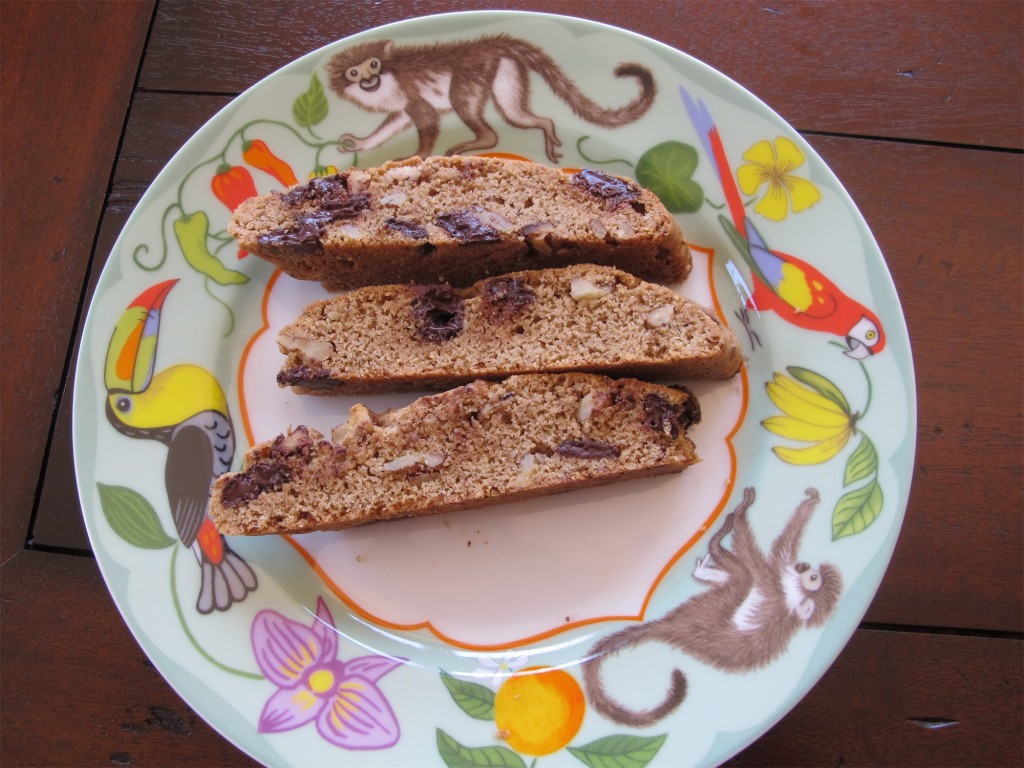
As you can see from this video, I have filled my kitchen with all the things I love. But, for me, there’s nothing like the smell of freshly baked cookies emanating from the oven to warm up My Global Kitchen. And chocolate chip “biscookies” are, perhaps, my favorite recipe. They are a cross between a cookie and biscotti, hence my name “biscookie.” When I want to give someone I love a special gift for a birthday or anniversary, I often bake a batch of these treats. I’ve been perfecting biscookies for over ten years and it is the recipe everyone requests.

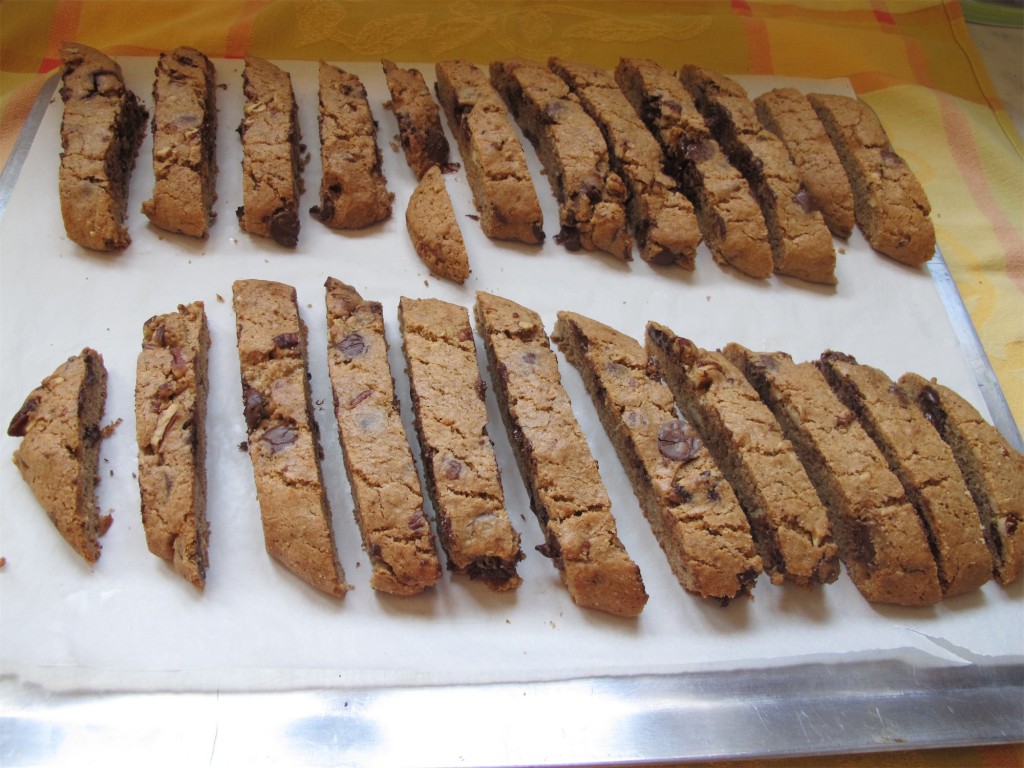
This recipe is very forgiving. It contains butter and eggs so it slices easily – making it far superior to other biscotti recipes that tend to be dry, rock hard and difficult to eat. And my favorite trick – using an electric knife! Typically these utensils are reserved for the one day a year when we carve our Thanksgiving turkeys. I pull mine out every time I bake biscookies and it allows me to make every slice symmetrical. I never figured I’d get so much use out of this little-utilized gadget I received as a wedding present 39 years ago!

Mise en place

I like to measure out my ingredients the night before and when I wake up early the next day I quickly put the batter together, toss it in the refrigerator and then bake the cookies. I often keep a jar of these on the counter and, from time to time, have one with my morning coffee. There are countless kinds of biscotti recipes out there. Some others I enjoy include white raisin and orange and chocolate with course ground pepper. Yet the combination of bittersweet chocolate and toasted almonds is my personal favorite.

Though I’ve been asked to share this recipe countless times over the years – I’ve never disclosed all the details. I figured it’s finally time to divulge my secrets – I hope you enjoy!

Chocolate Chip Biscookies

Makes approximately 24-30 large cookies

Ingredients
  • ½ cup salted butter (1 stick), room temperature
  • ½ cup granulated sugar
  • ½ cup light brown sugar
  • 1 Tbsp. instant espresso powder (many grocery stores carry this in the coffee section)
  • 2 large eggs, room temperature
  • 2 cups unbleached white flour
  • 1 ½ tsp baking powder
  • 1 tsp ground cinnamon
  • 1 cup whole almonds with skins, toasted and cooled, then coarsely chopped
  • 1 cup bittersweet chocolate chips (Ghirardelli is my favorite)
Instructions

Preheat oven to 350 and line a cookie sheet with parchment paper. Place rack in center of oven.

Using a mixer, cream the butter with the two sugars and espresso powder. Then add the eggs one at a time.

Stir together the flour, baking powder and cinnamon. Add this mixture slowly until just incorporated. Then add almonds and chocolate chips, stirring just until mixed.

Refrigerate the raw dough for 60 minutes in a bowl, covered well.

Divide refrigerated dough in half and form into thick logs – approximately 10 inches long and one inch thick. Place each log about 2 inches from the long edge of the cookie sheet so it has room to spread.

Cover the top of the logs of dough (it will be somewhat soft) with a sheet of parchment, then place a second empty cookie sheet on top and push down on the top sheet so the tops of the logs compress, are even. They will now be about 12 inches long and 2 inches wide. You can use a bench scraper to even out the sides too.

Place in oven and rotate the sheet halfway through the baking time. Bake 30 minutes total until nicely browned all over. Remove from oven and let rest on the baking sheet for six minutes.

Baked goods

Carefully lift each log onto a cutting board (I use a very wide spatula to do this, or use two spatulas). Slice on the diagonal with an electric knife into ½ inch wide strips, place slices on parchment lined sheet about ¼ inches apart from each other and bake 8 more minutes. If you don’t have an electric knife, use a serrated knife and slice gently. Remove sheet from oven and let cool on a cooling rack until they are room temperature.

Store in an airtight container – they’ll keep for about 14 days. Or you can freeze them for up to two months. This recipe can be easily doubled!

End note: I have a special blade for my stand mixer that scrapes the sides of the mixing bowl while it is mixing! In other words, it’s like having a rubber spatula do the work except you don’t have to stop the machine, scrape down the sides of the bowl, etc. It goes into the dishwasher too. If you order this, be sure to check the serial number and make of your stand mixer!

Share
Posted in Dessert, North America | Tagged , , , | 5 Comments

Barley Veggie Salad

Whole Grain Salad

It’s obvious to my friends and family that I am passionate about cooking. It’s also quite apparent that I am restless – always looking for a new recipe or adventure. I’m not a fan of repeating menu items over and over; trying out a new dish exhilarates me and keeps my creative juices flowing. But I’m only human. From time to time, even I tire of trying to decide what to cook.

Last summer, when I was visiting my son in San Francisco, I was feeling a bit uninspired and decided to flip through a monthly publication. Lo and behold I stumbled upon the perfect solution to that night’s dinner – in a magazine ad of all places! There it was – an advertisement for Pompeian vinegar featuring a beautiful picture of a chopped salad. I was already a fan of Pompeian Red Wine Vinegar; it’s the brand I use most of the time because it’s less acidic and lends a nice mild flavor to salad dressings. So I was thrilled to read about a healthy “Black Bean, Edamame and Wheat Berry Salad” featuring my favorite vinegar.

Not one to follow recipes, I quickly reviewed the ingredients and started plotting how I would change it. My daughter-in-law Shira agreed to help me shop for ingredients so off we went in search of beans and grains and fresh vegetables – some of my all-time favorite salad components. We couldn’t find wheat berries at the nearby markets, but I substituted toasted barley. We found some beautiful corn and bright orange carrots and when we returned home I plucked some mint and basil from my son’s herb garden to toss in at the end.

My son’s kitchen where we created the salad

Then we got to cooking. I decided to make my own black beans, which you don’t have to do, but they are so much better than canned. Shira chopped and diced while I created the dressing and we gabbed away the entire time – catching up and enjoying our time together in the kitchen. I was happy to share a few tricks with her – like rinsing the diced onion in cold water to get rid of the bite and adding a healthy spoonful of Dijon mustard to the vinaigrette to punch up the flavor. My son hovered from time to time. At one point he expressed his reservations about the whole grains, wondering if people would really take the time to toast and cook barley. While I recognize that it takes a bit longer to prepare them, whole grains are a staple of my cooking and the texture, flavor and health benefits are worth the wait!

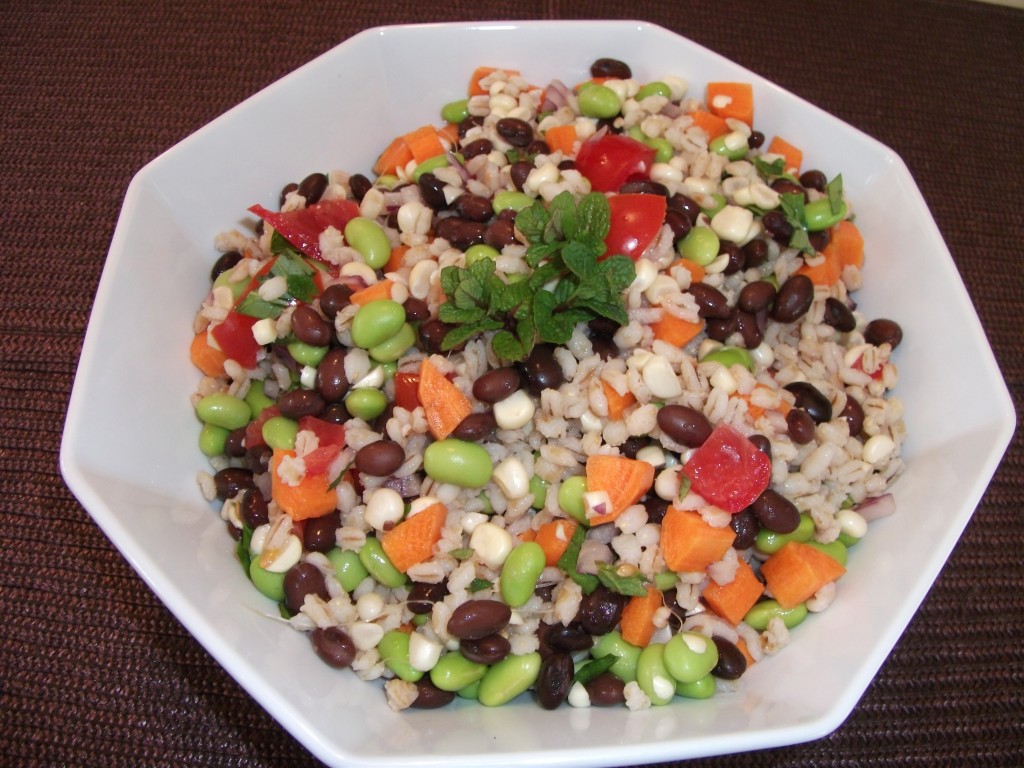
The hearty salad that resulted from our afternoon in the kitchen turned out to be nothing like the original recipe. It’s healthy and filling and has countless possibilities if you want to try using different grains or beans or vegetables or herbs. My kids gobbled up two huge bowlfuls and made me promise to write down my interpretation before I left. And it’s become one of my favorite “go to” recipes. Rest assured, though, that I never make it the same way twice!

Muffy’s Made Up Good For You Chopped Summer Salad

Serves 8-10 and makes about eight cups of salad

Salad Ingredients
  • ½ cup wheat berries or toasted barley
  • 4 cups water
  • 1 cup cooked black beans, fresh or canned (if canned, rinse)
  • 1 cup shelled edamame beans, thawed
  • 1 cup diced fresh tomato
  • ½ cup carrots, finely diced
  • 1 cup corn kernels (2 ears fresh), uncooked
  • ¼ cup Bermuda onion, finely minced and rinsed under cold water
  • 2 Tbsp fresh mint leaves, minced
  • 1 Tbsp fresh basil leaves, minced
Vinaigrette Ingredients
  • ¼ cup extra virgin olive oil
  • 2 ½ Tbsp red wine vinegar
  • ¼ tsp Dijon mustard
  • 1 Tbsp honey or to taste
  • ¼ tsp salt
  • 4 grinds fresh black pepper
Instructions

Whisk together all vinaigrette ingredients and set aside. Note – there is probably more dressing here than what you ultimately need, so use the extra on roasted or steamed veggies or greens. This can be stored in an airtight container in the refrigerator for about 3-4 days.

Bring water to a boil and add wheat berries. Lower heat and cook 45 minutes or until wheat berries are tender. If you are working with barley instead – put the barley in a dry fry pan over medium heat, keep stirring until it turns light brown and aromatic, approximately 4-5 minutes. Note that barley cooks in less time – about 35 minutes. Drain and rinse well. Let sit in a strainer until no more liquid comes out and cool the grain to room temperature. Transfer to a medium bowl. If you want to expedite the cooling process – put it in the refrigerator.

Once the grains have cooled, add the rest of the vegetables and stir. Refrigerate in a sealed container for up to 3 days without dressing. Add vinaigrette right before serving. Stir well, taste and add more dressing, salt or pepper to taste.

This salad has endless possibilities. In addition to changing up the grains and switching out brown rice, quinoa, wheat berries or farro for the barley – feel free to experiment with different beans or lentils and various vegetables and herbs. Try yellow peppers in place of corn, blanched green beans in place of edamame, cilantro instead of mint. I use whatever’s in season and whatever speaks to me!

Share
Posted in North America, Salads & Dressings | Tagged , , | Leave a comment

“Maria’s Rice” – Arroz Con Plantanos

Arroz con Plantanos

Throughout my travels and my culinary explorations, I have discovered that many of my favorite recipes are those that have been passed down through generations. Similar to the recipe for Tapado, which our friend Jose learned from his mother, Arroz Con Plantanos (rice with plantains) was also passed down from parent to child.

Maria's Grandmother Petronila

This recipe originated with the mother of my dear friend Maria who is 21 years old, warm, outgoing, and very proficient in English. She often walks with me on the beach and allows me to stumble through my Spanish, gently correcting my grammar and helping me when I don’t know a Spanish word. Maria was reared in San Juaquin, an area of the Corozal District in Belize. The recipe, however, comes from Oxaca, Mexico where Maria’s mother and grandmother spent their early years.

Maria’s family serves this rice dish with stewed meat – often chicken. I especially like it as an accompaniment to Tapado because I find it provides a sweet sense of balance to the rich, savory taste of the fish stew. Despite the simplicity of this dish, it has become a favorite in our home. I learned this as a special request from my husband who tasted “Maria’s rice “and thought it was the best he’d ever had!

Arroz Con Plantanos

Serves 10-12

Ingredients
  • 2 cups long grain white rice
  • 2 Tbsp vegetable or coconut oil
  • 4 cups water, or enough to cover the rice by about ¾ inch
  • 1 tsp fine grain sea salt
  • ⅓ cup canned coconut milk
  • 2 large ripe (almost black) plantains, peeled and cut into ¼ inch pieces
Instructions

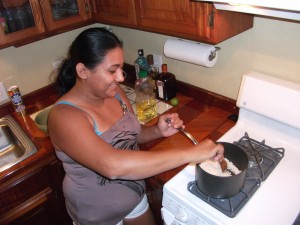
Maria stirring the rice

Wash the rice well until the water runs clear and drain in a colander. Shake out all the water you can.

Heat oil in a medium sauce pan on medium high and then add the rice to fry it for about 5 minutes – stirring occasionally. It should not turn brown but the grains should not stick together.

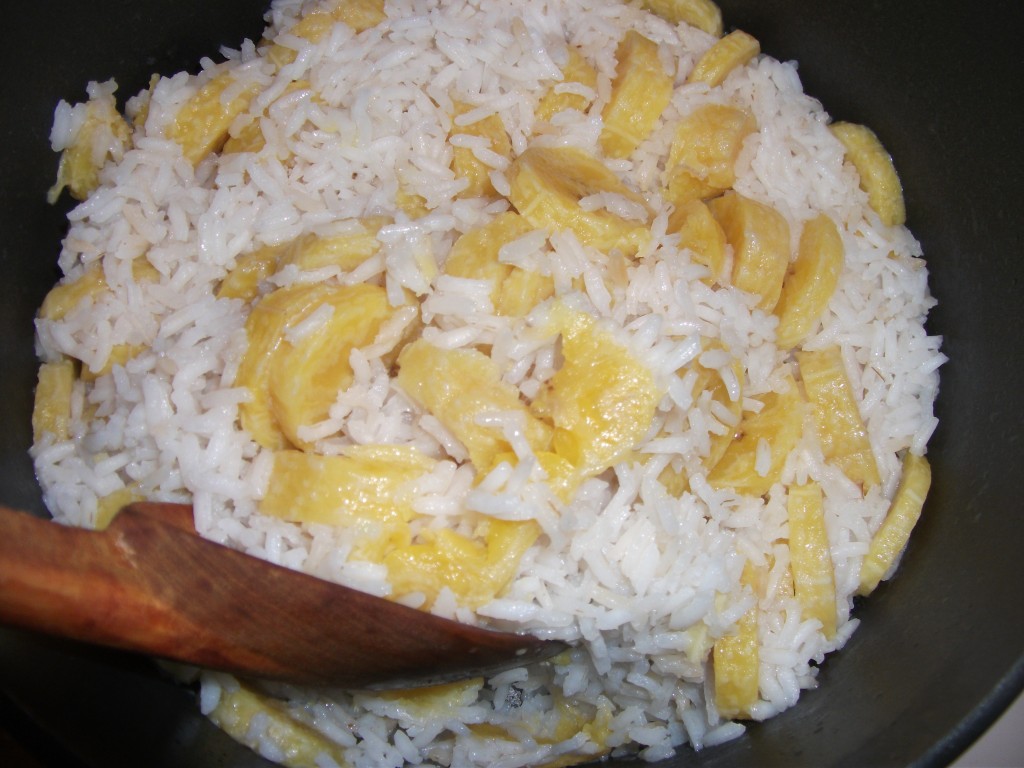
Add water and salt. Bring to a boil and then stir in the plantains and coconut milk. Cover the sauce pan, and keep on medium high for 10 minutes without uncovering. Turn the heat to low, uncover and continue to cook for 2 minutes. When the liquid is absorbed, take the pan off of the burner and replace the cover and let sit for 10 minutes. Fluff with a fork and serve.

I also make this as a side dish to my Belizean chicken. Stay tuned for a post on this delicious dish – coming soon!

Share
Posted in Central America, Side Dish | Tagged , , , , | Leave a comment